3
FREQUENCY
CODES
If you are adding a second chime re-
ceiver to another area of your home,
you’ll want to make sure the frequency
codes on the additional receivers are
set the same. That way, they’ll all ring
when a button is pushed.
The first six pins on the chime and but-
ton change the frequency code. Re-
move the exact same one or two pins
from the chime and button. After mak-
ing your changes make sure the jump-
ers on the first 6 pins match on both the
chime and button.
If your chime goes off by itself, it may
be experiencing interference from a
neighbor’s wireless chime. You can stop
this from happening by changing the fre-
quency code of your chime.
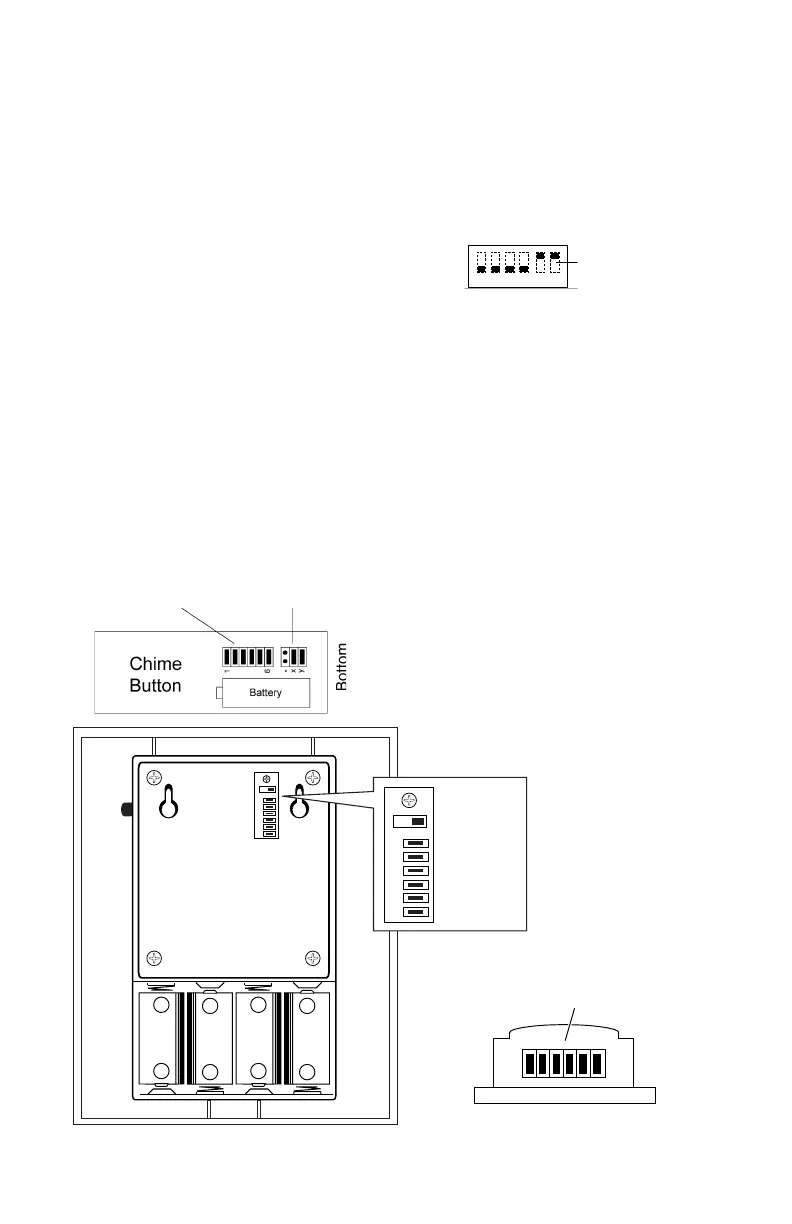
DIP Slide Switch
(5 and 6 are “on”)
1 2 3 4 5 6
ON
Frequency Set
Jumpers
Door Set
Jumpers
Frequency
Set Jumpers
SWITCH VS.
JUMPER
Some models use a DIP switch instead
of jumpers, setting the switch to “ON” is
the same as a jumper being installed.
ADDITIONAL
DOOR CHIMES
When installing other wireless Door
Chime sets, remember to set frequency
codes to different settings to avoid in-
terference. If you want them to all ring
at the same time, set them to the same
frequency code.
-
+
-
+
-
+
-
+
5
4
3
2
1
6
5
4
3
2
1
6
Frequency
Set Jumpers
Volume Control
Tone Switch
(Melody or Bell)
Back view of RC516 Top View of RC520
16
 Loading...