UTILITY STITCHES —————————————————————————————————————————————————
38
■ Sewing buttonholes on stretch fabrics
When sewing buttonholes on stretch fabrics, use a
gimp thread.
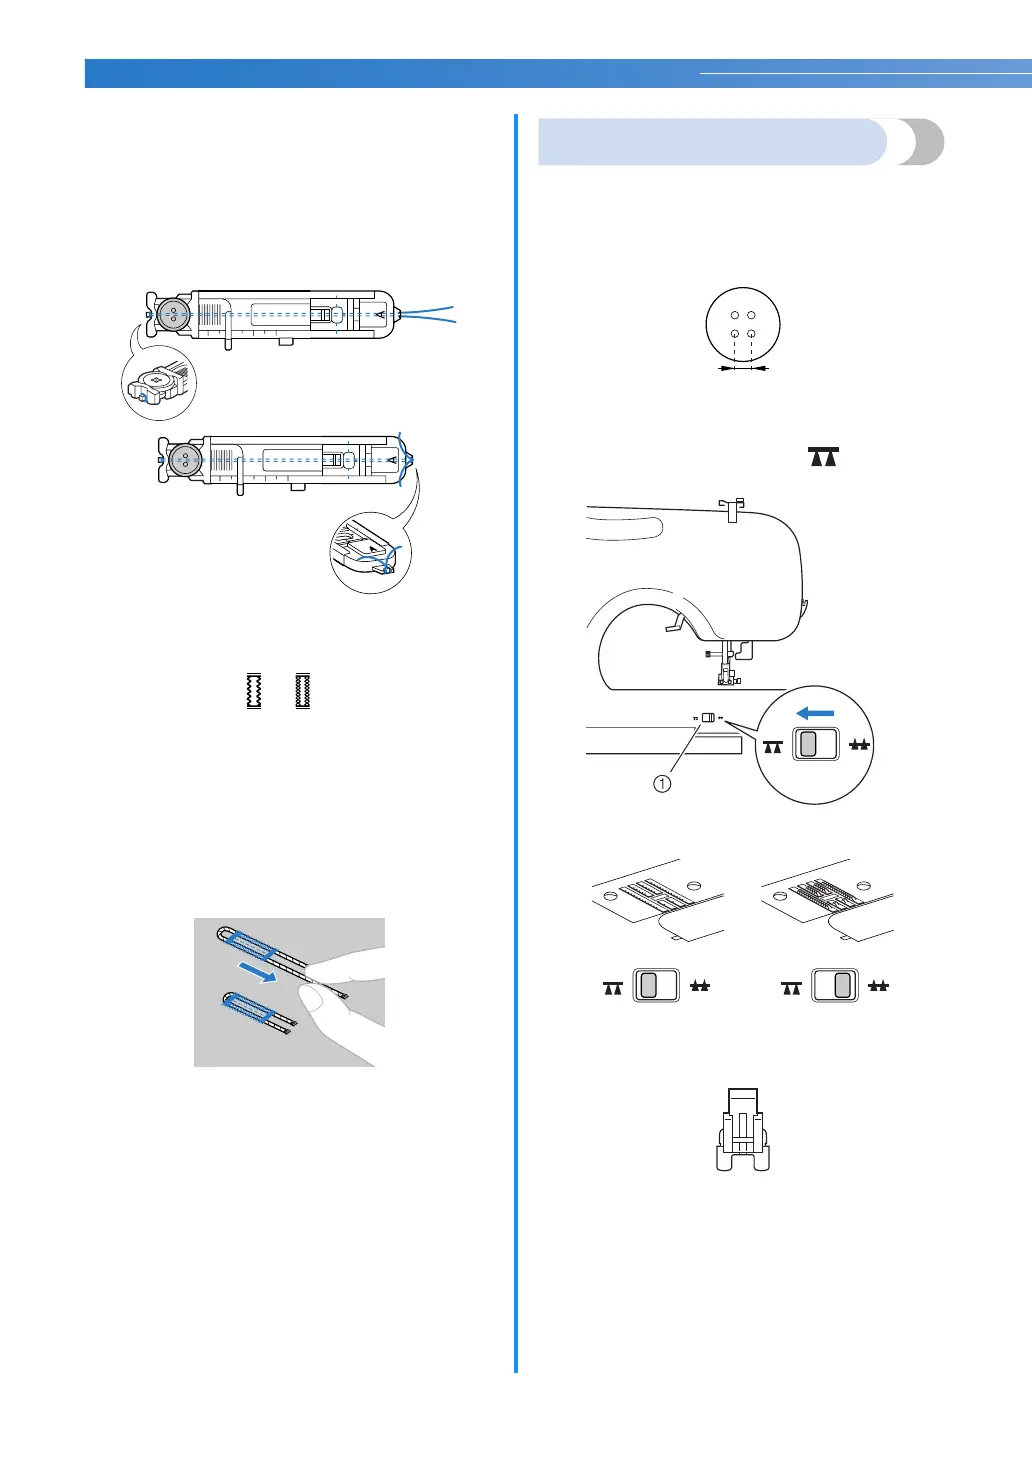
a
Hook the gimp thread onto the part of
buttonhole foot “A” shown in the illustration
so that it fits into the grooves, and then
loosely tie it.
b
Attach buttonhole foot “A”.
c
Select a stitch or .
d
Adjust the stitch width to the thickness of the
gimp thread.
e
Lower the presser foot lever and the
buttonhole lever, and then start sewing.
f
When sewing is finished, gently pull the gimp
thread to remove any slack.
g
Use a handsewing needle to pull the gimp
thread to the wrong side of the fabric, and
then tie it.
h
With a seam ripper, cut the middle part of the
gimp thread remaining at the top end of the
buttonhole.
Trim off any excess of the gimp thread.
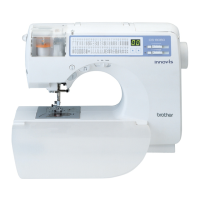
Button sewing
Buttons can be sewn on with the sewing machine.
Buttons with 2 or with 4 holes can be attached.
a
Measure the distance between the holes in the
button to be attached.
b
Raise the presser foot lever, and then slide the
feed dog position lever, located at the rear of
the machine on the base, to (to the right
as seen from the front of the machine).
a Feed dog position lever
(as seen from the rear of the machine)
X The feed dogs are lowered.
c
Attach presser foot “M”.
a Button fitting foot “M”
1