Home > FaxForward > Turn On FaxForward
Turn On FaxForward
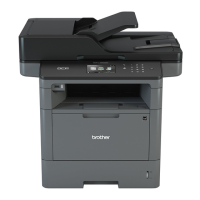
Related Models: MFC-L5700DW/MFC-L5800DW/MFC-L5850DW/MFC-L5900DW/MFC-L6700DW/
MFC-L6750DW/MFC-L6800DW/MFC-L6900DW
Turn on the FaxForward to Cloud feature or FaxForward to E-mail feature to automatically forward your incoming
faxes to the online service account of your choice.
• If you are a restricted Web Connect user due to the Secure Function Lock feature (available for certain
models), you cannot upload the scanned data.
• This feature is available only for black and white faxes.
• If you turn on the FaxForward to Cloud feature, you cannot use the following features:
• [Fax Forward]
• [Paging] (available only for certain countries)
• [Fax Storage]
• [PC Fax Receive]
1. Swipe left or right or press d or c to display the [Apps] option.
2. Press [Apps].
• If information regarding the Internet connection appears on the machine’s LCD, read the information
and press [OK]. If you want to display this information again, press [Yes].
• Occasionally, updates or announcements about Brother Web Connect's features will appear on the
LCD. Read the information, and then press [OK].
3. Swipe left or right or press d or c to display [FaxForward to Cloud/E-mail], and then press
[FaxForward to Cloud/E-mail].
If information regarding [FaxForward to Cloud/E-mail] appears, read it, and then press [OK].
4. Press [On].
5. Press [Forward to Cloud] or [Forward to E-mail].
6. If you selected [Forward to Cloud], swipe left or right or press d or c to display the service you want,
and then press it.
7. Swipe up or down or press a or b to display your account name, and then press it.
8. If the PIN entry screen appears, enter the four-digit PIN and press [OK].
9. When the Upload Settings screen appears on the LCD, do one of the following:
• To continue without changing the upload settings, press [OK].
• Select the upload settings you want to change, and then press [OK].
Option Description
File Type
Select the file type for your document.
Backup Print
When On is selected, the machine prints a copy of the fax.
10. Read and confirm the displayed list of settings you have selected, and then press [OK].
11. Press [OK].
Related Information
• FaxForward
32

 Loading...


