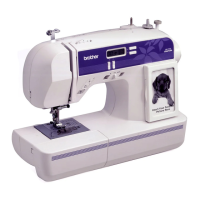
Do you have a question about the Brother GS3700 and is the answer not in the manual?
Overview of the sewing machine's main mechanical systems and their arrangement.
Explanation of the power transmission and motion control within the sewing machine.
Diagrams showing the location of electronic parts within the machine.
Visual representation of the sewing machine's electrical control flow.
Procedures for disassembling and assembling the machine's external housing.
Steps for removing and installing the primary drive motor.
Procedures for disassembling and assembling the fabric feeding mechanism.
Steps for disassembling and assembling the needle threading system.
Procedures for disassembling and assembling the zigzag stitch control.
Steps for disassembling and assembling the feed control components.
Procedures for disassembling and assembling the buttonhole and pattern selection systems.
Steps for disassembling and assembling the upper needle bar and presser foot assembly.
Detailed steps for disassembling and assembling the machine's external housing.
Detailed steps for removing and installing the primary drive motor.
Detailed steps for disassembling and assembling the fabric feeding mechanism.
Detailed steps for disassembling and assembling the needle threading system.
Detailed steps for disassembling and assembling the zigzag stitch control.
Detailed steps for disassembling and assembling the feed control components.
Detailed steps for disassembling and assembling the buttonhole and pattern selection systems.
Detailed steps for disassembling and assembling the upper needle bar and presser foot assembly.
Procedure for safely removing the machine's covers to access internal components.
Adjustment procedure for the main timing belt tension.
Adjustment procedure for the motor drive belt tension.
Adjustment for the lateral movement timing of the needle.
Adjustment procedure for the vertical position of the needle bar.
Procedures for adjusting the feed dog's position and height.
Adjustment procedure for the upper thread tension unit.
Adjustment procedure for the lower thread tension.
Adjustment procedure for the fabric feed distance.
Troubleshooting steps for issues with the sewing machine's illumination.
Troubleshooting steps for problems with the main motor not turning or running slow.
Instructions for correctly wiring the 3-phase motor supply assembly.
Instructions for correctly wiring the LED lamp assembly.
| Type | Manual sewing machine |
|---|---|
| Free arm | Yes |
| Sewing speed | 800 |
| Stitch width | 5 mm |
| Product color | Blue, White |
| Buttonhole type | 1 Step |
| Number of programs | - |
| Sewing machine functions | Sewing |
| Number of stitch patterns | 37 |
| Power supply type | Electric |


