Do you have a question about the Brother HL-L2400DW and is the answer not in the manual?
Troubleshoot connection issues by checking network status, restarting devices, or visiting the support website.
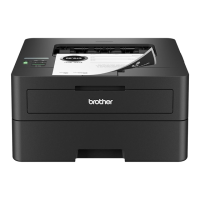
This document serves as a Quick Setup Guide for a range of Brother monochrome laser printers, including models like the HL-L2400DW, HL-L2400DWE, HL-L2442DW, HL-L2445DW, HL-L2447DW, HL-L2460DN, and HL-L2865DW. It provides essential instructions for the initial setup, from unpacking and component installation to connecting the device to a computer or mobile device, and configuring wireless settings. The guide emphasizes user-friendliness and aims to get the printer operational quickly.
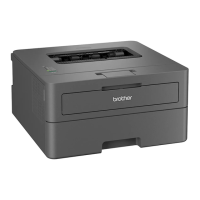
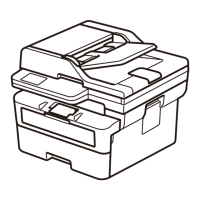
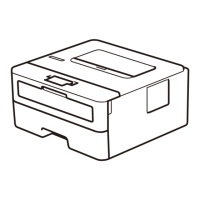
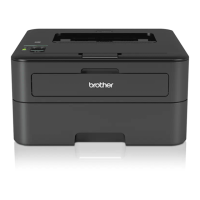
These Brother devices are monochrome laser printers designed for efficient printing of documents. They are primarily intended for use in home or small office environments where reliable, high-quality black and white printing is required. The "DW" and "DWE" in some model names typically indicate duplex (two-sided) printing and wireless connectivity capabilities, offering enhanced convenience and paper-saving features. The "DN" in other models suggests duplex printing and network connectivity, often via an Ethernet cable. The core function of these printers is to produce crisp, clear text and graphics on various paper types. They are built for speed and consistency, making them suitable for everyday printing tasks.
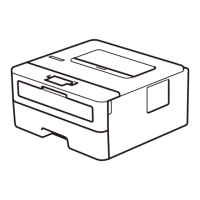
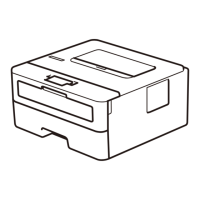
The setup process for these printers is designed to be straightforward. Upon unboxing, users are guided to remove all protective packaging materials and install the toner cartridge and drum unit assembly. This two-part consumable system is a common feature in Brother laser printers, where the toner cartridge, containing the printing powder, is separate from the drum unit, which transfers the toner to the paper. This design allows for individual replacement of each component, potentially reducing waste and cost.
Connecting the printer to a power source is a simple step, followed by selecting the desired language on the printer's control panel. The guide then outlines the primary methods for connecting the printer to a computer or mobile device. The recommended approach is to visit setup.brother.com, where users can download the necessary software and follow on-screen instructions for a guided setup. This method typically covers USB, wired network (Ethernet), and wireless network connections.
For wireless models, the guide provides detailed instructions for both automatic and manual wireless setup. The automatic method relies on the downloaded software to guide the user through connecting to their wireless network. If this fails, a manual wireless setup option is available directly on the printer's control panel. This involves finding the SSID (Network Name) and Network Key (Password) of the wireless access point or router and entering them into the printer. The control panel allows users to navigate menus and input characters using arrow keys and an "OK" button. The guide specifically mentions the range of characters that can be entered for the Network Key, including numbers, letters (both uppercase and lowercase), and various symbols.
The printers support various connection types:
The guide also includes troubleshooting tips for connection issues, such as restarting the wireless access point/router or the printer itself, and advises users to visit the Brother support website for further assistance.
An important security feature highlighted in the guide is the default password for managing the machine's settings. Users are strongly advised to change this default password, which is located on the back of the machine and marked "Pwd," to protect the printer from unauthorized access.
While the guide primarily focuses on initial setup, it implicitly touches upon maintenance aspects related to consumables and general care. The two-part toner and drum system means that users will need to replace these components periodically. The guide's emphasis on installing this assembly correctly during setup is foundational for proper printer operation.
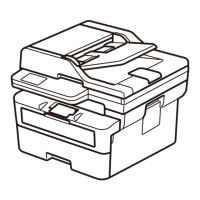
The instruction to load paper into the paper tray, including adjusting the paper guides and observing the "Do not exceed this mark" indicator, is a basic maintenance step that ensures smooth paper feeding and prevents jams. Proper paper loading is crucial for consistent print quality and to avoid wear and tear on the paper handling mechanisms.
The guide also encourages users to save all packing materials and the box. This is a practical maintenance tip for potential future shipping of the machine, whether for service, relocation, or return.
Furthermore, the mention of Brother's environmental work at www.brotherearth.com suggests that the devices are designed with sustainability in mind, which often translates to features that facilitate recycling of consumables or energy-saving modes during operation, though these specific features are not detailed in this quick setup guide. The separate Product Safety Guide, which users are instructed to read first, would contain more detailed information on safe operation and potentially more specific maintenance guidelines.
In summary, these Brother monochrome laser printers are designed for reliable, efficient, and user-friendly document printing. The Quick Setup Guide provides a clear pathway for initial installation, covering various connectivity options and emphasizing ease of use, security, and basic operational care.
| Color | No |
|---|---|
| Duplex printing | Yes |
| Print technology | Laser |
| Maximum resolution | 1200 x 1200 DPI |
| Duplex printing mode | Auto |
| Time to first page (black, normal) | 17.5 s |
| Print speed (black, normal quality, A4/US Letter) | 30 ppm |
| Printing colors | Black |
| Maximum duty cycle | - pages per month |
| Recommended duty cycle | 250 - 500 pages per month |
| Number of print cartridges | - |
| Sound pressure level (printing) | 48 dB |
| Storage temperature (T-T) | 0 - 40 °C |
| Operating temperature (T-T) | 10 - 32 °C |
| Storage relative humidity (H-H) | 35 - 85 % |
| Operating relative humidity (H-H) | 20 - 80 % |
| USB 2.0 ports quantity | 1 |
| Wi-Fi standards | 802.11a, 802.11b, 802.11g, Wi-Fi 4 (802.11n) |
| Security algorithms | 64-bit WEP, 128-bit WEP, WPA-AES, WPA-PSK, WPA-TKIP, WPA2-AES, WPA2-PSK, WPA2-TKIP, WPA3-SAE |
| Mobile printing technologies | Brother iPrint & Scan |
| Supported network protocols (IPv4) | ARP, RARP, BOOTP, DHCP, APIPA(Auto IP), WINS/ NetBIOS name resolution, DNS Resolver, mDNS, LLMNR responder, LPR/LPD, Custom Raw Port/ Port9100, SMTP Client, IPP/IPPS, FTP Server, SNMPv1/v2c/v3, HTTP/HTTPS server, TFTP client and server, ICMP, Web Services (Print) |
| Supported network protocols (IPv6) | NDP, RA, DNS resolver, mDNS, LLMNR responder, LPR/LPD, Custom Raw Port/Port9100, IPP/IPPS, SMTP Client, FTP Server, SNMPv1/v2c/v3, HTTP/ HTTPS server, TFTP client and server, ICMPv6, Web Services (Print) |
| AC input voltage | 220 - 240 V |
| AC input frequency | 50/60 Hz |
| Power consumption (off) | 0.08 W |
| Power consumption (ready) | 43 W |
| Power consumption (printing) | - W |
| Display | LCD |
| Control type | Buttons |
| Market positioning | Home & office |
| Total input capacity | 250 sheets |
| Total output capacity | 150 sheets |
| Envelopes sizes | C5, Com-10, DL, Monarch |
| Paper tray media types | Bond paper, Envelopes, Executive, Labels, Plain paper, Recycled paper, Thicker paper, Thin paper |
| Non-ISO print media sizes | Letter |
| ISO A-series sizes (A0...A9) | A4, A5, A6 |
| ISO B-series sizes (B0...B9) | B5, B6 |
| Maximum ISO A-series paper size | A4 |
| Cables included | AC |
| Included cartridge capacity (black) | 1 pages |
| Depth | 360 mm |
|---|---|
| Width | 356 mm |
| Height | 183 mm |