EasyManua.ls Logo

Brother HL-L2465DW - User Manual

Brother HL-L2465DW
2 pages
Print Icon
To Next Page IconTo Next Page
Loading...
Unpack the machine and check the components
Toner Cartridge and Drum Unit
Assembly
Toner Cartridge Replacement
(MFC-L2820DWXL only.
Save for later use.)
AC Power Cord
Quick Setup Guide
Product Safety Guide
1
Remove the packing materials and install the toner cartridge and drum unit assembly
2
Load paper in the paper tray
3
Connect the power cord and
turn the machine on
Back Front
NOTE:
Before connecting the power cord, locate the Serial Number
label on the back or side of the machine. Record this number
for product registration and warranty support.
NOTE:
•Manuals in Spanish for this model are available at support.brother.com.
Manuales en Español para este modelo están disponibles en
support.brother.com.
•The components included in the box may differ depending on your country.
•The available connection interfaces vary depending on the model.
If you use a wired connection, you must purchase the correct cable for the
interface you want to use.
•USB cable
We recommend using a USB 2.0 cable (Type A/B) that is no more than
6 feet (2 meters) long.
•Network cable (for wired network models only)
Use a straight-through Category 5 (or greater) twisted-pair cable.
•The screens and images in this Quick Setup Guide show the MFC-L2820DW.
•Save all packing materials and the box in case you must ship your machine.
4
Select your language (if needed)
For touchscreen models:
1. On the machine’s touchscreen,
press
[Settings] >
[All Settings] >
[Initial Setup] >
[Local Language].
2. Select your language.
3. Press .
Remove the orange part.
1
1
2
Push firmly.
Adjust the paper
guides.
Do not exceed this mark.
For LCD models:
1. Press Menu.
2. Press▲or▼todisplay
[Initial Setup], and then
press OK.
3. Press▲or▼todisplay
[Local Language], and then
press OK.
4. Press▲or▼toselectyour
language, and then press OK.
5. Press Stop/Exit.
Remove the protective tape or film covering the machine and the supplies.
Quick Setup Guide
Read the Product Safety Guidefirst,thenreadthisQuick Setup Guide for the correct installation procedure.
Not all models are available in all countries.
The latest manuals are available at the Brother support website:
support.brother.com/manuals
EN
HL-L2465DW / DCP-L2640DW / DCP-L2660DW / HL-L2480DW /
MFC-L2760DW / MFC-L2807DW / MFC-L2820DW / MFC-L2820DWXL / MFC-L2880DW
D02YBS001-00
USA/CAN
Version A
Question and Answer IconNeed help?

Do you have a question about the Brother HL-L2465DW and is the answer not in the manual?

Summary

Initial Machine Setup

Unpack and Install Components

Remove packaging and install the toner cartridge and drum unit assembly.

Load Paper and Connect Power

Load paper into the tray and connect the power cord.

Select Language

Choose the desired language for the machine's display.

Fax Setup (MFC Models)

Connect Telephone Line

Connect the telephone line cord for fax functionality.

Configure Fax Settings

Set date, time, and station ID for fax operations.

Connect Computer or Mobile Device

Standard Connection

Connect your computer or mobile device for printing/scanning.

Troubleshooting Connection Issues

Check wireless access point, restart devices, or disconnect cables.

Manual Wireless Setup

Find Network Credentials

Locate SSID and Network Key from wireless access point or router.

Configure Wireless Connection

Manually select SSID and enter Network Key for connection.

Overview

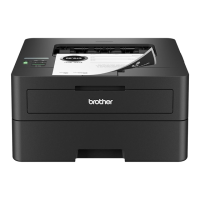
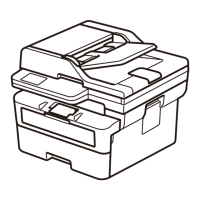
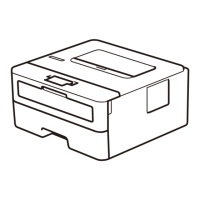
This document serves as a Quick Setup Guide for a range of Brother multifunction devices, including models like the HL-L2465DW, DCP-L2640DW, MFC-L2760DW, and others. These devices are designed to offer printing, scanning, and, for MFC models, faxing capabilities, catering to both home and small office environments. The guide outlines the initial steps required to get the machine operational, from unpacking to connecting it to a computer or mobile device.

Function Description

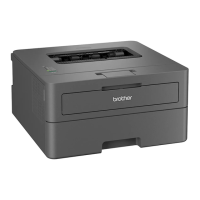
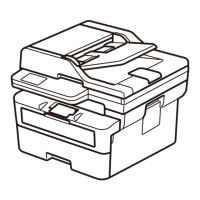
The Brother devices covered by this guide are primarily laser multifunction printers. They are capable of high-quality monochrome printing, suitable for documents, reports, and general office use. For models designated with "DCP" or "MFC," they also integrate scanning functionality, allowing users to digitize documents. The "MFC" (Multi-Function Center) models further extend their capabilities to include faxing, providing a comprehensive communication solution. The "DW" suffix in many model names indicates that these devices support duplex (two-sided) printing and wireless connectivity, enhancing efficiency and flexibility. The "XL" suffix, as seen in MFC-L2820DWXL, typically denotes an extended-yield toner cartridge included with the device, offering a lower cost per page and less frequent cartridge replacement.

Usage Features

The setup process emphasizes ease of use, guiding users through each step with clear instructions and illustrations.

  • Unpacking and Component Check: The initial stage involves carefully unpacking the machine and verifying that all essential components are present. This includes the toner cartridge and drum unit assembly, AC power cord, Quick Setup Guide, and Product Safety Guide. For specific models like the MFC-L2820DWXL, a replacement toner cartridge is also included, to be saved for later use. The guide advises retaining all packing materials and the box for potential future shipping.
  • Physical Setup:
    • Toner Cartridge and Drum Unit Installation: Users are instructed to remove internal packing materials, including an orange part, and then firmly install the toner cartridge and drum unit assembly into the machine. This step is crucial for print functionality.
    • Paper Loading: The guide provides instructions on how to load paper into the paper tray, including adjusting the paper guides to fit the paper size. It also indicates a maximum fill line to prevent overfilling.
    • Power Connection and Initial Power-On: Users connect the AC power cord to the machine and a power outlet, then turn the machine on. A note reminds users to locate and record the serial number on the back or side of the machine for product registration and warranty support before connecting the power cord.
  • Language Selection: Upon initial power-on, users are prompted to select their preferred language. The guide provides separate instructions for LCD models (navigating through menus using arrow keys and OK button) and touchscreen models (using on-screen menus).
  • Fax Setup (For MFC Models Only): For MFC models, the guide details how to connect the telephone line cord and configure fax settings. This includes setting the date and time, as well as the Station ID (fax number and name). Users who do not intend to use the fax feature can skip these steps.
  • Connectivity Options: The devices offer various ways to connect to a computer or mobile device:
    • USB Connection: Users can connect the machine directly to a computer using a USB 2.0 cable (Type A/B), with a recommended length of no more than 6 feet (2 meters).
    • Wired Network Connection: For models supporting wired networks, a straight-through Category 5 (or greater) twisted-pair cable is required to connect the machine to a network router or switch.
    • Wireless Network Connection: Many models feature built-in Wi-Fi, allowing for wireless printing and scanning from computers and mobile devices. The guide directs users to setup.brother.com to download and install the necessary Brother software, which guides them through the wireless setup process.
  • Software Installation: The primary method for connecting the device to a computer or mobile device is by visiting setup.brother.com. This website provides the appropriate software and drivers, along with on-screen instructions to complete the setup.
  • Network Security: An important notice highlights the default password for managing the machine's settings, located on the back of the machine and marked "Pwd." Users are strongly advised to change this default password immediately to protect the machine from unauthorized access.
  • Troubleshooting Connectivity: The guide includes a "Can't Connect?" section with troubleshooting steps for wireless, wired, and USB connections. These steps include restarting the wireless access point/router, restarting the machine and computer, and, if necessary, performing a manual wireless setup.
  • Manual Wireless Setup (Wireless Models): If the automatic wireless setup fails, the guide provides detailed instructions for manual configuration. Users need to find their SSID (Network Name) and Network Key (Password) from their wireless access point or router. The steps vary slightly for LCD and touchscreen models, guiding users through selecting the network and entering the password. The guide also provides a list of characters that can be used when entering the Network Key on LCD models.

Maintenance Features

While the guide primarily focuses on initial setup, it implicitly touches upon maintenance aspects through the inclusion of the toner cartridge and drum unit. The "XL" designation for some models suggests a focus on reducing the frequency of toner replacement, which is a common maintenance task. The guide's emphasis on retaining packing materials also hints at the possibility of needing to transport the machine for service or replacement, which could be considered a maintenance-related consideration. The Product Safety Guide, mentioned as a document to read first, would contain more detailed information on safe operation and potential maintenance warnings. The availability of manuals on the Brother support website (support.brother.com/manuals) further indicates a resource for ongoing maintenance and operational guidance beyond the initial setup.

Brother HL-L2465DW Specifications

General IconGeneral
Printer TypeLaser
Print Resolution2400 x 600 dpi
ConnectivityUSB, Ethernet, Wireless
Paper Capacity250 sheets
Duplex PrintingYes
Monthly Duty CycleUp to 15, 000 pages
Weight15.9 lbs
Operating System CompatibilityWindows, Mac, Linux
FunctionalityPrint
Print Speed30 ppm
Dimensions (W x D x H)14.2" x 14.7" x 7.2"
Mobile PrintingAirPrint

Related product manuals