On your mobile device:
1. In Settings, access the Bluetooth option, and turn it ON.
2. When the list of discovered Bluetooth devices appears, tap P300BT**** (where **** is
the last four digits of your label printer’s serial number, alternatively, you can find your
machine number on the sticker below the Power Button). The unit's serial number is
located where the TZe Tape Cassette is set inside the Cassette Cover.
3.If asked to enter a PIN Code, enter “0000”.
NOTE
• Pairing instructions may differ slightly, depending on the mobile device you are using.
• If your machine is not discovered by your mobile device, your machine may already be
connected to another device. If so, locate the mobile device that is paired with your
machine, turn off Bluetooth on that device, and then turn your machine off and then on
again.
• If your machine is moved too far from your mobile device, it may disconnect. If this
happens, repeat these steps near the label printer to pair them again.
• If using a Smart Cover on your tablet, ensure that the cover remains open while you are
creating or printing labels. Closing the Smart Cover may interrupt data communication, and
your labels will not print.
6. Pairing Your Machine with Your Mobile Device
7. Troubleshooting
Problem Solution
I cannot turn my machine on. Check to see that the batteries are installed correctly, or that
the AC Adapter is securely connected.
A horizontal space runs
through the middle of printed
labels.
Streaks or poor quality characters on printed labels generally
indicate that the Print Head is dirty. See the section
"Performing Routine Maintenance" for instructions on
cleaning the Print Head.
* Do not touch the Print Head with your hands.
Make sure your Tape Cassettes display the TZe mark ( ).
Use only tape widths of 3.5 mm, 6 mm, 9 mm, or 12 mm.
If there is a stopper on the TZe Tape Cassette, remove it before installation.
3. Inserting the Tape Cassette
1. Hold your machine as shown in the
illustration. Open the Cassette Cover
by pressing the mark on its side (1) and
pulling in the direction of the arrow (2).
2. Insert the Tape Cassette following the
drawing marked inside the case.
Confirm that the tape is aimed at the
green Tape Outlet and gently press the
Tape Cassette into your machine until it
locks into place.
NOTE
• Make sure that there is no slack in the
tape. To fix any slack, pull the end of
the tape out of the Tape Guide.
• When inserting or removing the Tape
Cassette, make sure that the tape
does not catch on the silver pin (3) or
the Print Head.
3. Insert the two hooks at the rear of the
Cassette Cover into the slots on your
machine (4). Push the Cassette Cover
making sure it locks into place (5).
Print Head
Tape Guide
End of Tape
3
4
5
NOTE
Do not use together old and new batteries. Replace all six batteries at the same time.
Connecting the AC Adapter
If you use the AC Adapter:
1. Insert the AC Adapter Cord into the AC Adapter Socket on the side of the machine.
2. Insert the AC Adapter into an electrical socket.
2
. Installing Batteries or Connecting the AC Adapter (cont)
CAUTION
USING A COMBINATION OF DIFFERENT BATTERIES (SUCH AS ALKALINE WITH
Ni-MH) MAY RESULT IN AN EXPLOSION. DISPOSE OF USED BATTERIES
ACCORDING TO THE INSTRUCTIONS.
CAUTION
• Remove the batteries if you do not intend to use your machine for an extended period
of time.
• Dispose of batteries at an appropriate collection point, not in the general waste
stream. Be sure to observe all applicable federal, state, and local regulations.
• When storing or discarding a battery, wrap it with cellophane tape
to prevent it from short-circuiting (see illustration).
1. Cellophane tape
2. Alkaline or Ni-MH battery
2
1
AC Adapter
AC Adapter Cord
7. Troubleshooting (cont)
Problem Solution
The label is difficult to cut. • Rotate and reset the Cutter Board. (see "Accessories")
• If the issue persists, replace the Cutter Unit.
* Do not touch the cutter blade with your hands.
My machine does not print, or
the printed characters are not
formed correctly.
• Check that the Tape Cassette has been inserted correctly.
• If the Tape Cassette is empty, replace it.
• Check the Cassette Cover is securely closed.
My machine powers off when
I try to print.
• The batteries may be weak. Replace them.
• Check that the batteries are correctly inserted.
(see "2. Installing Batteries or Connecting the AC
Adapter")
• You are using an incompatible adaptor. Use only the
recommended adapter: the AD-24ES.
The tape does not feed
correctly, or the tape gets
stuck inside my machine.
• Check that the end of the tape feeds under the tape guides.
• You may have tried to use the Cutter while printing. Do not
try to cut a label while it is printing.
I cannot print from my mobile
device.
Check that your machine and your mobile device are
connected via Bluetooth. See "6. Pairing Your Machine
with Your Mobile Device".
System error Please contact Brother customer service.
Booting In the event that Booting occurs due to the failure of
transferring the program, the system will recover if the
program is transferred again. Follow operating procedures of
the application.
To resolve the issue, contact your Brother dealer or Brother
customer service for assistance.
Transmission error Data transfer from your mobile device to the machine was
interrupted. Turn the machine off, then on again, and try
sending the label from your mobile device to the machine
again.
High pressure error An incompatible AC Adapter is plugged into the machine and
voltage is too high. Use ONLY the AC Adapter (part
AD-24ES).
Front
Rear
Feeding Tape
Power on your machine and press the Power Button twice quickly to automatically feed the
tape.
Cutting Tape
When your label finishes printing, press the Tape Cutter Lever to cut the tape.
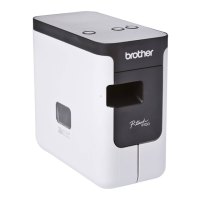
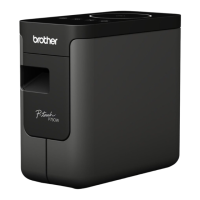
1. Parts and Components
Tape Cutter Lever
LED
Battery Cover
Tape Exit Slot
Power Button
AC Adapter Socket
Tape Window
Cassette Cover
- To turn the machine on, press the Power Button.
- To turn the machine off, press and hold the Power Button for 0.5 seconds.
Your machine's LED indicates your machine's status.
4. Turning Your Machine On or Off
5. LED Indications
LED Condition
Steady green light
Your machine is connected via Bluetooth, or the tape is
feeding.
Flashing green light
If the green light is lit for 3 seconds, then off for 1
second, your machine is powered on and ready.
Flashing green light
If the green light flashes at 0.5 second intervals, the unit
is receiving data from your mobile device.
Steady red light Your machine is booting.
Flashing red light
If the red light flashes at 1 second intervals, one of the
following has occurred:
• No Tape Cassette installed
• Incorrect Tape Cassette installed
• Incompatible Tape Cassette installed
• Transmission error (see "7. Troubleshooting")
• Cutter error
• Incompatible AC Adapter used
(see "7. Troubleshooting")
Flashing red light
If the red light flashes at 0.5 second intervals, there is a
system error (see "7. Troubleshooting").
Flashing orange light
If the orange light flashes at 1 second intervals, the
batteries are almost out of power.
* You are responsible for any connection fees.
iPad/iPhone/iPod touch
Go to the App Store, search for [ P-touch Design&Print ], and download.
Go to Google Play™, search for [ P-touch Design&Print ], and download.
Android
User’s Guide (English)
Introduction
P-touchDesign&Print
Download the P-touch Design&Print app
to your mobile device
Visit the download page for the [ P-touch Design&Print ] app using
the QR code on the right.
Printed in China
D00FP5001
This label printer requires six (6) AAA alkaline batteries or six (6) fully-charged AAA Ni-MH
batteries, not included. As an alternative, use the AC Adapter and plug your machine into
an AC socket.
2. Installing Batteries or Connecting the AC Adapter
1. Hold your machine as shown in the
illustration. Open the Battery Cover
by pressing the mark on its side (1)
and pulling in the direction of the
arrow (2).
2. Insert six batteries as shown in the
illustration inside the case. Alternate
the positive and negative poles,
making sure the negative poles
touch the coil spring in the battery
slot.
3. Insert the two hooks at the rear of
the Battery Cover into the slots on
your machine (3). Push the Battery
Cover (4), making sure it locks into
place.
2
1
The coils are
negative pole
4
3

 Loading...