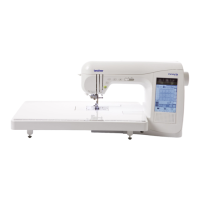
Do you have a question about the Brother RH137 and is the answer not in the manual?
Diagram showing the key functional mechanisms of the sewing machine.
Explanation of the mechanical systems driving needle and feed movements.
Diagram indicating the location of electrical parts like motor and PCB.
Schematic of the electrical system's interconnectedness.
Steps and diagrams for removing the main external covers.
Diagram and steps for removing the main motor assembly.
Diagram and steps for removing the feed mechanism components.
Diagram and steps for removing needle threading parts.
Diagram and steps for removing the zigzag stitch mechanism.
Diagram and steps for removing the feed control components.
Diagram and steps for removing buttonhole/pattern selection parts.
Diagram and steps for removing the upper shaft/needle bar assembly.
Steps for reassembling the upper shaft and needle bar assembly.
Steps for reassembling buttonhole and pattern selection parts.
Steps for reassembling the feed control mechanism.
Steps for reassembling the zigzag mechanism.
Steps for reassembling the needle threading mechanism.
Steps for reassembling the feed mechanism components.
Steps for reassembling the main motor assembly.
Steps for reassembling the main external covers.
Steps to remove machine covers for adjustment access.
Procedure for inspecting the needle for bends or damage.
How to adjust the timing belt tension for synchronization.
How to adjust the motor belt tension for proper power transmission.
Adjusting the left stopper for correct needle bar movement.
Adjusting the right stopper for correct needle bar movement.
Adjusting the needle's lateral oscillation timing.
Aligning needle drop points for consistent stitch formation.
Adjusting needle clearance with the rotary hook.
Adjusting the right needle drop in zigzag stitch mode.
Adjusting needle drop alignment with the presser foot hole.
Adjusting the position of the inner rotary hook plate for hook timing.
Adjusting the needle bar's upward travel relative to the hook.
Adjusting the vertical position of the needle bar.
Adjusting the lateral clearance between the needle and hook.
Matching needle drop points for straight and zigzag stitches.
Adjusting the feed dog's position for proper fabric feeding.
Adjusting the vertical height of the feed dog.
Adjusting the presser foot height for proper fabric contact.
Adjusting the tension of the upper thread for stitch quality.
Adjusting stitch length for specific stretch stitch patterns.
Adjusting the forward and reverse feed distance.
Adjusting stitch length for forward and reverse sewing.
Adjusting the force required to operate the buttonhole lever.
Adjusting stitch length for left reverse buttonhole stitches.
Adjusting feed distance for buttonhole bar tacks.
Adjusting the overall length of the buttonhole stitch bar tack.
Adjusting the bobbin winder for even thread winding.
Adjusting the automatic needle threader mechanism.
Adjusting the tension of the lower thread for stitch quality.
Troubleshooting steps for a non-functional sewing lamp.
Troubleshooting steps for motor performance issues.
Specific wiring instructions for the motor power supply unit.
Wiring instructions for the LED sewing lamp installation.
| Number of Stitches | 37 |
|---|---|
| Stitch Width | 5 mm |
| Stitch Length | 4 mm |
| Free Arm | Yes |
| Bobbin Type | Drop-in |
| Needle Threader | Yes |
| Lighting | LED |
| Maximum Sewing Speed | 800 stitches per minute |
| Type | Mechanical |
| Buttonhole Styles | 1 |
| Presser Feet | 4 |
| Warranty | 25-year limited warranty |


