PAGE 12 BRUNSWICK INSTALLATION MANUAL
EDINBURGH
ATTACHING RAIL CLOTH
(CONTINUED)
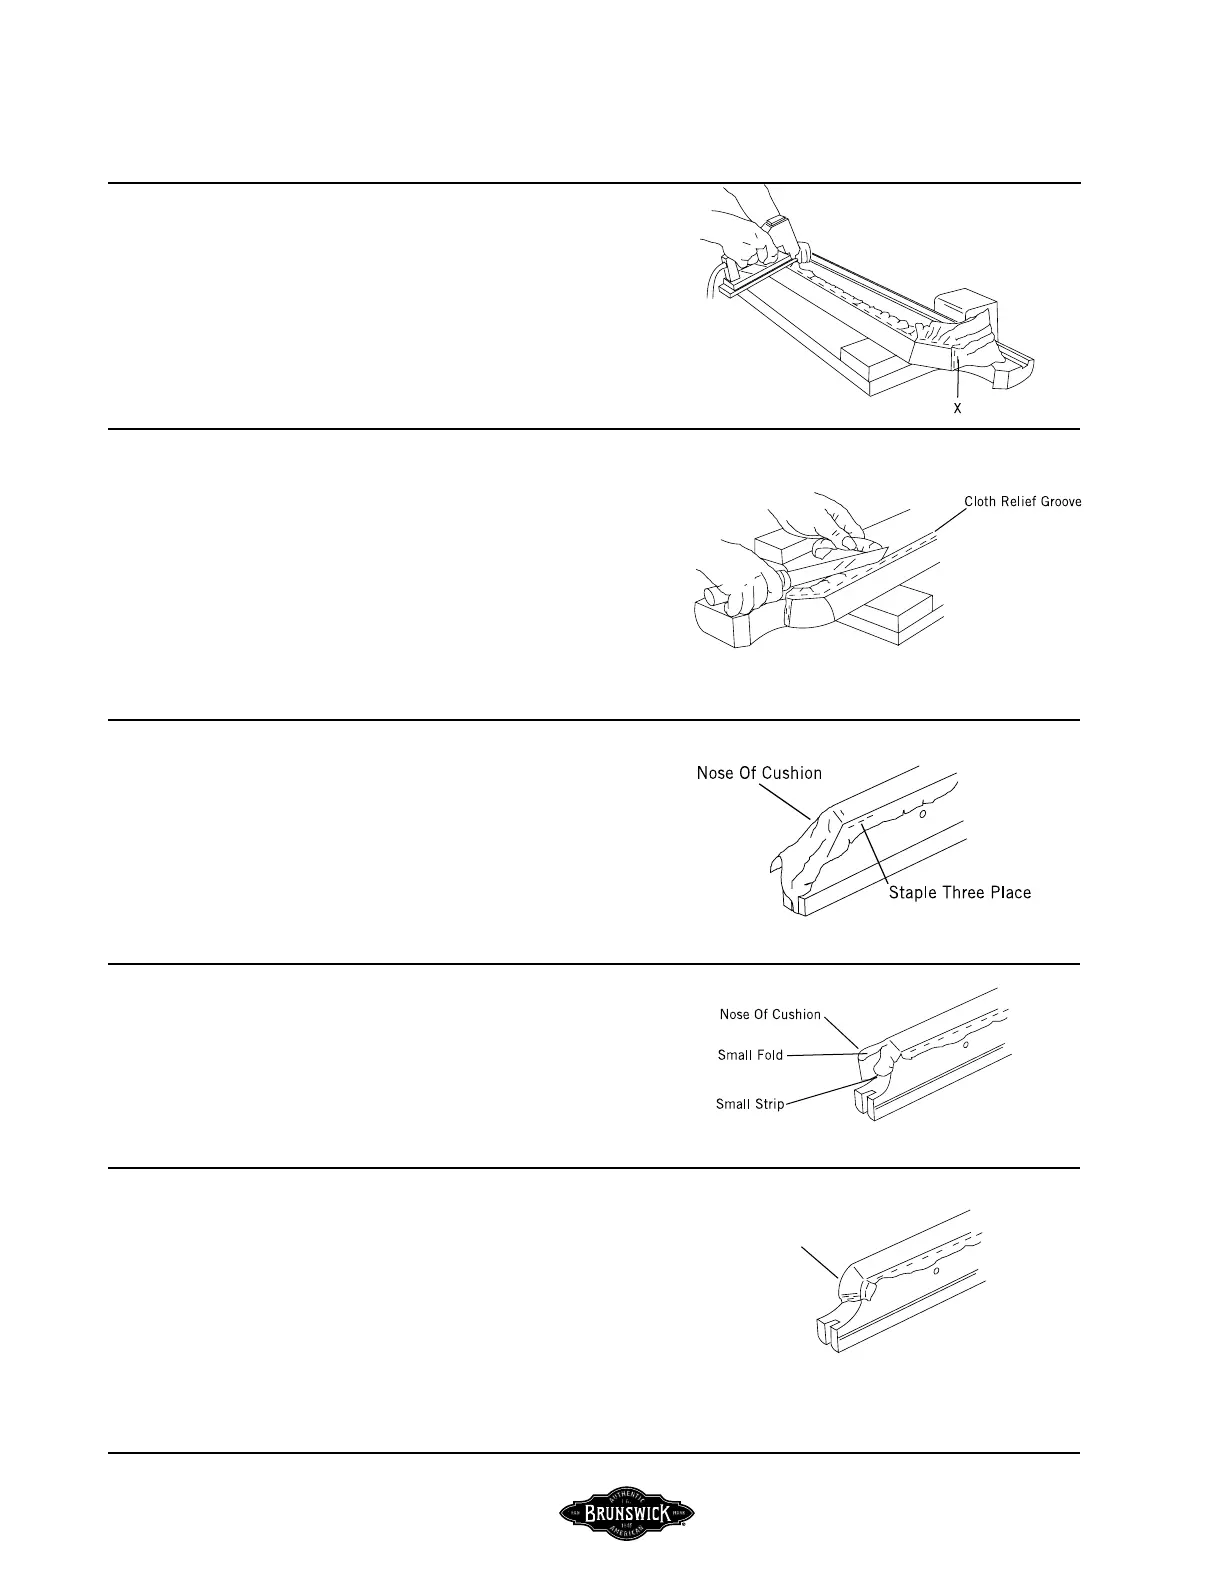
FIGURE SIX
Step #7: Staple three places along the rear edge of the pocket
facing X, then trim off excess cloth at pocket area.
Step #8: If rail is an end rail, repeat Step 7 at other corner
pocket. Then, starting at center of rails, stretch cloth tightly over
cushion and staple at bottom of rail working toward each end.
FIGURE SIX
FIGURE SEVEN
Step #9: Trim excess cloth from bottom of rail ush with edge of
cloth relief groove.
FIGURE SEVEN
SIDE POCKET
FIGURE EIGHT
Step #10: At side pocket, stretch the cloth tightly over nose of
cushion and staple three places as shown.
FIGURE EIGHT
FIGURE NINE
Step #11: Slit the cloth up to the edge of cushion nose as shown.
Then rmly pull the small strip to the rear of the cushion and
staple at rear of facing.
FIGURE NINE
FIGURE TEN
Step #12: Hold the small fold in place with thumb and forenger
and rmly hold it down over facing. Then staple at rear of facing
and at bottom of rail as shown.
Step #13: Trim excess cloth as required.
FIGURE TEN
Small Fold On Top
Of Small Strip
 Loading...