PAGE 14 BRUNSWICK INSTALLATION MANUAL
EDINBURGH
RAIL & APRON ASSEMBLY
CONTINUED
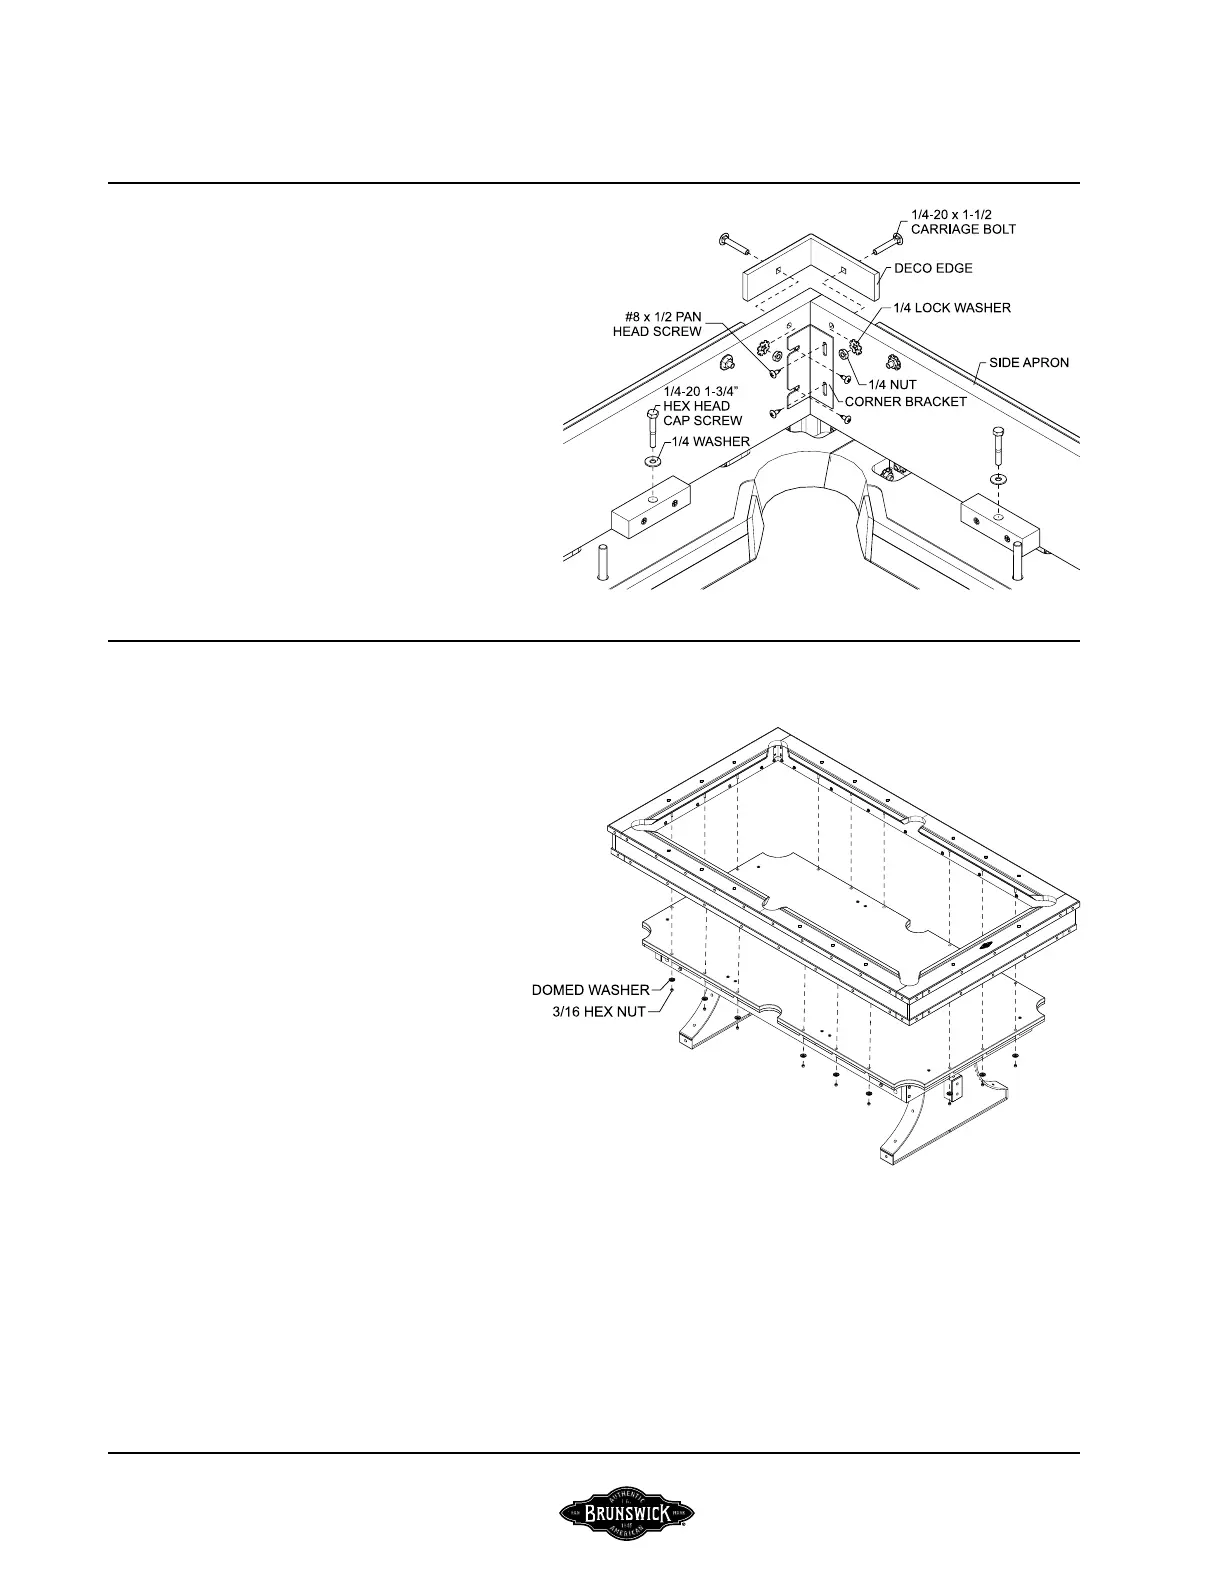
FIGURE THREE
Step #4: Loosely attach the side and end aprons to the bottom
side of the rails using 1/4-20 x 1-3/4” hex head cap screws and 1/4
washers. Attach the apron corners to the aprons using 1/4-20 x
1-1/4” hex head cap screws.
Step #5: Align the apron corner right angle bracket with the
pilot holes in each of the apron corners. While holding each joint
tight, securely fasten bracket with #8 x 1/2 pan head screws.
Step #6: Attach decorative edge corners with pre-nished 1/4-20
x 1-1/2” carriage bolt, washers and nuts.
Step #7: Securely tighten all remaining hardware.
FIGURE THREE
FIGURE FOUR
Step #8: Carefully turn the rail assembly over.
CAUTION: Do not let the rail assembly “twist” or “bow”
while turning; the strain may cause damage.
Step #9: Align the eighteen Threaded Rods with the
eighteen holes through the slate and lower the rail
assembly onto the slate. The rail assembly should align
ush with the exterior surfaces of the lower frame. Be
sure that the head rail (with Brand logo) is in the desired
location prior to completing Step #10.
Step #10: Using (3) Domed Washers and (3) 3/16UNC
Hex Nuts, secure one end of the rail assembly and tighten
securely.
Step #11: Repeat Step #10 at the other end of the rail
assembly making sure the assembly is in a square
condition.
Step #12: Making sure the side rails are in a straight line
(cushion side) fasten each side rail securely using the
remaining Domed Washers and Hex Nuts.
FIGURE FOUR
 Loading...