BRUNSWICK INSTALLATION MANUAL PAGE 7
EDINBURGH
SLATE ASSEMBLY AND LEVELING
FIGURE ONE
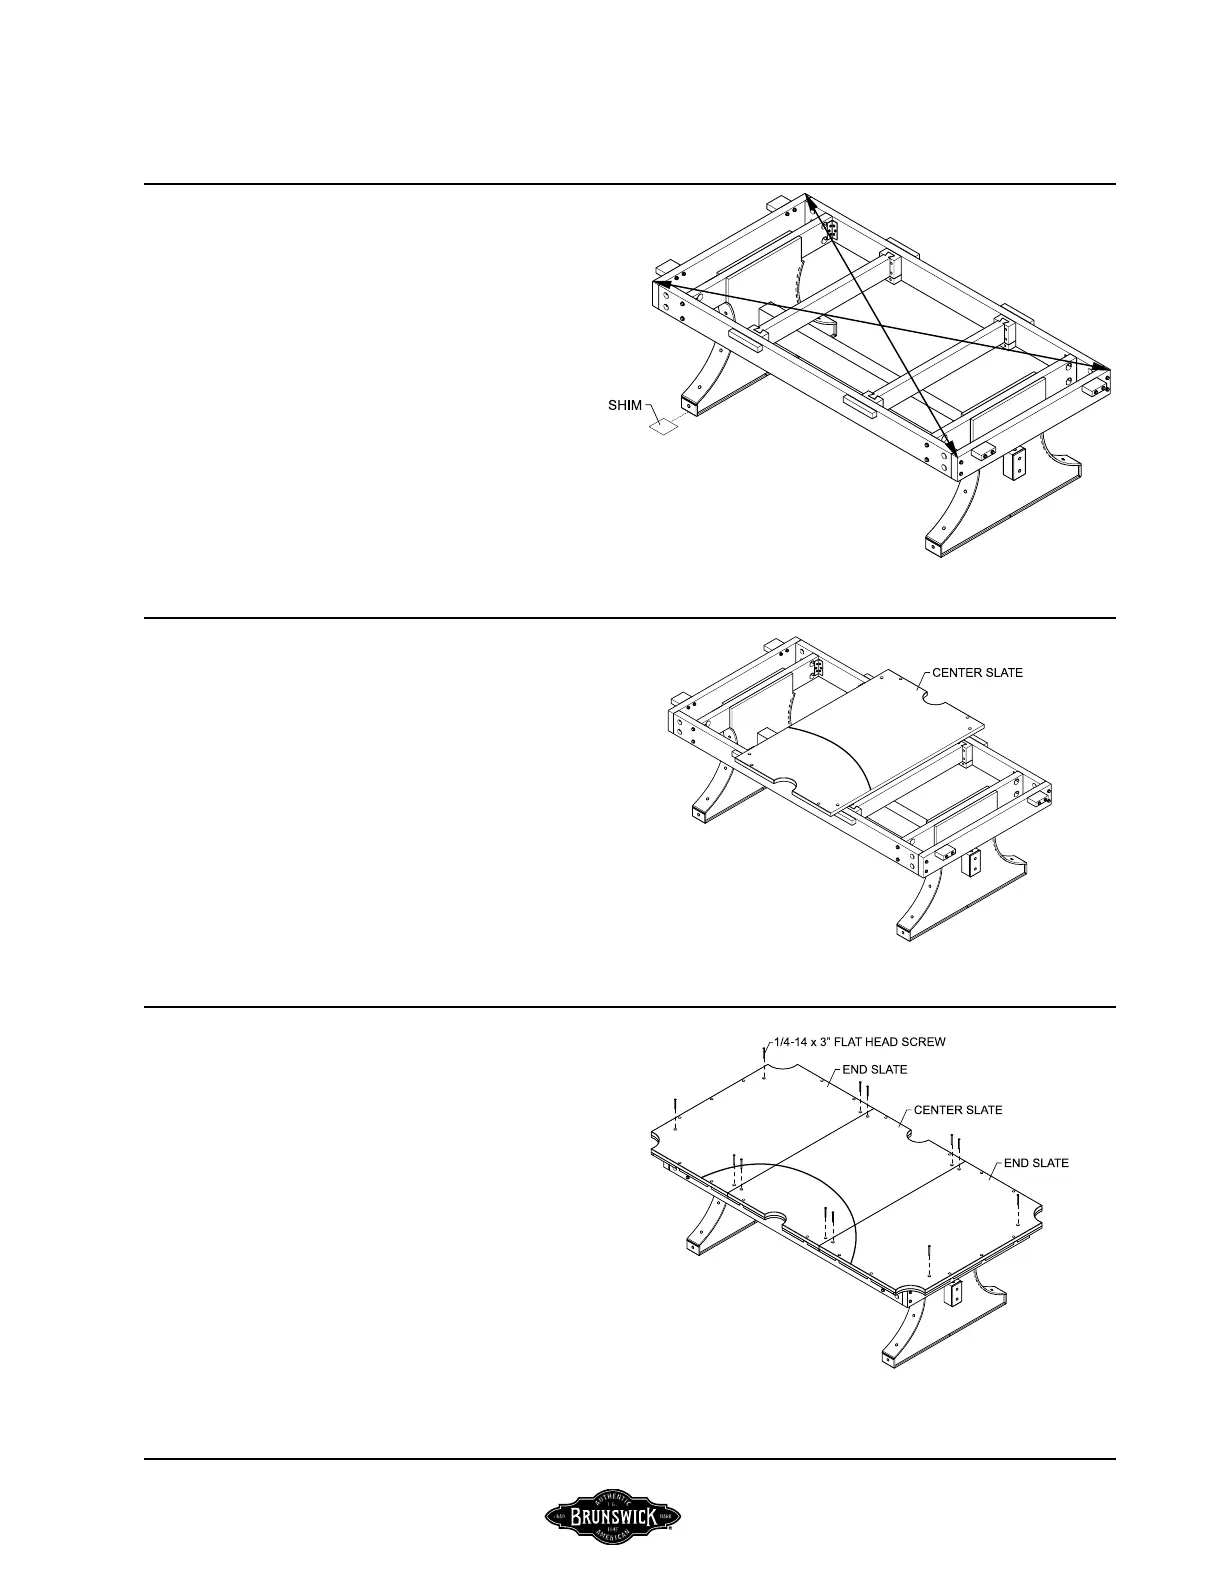
Step #1: Place a good level on top of the baseframe and determine
the highest corner. Level the table by positioning shims under the
other three legs until the table is level. Be sure that all four legs
have positive bearing against the oor.
NOTE: Make top surfaces absolutely ush. Add or
remove wood if necessary to accomplish this.
FIGURE ONE
FIGURE TWO
Step #2: With baseframe level and placed in its permanent loca-
tion, position the center slate section evenly between the two cross
supports as shown, with an equal amount of overhang at each side
of the base frame.
FIGURE TWO
FIGURE THREE
Step #3: Position the two end slate sections on the base frame as
shown. Be sure that the penciled arc forms a radius as shown.
Step #4: Recheck to be sure the slate has an equal amount of
overhang around the base frame.
Step #4: Using the 12 countersink holes in the slate as a tem-
plate, pilot drill 5/32” diameter holes into the mounting cleats.
Step #5: Securely fasten the end slate sections at both ends of the
table with 1/4 x 1-3/4” at head screws for UNFRAMED slate or
#14 x 3” at head screws for FRAMED slate.
FIGURE THREE