This document is an installation manual for the Brunswick Metro™ Pocket Billiard Table, published in September 2005. It provides detailed, step-by-step instructions for assembling the table, including the baseframe, legs, slate, and ball return system, as well as attaching the billiard cloth to both unframed and framed slate, and attaching the rail cloth. The manual emphasizes careful handling of all components to prevent damage during assembly.
Function Description:
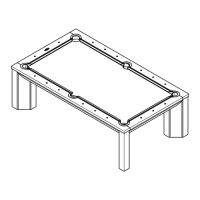
The Brunswick Metro™ Pocket Billiard Table is a recreational device designed for playing billiards. Its primary function is to provide a stable, level playing surface with integrated pockets and a ball return system for an optimal billiard experience. The modular design allows for assembly in various settings, and the detailed instructions ensure proper setup for consistent play.
Important Technical Specifications (derived from assembly instructions):
- Fasteners:
- Baseframe and Leg Assembly:
- Side sills to cross support sills: 5/16-18 x 4" hex head bolts, 5/16 flat washers, 5/16-18 weld nuts.
- Slate attach cleats to baseframe: 5/16-18 x 5-1/2" hex head bolts, 5/16 flat washers, 5/16-18 hex nuts.
- Leg attach brackets to legs: 5/16-18 x 1-1/4" hex head bolts, 5/16 flat washers.
- Baseframe to brackets: 3/8-16 x 2-3/4" hex head bolts, 3/8 flat washers, 3/8-16 hex nuts.
- Leg bracket to leg: #10 x 1" pan head self-tapping screws.
- Slate Assembly:
- End slate sections to table (UNFRAMED slate): 1/4 x 1-3/4" flat head screws.
- End slate sections to table (FRAMED slate): #14 x 3" flat head screws.
- Rail and Apron Assembly:
- Corner and side castings to rails: 5/16-18 x 1-3/4" hex head bolts, 5/16 flatwashers, 5/16-18 weld nuts.
- Aprons to rails: 1/4-20 x 2" hex head bolts, 1/4 flat washers.
- Apron corners to apron ends: #10 x 1/2" pan head tapping screws.
- Rail assembly to slate: 3/8-16 hex nuts, dome washers (for machine studs).
- Pockets to castings: #10-24 x 5/8" socket head machine screws, #10 external tooth washers.
- Ball Return System:
- Ball receiver box to foot end sill: #10 x 2" drill point screws, #10 fender washers.
- Gulley track to sills: #10 x 1-1/4" pan head tapping screws.
- Leveling Mechanisms: Leg levelers are integrated into the legs, allowing for precise adjustment of the table's level.
- Slate Construction: The table uses a multi-section slate (center and two end sections) for the playing surface, which requires careful leveling and joint filling.
- Ball Return System: Features a ball receiver box and gulley tracks, including left-hand and right-hand head gully boots, designed to return balls to a collection point.
- Rail Construction: Rails are assembled with corner and side castings, and aprons, and are designed to be securely attached to the slate.
- Cloth Application: The manual details specific methods for attaching billiard cloth to both unframed and framed slate, as well as the rail cloth, emphasizing proper tension and wrinkle prevention.
Usage Features:
- Adjustable Leveling: The leg levelers allow users to achieve a perfectly level playing surface, crucial for fair and accurate billiard play. This feature ensures adaptability to various floor conditions.
- Integrated Ball Return: The ball return system simplifies gameplay by automatically collecting pocketed balls, eliminating the need to retrieve them manually from each pocket.
- Durable Construction: The use of specific bolts, washers, and nuts, along with detailed assembly steps, indicates a design focused on structural integrity and stability for long-term use.
- Optimized Playing Surface: The instructions for slate leveling, joint filling, and cloth application are critical for creating a smooth, consistent, and responsive playing surface.
- Pocket Design: The manual describes the installation of side and corner pockets, which are designed to fit securely within the castings and behind the cushion facing.
Maintenance Features (derived from installation and general care):
- Slate Joint Maintenance: The manual instructs users to fill slate joints with Rock Hard putty or wax and then sand/scrape them smooth. This is a crucial maintenance step to ensure a seamless playing surface and prevent damage to the billiard cloth.
- Billiard Cloth Care:
- Cleaning: Before applying the bed cloth, the slate must be thoroughly cleaned with a damp cloth. This prevents debris from affecting the cloth's adhesion and lifespan.
- Proper Application: The detailed instructions for attaching the billiard cloth, including stretching and securing it, are essential for its longevity and performance. Incorrect application can lead to wrinkles, uneven play, and premature wear.
- Pocket Cushioning: Strips of cloth are to be glued to pocket cutouts to provide cushioning from ball impact, which significantly extends the life of the bed cloth in high-wear areas.
- Wrinkle Removal: The manual provides a troubleshooting step for wrinkles at the pockets, advising to remove aprons and rails, pull the cloth taut, and retack/restaple. This highlights the importance of maintaining cloth tension.
- Rail Cloth Care: Instructions for attaching rail cloth, including stretching and stapling, are designed to ensure a tight, wrinkle-free finish, which contributes to the aesthetic and functional integrity of the rails.
- Ball Return System Alignment: The note about bending wires in the gulley track to match for a smoother roll suggests a potential adjustment or maintenance point to ensure the ball return system functions optimally.
- Hardware Tightening: The manual repeatedly emphasizes securely tightening all hardware components (e.g., baseframe, leg attachments, rail assembly). Regular checks and re-tightening of fasteners would be a key maintenance practice to ensure the table's stability and prevent loosening over time.
- Protection During Assembly: The instruction to position rails upside down on a "protected surface" during assembly implies a general care principle to prevent scratches or damage to finished surfaces.