PAGE 12 BRUNSWICK INSTALLATION MANUAL
METRO
RAIL AND APRON ASSEMBLY
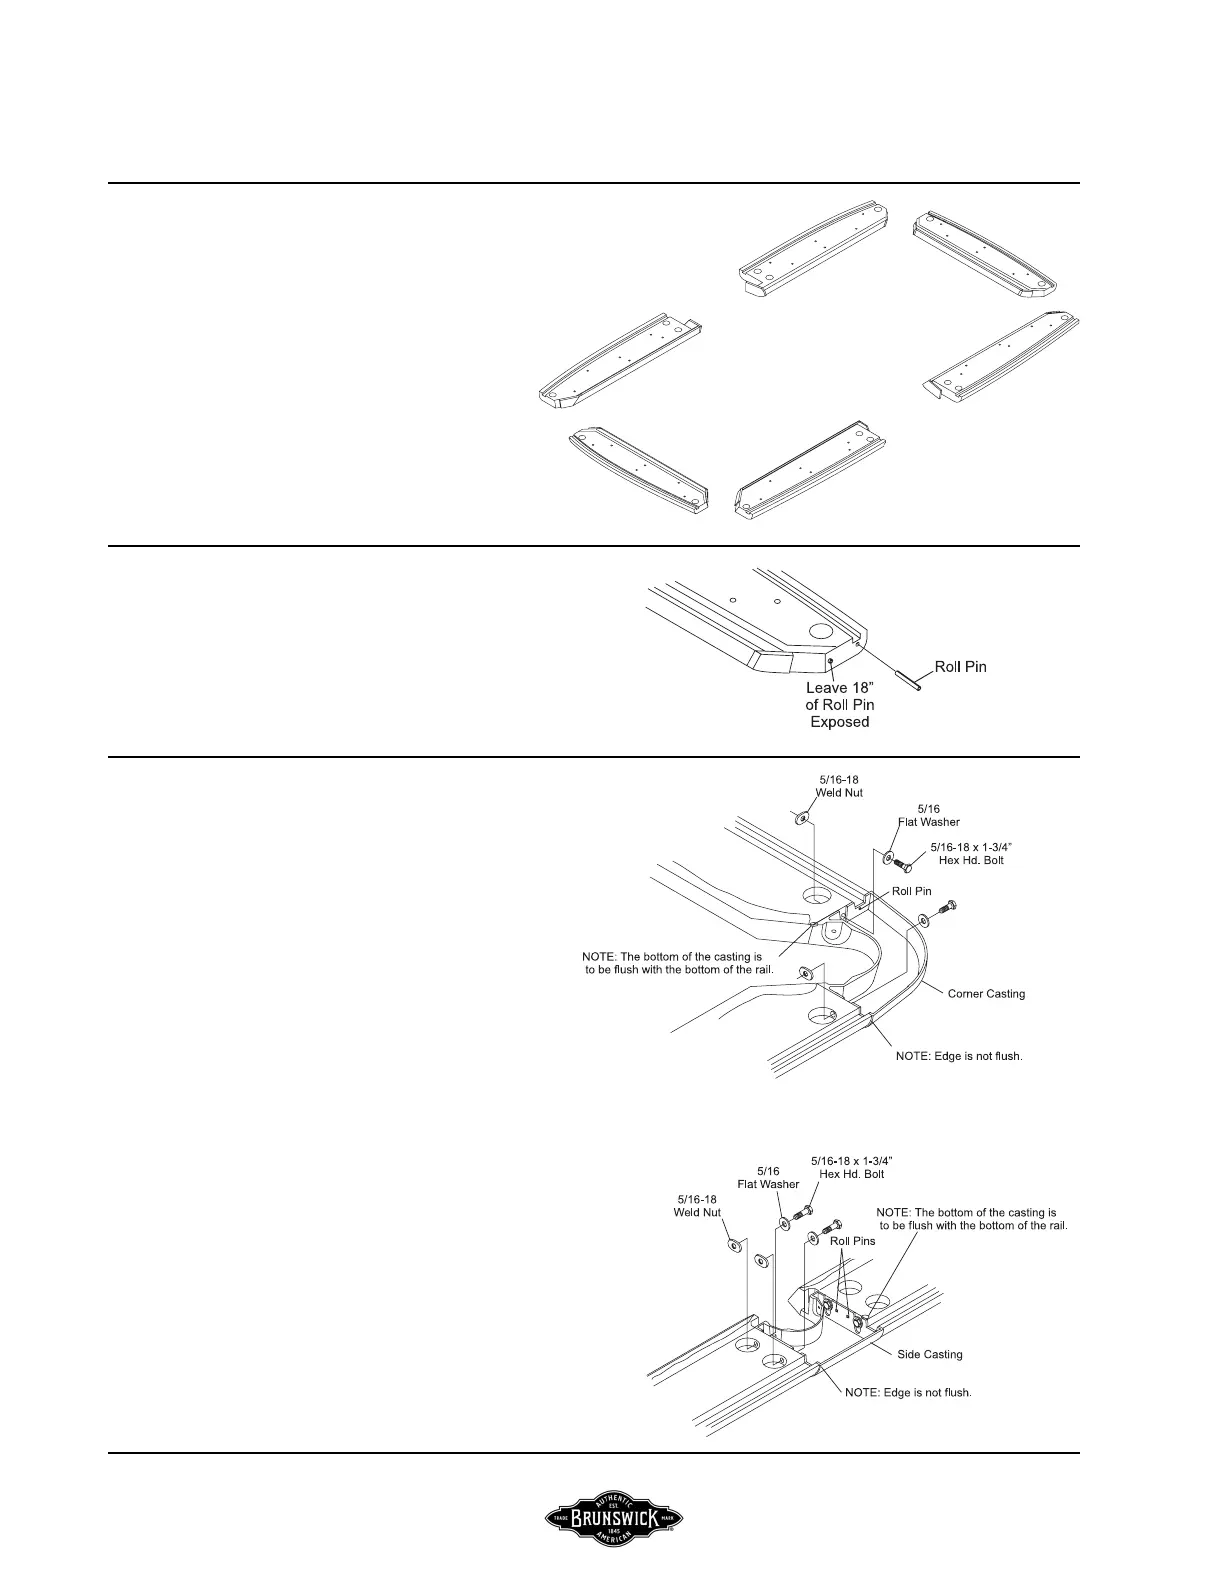
FIGURE ONE
Step #1: Position the six rails upside down in their
respective locations on a protected surface as shown.
FIGURE ONE
FIGURE TWO
Step #2: With the rails laid out, drive roll pins into the
end of each rail. Leave 1/8” of roll pin exposed. Position
the sides and corner castings on rails using so pins align
with clearance holes.
FIGURE TWO
FIGURES THREE AND FOUR
Step #2: Attach the corner and side castings to the rails
using 5/16-18 x 1-3/4” hex head bolts, 5/16 flatwashers
and 5/16-18 weld nuts. Tighten finger tight, square the
rail assembly and tighten all casings securely.
NOTE
: the castings will not be flush with the top and
back of the rails you will have about a 1/8” overhang.
FIGURE THREE
FIGURE FOUR
 Loading...