Do you have a question about the Bryant 226A and is the answer not in the manual?
General safety warnings about improper installation and maintenance.
Emphasizes following safety codes, wearing protective gear, and having fire extinguishers.
Explains safety-alert symbols and signal words like DANGER, WARNING, CAUTION.
Warns of personal injury or death if electrical disconnect is not used.
Warns of death, injury, or property damage from using oxygen for leak testing.
Recommends locating the unit away from living areas to minimize noise disturbance.
Advises correct tube diameters, direct routing, and leaving slack for vibration absorption.
Covers sealing wall openings, avoiding tubing contact, and ensuring proper insulation.
Details proper hanger strap use and isolation from insulation.
States maximum liquid-line size and emphasizes installing the factory filter drier.
Warns of personal injury from sharp edges or burrs on sheet metal parts.
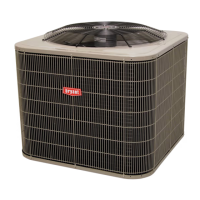
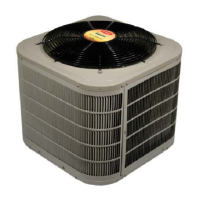
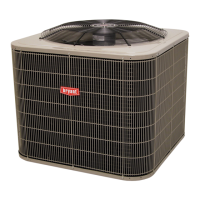
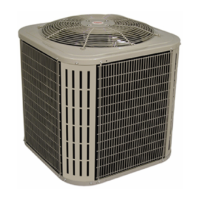
Instructions for unpacking the unit and checking the rating plate for specifications.
Details on securing the unit to a level pad, including hurricane tie-downs and leveling specs.
Guidance for mounting units on rooftop platforms and use of wind baffles.
Warns of equipment damage or improper operation if the unit is not stable and protected from weather.
States the need for sufficient space for airflow, wiring, piping, and service access.
Specifies clearance between units and protection from water, snow, or ice.
Specifies outdoor operating ambient limits for cooling mode.
Notes potential compressor thermal trip at high stage with high voltage and ambient temps.
Instructions to check the defrost thermostat's location and secure attachment.
Warns of equipment damage or improper operation if water/ice builds up in the base pan.
Advises elevating the unit per local climate conditions and snowfall levels.
Details requirements for long refrigerant piping lines and elevation differences, including LSV installation.
Emphasizes that the LSV flow arrow must point towards the outdoor unit.
Warns of fire hazard from refrigerant and oil mixture igniting during brazing.
Instructs to recover refrigerant and states federal regulations against venting.
Advises a vertical rise for buried refrigerant tubing and limits burial length.
Discusses using accessory tubing packages and performance losses for longer lines.
Stresses evacuating to 500 microns to eliminate contamination and moisture in the system.
Explains the unit's factory charge for specific indoor units and line lengths.
States that service valves are factory-closed and plugged before installation.
Notes the requirement for a piston metering device in the liquid service valve for proper heating operation.
Provides steps for installing the piston metering device into the liquid service valve, referencing Fig. 4.
Warns of fire hazard from refrigerant and oil mixture igniting during brazing.
Instructs to connect vapor and liquid tubes to the outdoor unit service valves.
Advises wrapping service valves with heat-sinking material during brazing.
Specifies brazing alloy and pre-brazing steps for vapor service valves, including core removal.
Provides instructions for installing the liquid line filter drier indoors, referencing Fig. 6.
Warns of equipment damage or improper operation if vacuum is not achieved properly.
Prohibits using the system compressor as a vacuum pump.
Details requirements for the deep vacuum method, including pump and gauge capabilities.
Advises breaking a vacuum using dry nitrogen to prevent moisture ingress.
Advises checking factory tubing for shifts or rubbing against sheet metal edges.
Ensures field wiring complies with all relevant fire, safety, and electrical codes.
Warns that improper line voltage operation constitutes abuse and affects unit reliability.
Warns of personal injury or death from electrical shock hazards.
Prohibits supplying power with the cover removed; specifies using only copper wire.
Advises installing an adequately sized branch circuit disconnect per NEC standards.
Instructs to remove an access panel to reach wiring and extend wires through holes.
Guides connecting ground wire to control box and power wiring to contactor as shown in Fig. 8.
Advises routing control wires, refers to thermostat instructions, and specifies control power source.
Mandates NEC Class 2 wiring, ensuring separation from incoming power leads.
Emphasizes checking wiring for secure terminations and proper routing away from sharp edges.
Instructs to supply power to the crankcase heater for at least 24 hours before starting the unit.
Explains when a crankcase heater is required based on tubing length or elevation differences.
Directs users to follow individual instructions packaged with kits or accessories for installation.
Explains ECM furnace blower operation for matching compressor stages via tap selections.
Summarizes required adjustments for variable speed furnaces, referencing installation instructions.
Details SW1-5, A/C DIP, and CF DIP switch settings for airflow selection.
Explains FV4C blower operation for matching compressor stages during cooling/heating.
Directs users to FV4C Installation Instructions for selecting recommended airflow.
Mentions the adjustable blower-off delay for FV4C fan coils, factory set at 90 sec.
Warns of personal injury and environmental damage when handling refrigerant.
Lists critical warnings for operation, including overcharging, vacuum, and low-pressure switch.
Provides step-by-step instructions for system startup, from opening valves to setting the thermostat.
Notes the defrost control board's 5-minute lockout timer initiated upon any power interruption.
States that models utilize a 2-stage indoor thermostat for operation.
Explains the sequence of operation for cooling, including Y/Y2 signals and safeties.
Explains the sequence of operation for heating, including Y/Y2 signals and safeties.
Details the compressor's internal unloader mechanism for modulating capacity between stages.
Relates 67% compressor capacity to approximately 75% cooling or heating capacity at the indoor coil.
Describes Quiet Shift-2 as a field-selectable defrost mode to reduce noise during cycle transitions.
Details the operational sequence when Quiet Shift-2 is enabled during defrost initiation and termination.
Explains the defrost control's field-selectable time/temperature settings.
Describes how the defrost thermostat senses coil temperature to initiate the defrost sequence.
Outlines defrost cycle termination conditions, including thermostat opening or time limit.
Details the procedure to initiate a forced defrost using speedup pins (J1) by shorting them.
Specifies that refrigerant charging should only be performed in high stage operation.
States that factory charge and desired subcooling levels are shown on the unit rating plate.
Provides guidance on adjusting refrigerant charge based on lineset length relative to the 15ft baseline.
Recommends operating in cooling mode for at least 15 minutes before checking charge under favorable conditions.
Outlines charge adjustment procedures for high/low indoor and unfavorable outdoor temperatures.
Refers to the Long Line Guideline for specific charging requirements beyond standard lengths or vertical separations.
Advises referring to the outdoor unit's Heating Check Chart to verify system operation.
Guides verification of proper switching between low and high capacity stages.
Advises checking suction pressures and compressor current for stage switching indication.
Explains the state of the compressor solenoid coil during low and high stage operation.
Warns against installing a plug without an internal rectifier due to voltage conversion needs.
Explains the unloader mechanism controlled by the DC solenoid for stage modulation and outlines testing methods.
Instructs to measure compressor amperage and test solenoid plug voltage output for unloader verification.
Guides measuring the unloader coil resistance if voltage is correct, to diagnose faults.
Lists crucial final checks including wiring security, valve stem cap tightness, and owner handover.
Introduces the troubleshooting table for compressor winding resistance to diagnose malfunctions.
Describes key components like the 2-stage compressor, internal relief, contactor, and pressure switches.
States the importance of periodic maintenance for ensuring high performance and minimizing equipment failure.
Notes that maintenance frequency can vary depending on geographic areas, such as coastal locations.
Details Puron refrigerant pressure, cylinder color, and compatibility with POE oils.
Specifies required service equipment like recovery cylinders, manifold sets, hoses, and leak detectors.
Covers filter drier pressure ratings, placement, and mandatory TXV replacement for Puron systems.
Outlines essential system service procedures, vacuum warnings, and the prohibition of venting Puron.
Mandates installation of a hard shutoff Puron TXV metering device with all indoor coils for proper operation.