START-UP
NOTE: Remove filter access panel (Fig. 2) to gain access to
enthalpy control, mixed-air thermostat, and damper motor.
A. Enthalpy Control Setting
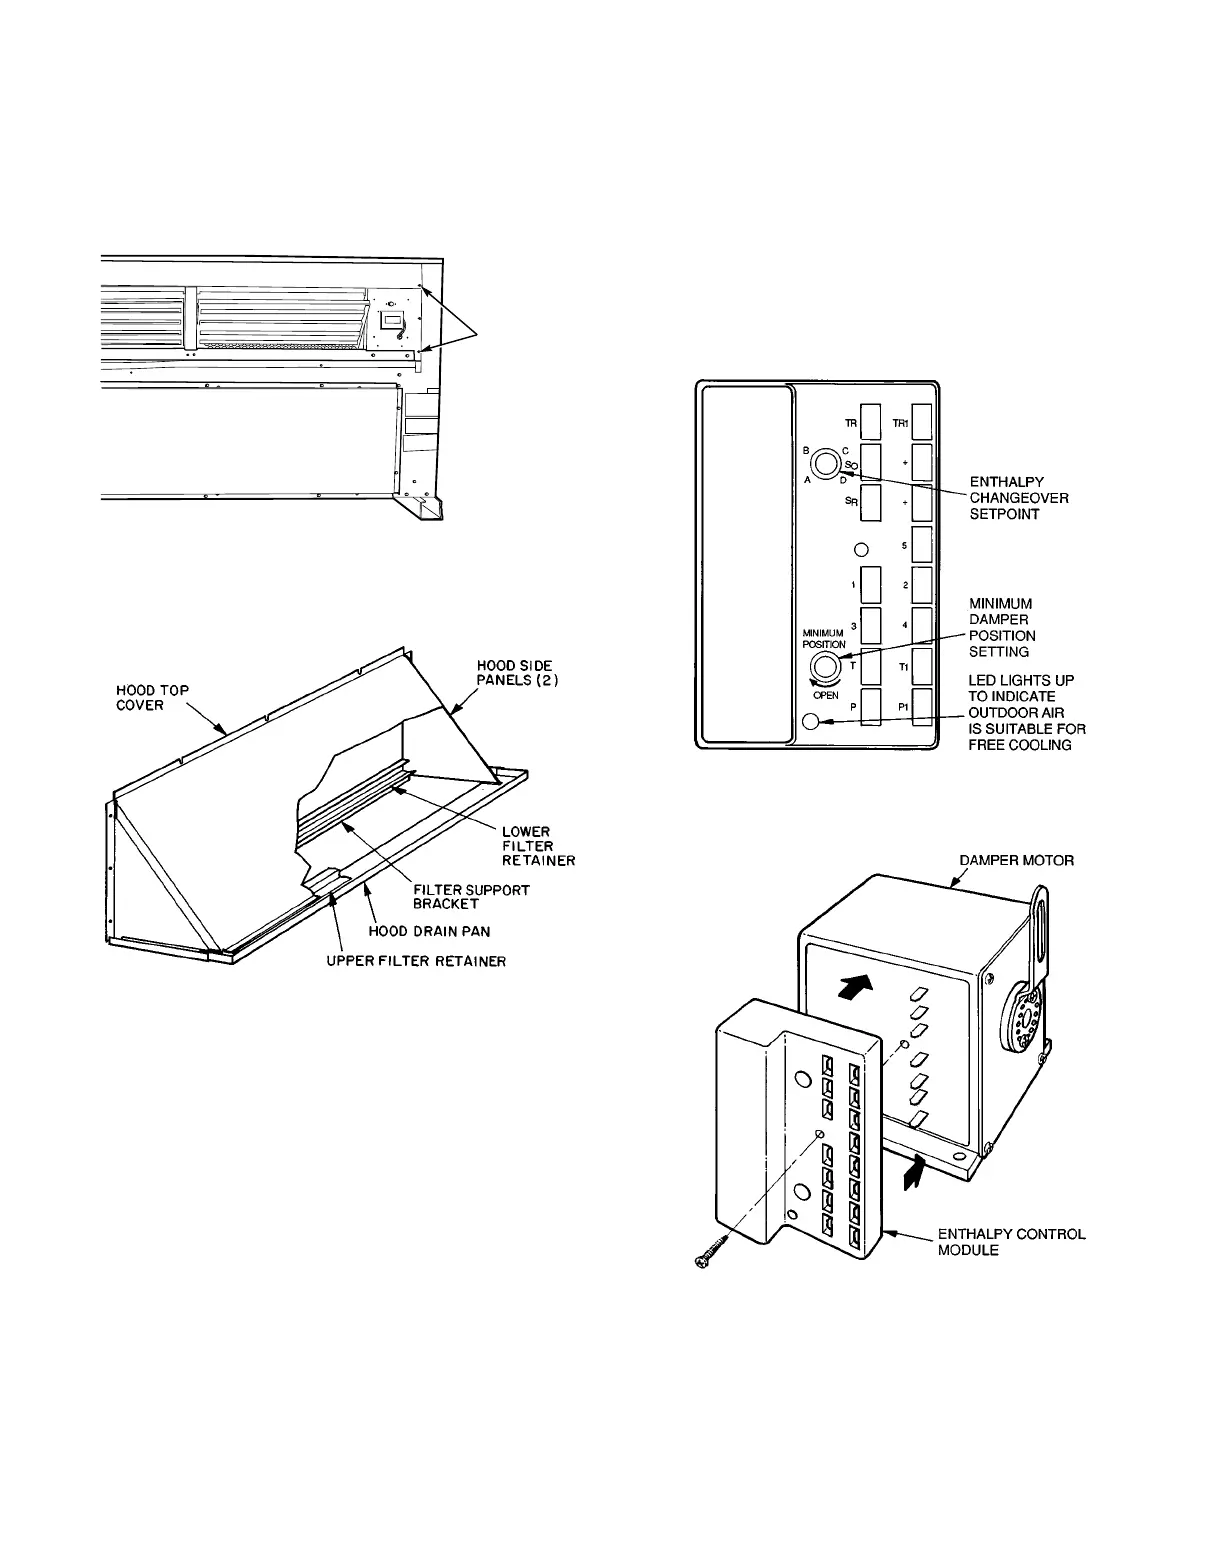
Set enthalpy control (Fig. 10-13) to the desired temperature
and relative humidity which provides cooling with outside air
only (no compressor operation).
Proceed as follows to determine the appropriate setting of the
enthalpy control.
1. Determine the maximum combination of relative hu-
midity and temperature of the supply air considered ac-
ceptable for the installation.
2. Refer to Fig. 14 and locate the percent of humidity on
the left-hand scale and the outdoor dry-bulb tempera-
ture on the right-hand scale. Example in Fig. 14 uses
60% rh (relative humidity) and 66 F outdoor air.
3. Draw a straight line connecting the two points.
4. Adjust enthalpy control dial (Fig. 11) to the control set-
ting indicated on control setting scale in Fig. 14. The
control setting for the example conditions is the B range.
B. Damper Vent Setting
1. Set thermostat FAN switch at ON (continuous fan op-
eration) and close night switch (if used).
2. Set thermostat SYSTEM switch at OFF.
3. Turn damper adjustment screw, located on the en-
thalpy control module, slowly clockwise until dampers
assume desired vent position. Do not manually operate
damper motor. Damage to damper motor will result.
4. Replace access panels before leaving unit.
Fig. 12 — Enthalpy Control Module
Fig. 13 — Enthalpy Control Module Location
SCREWS
ATTACHING
ECONOMIZER
TO UNIT (4)
Fig. 10 — Economizer Damper Assembly —
Completely Installed
Fig. 11 — Outdoor-Air Hood Details
—5—