NOTE: As damper assembly is inserted into unit, connect econo-
mizer plug to the receptacle behind the unit control box where
shorting plug was removed.
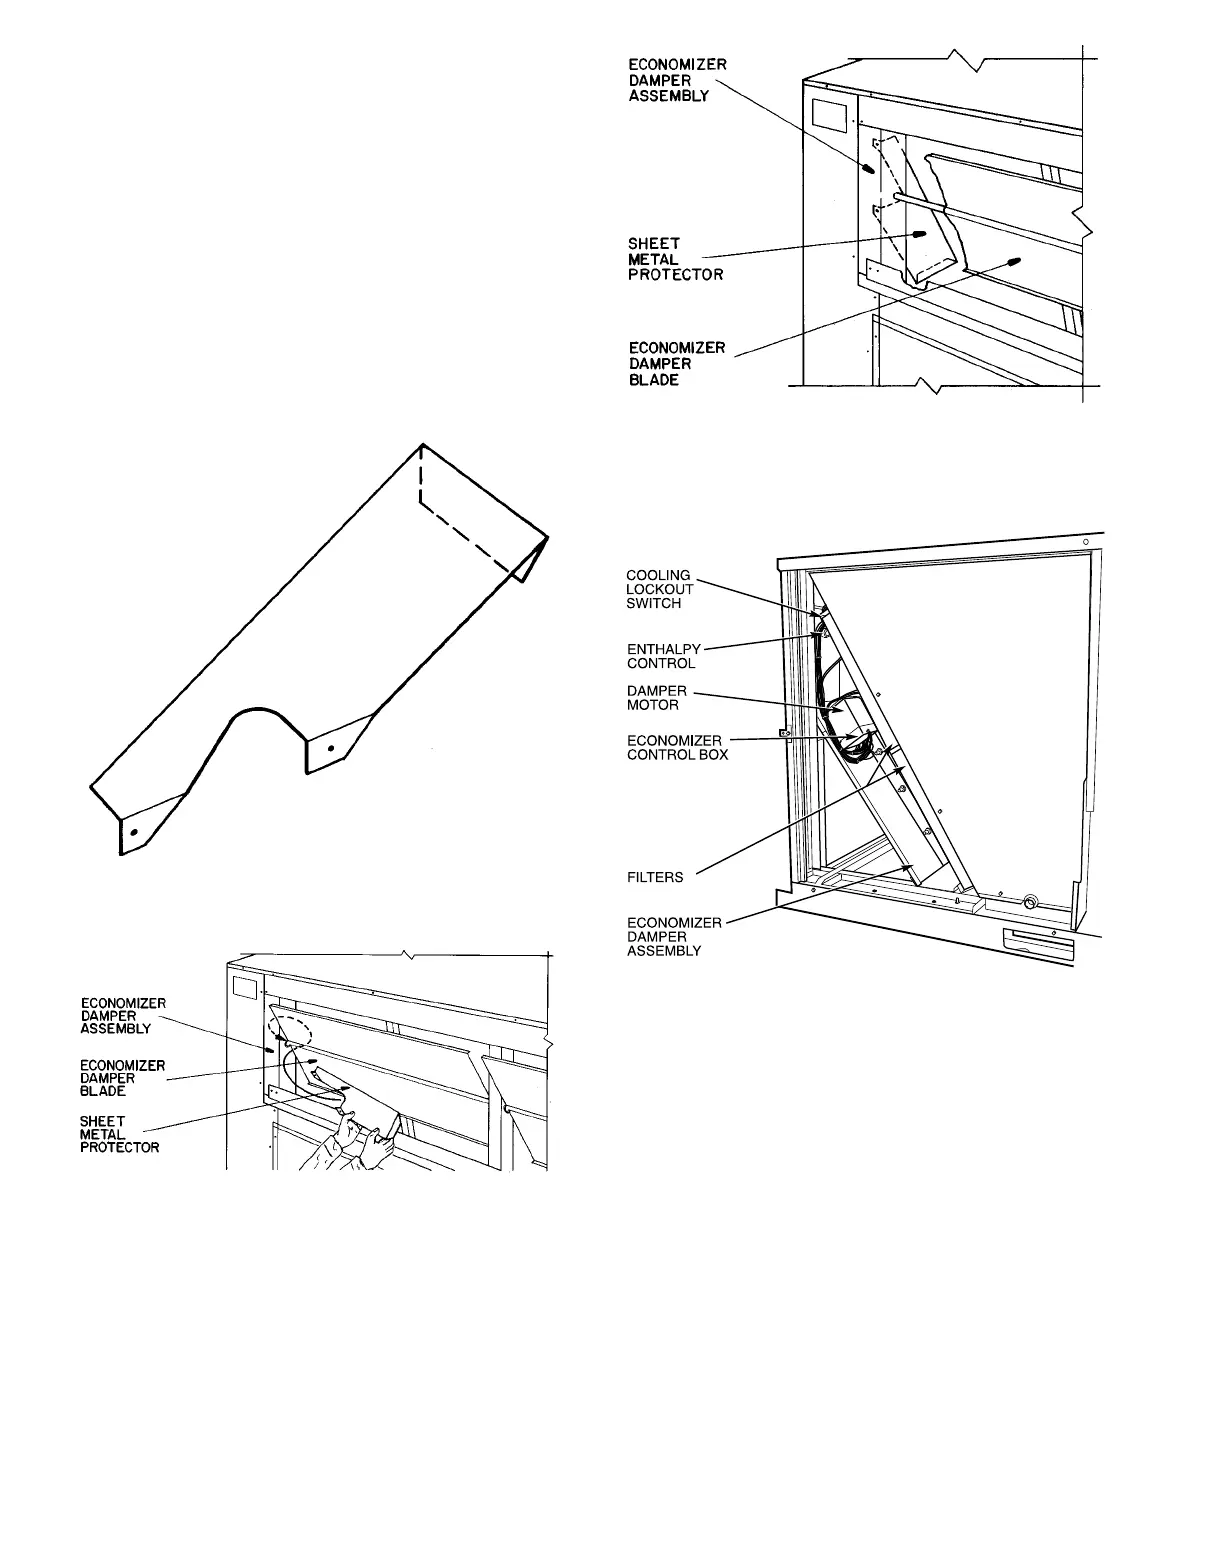
7. Install sheet-metal barrier (Fig. 6) to damper assem-
bly. With economizer damper in open position, pass bar-
rier through lower damper opening. See Fig. 7. Rotate
barrier 90 degrees and position to cover economizer plug
and wiring harness as shown in Fig. 8. Using screws
from assembly package, secure barrier to assembly.
8. Complete assembly of economizer damper assembly to
unit. See Fig. 9 for an end view of an installed econo-
mizer. Ensure that economizer bottom flange is posi-
tioned on basepan as shown.
9. Using four screws removed in step 3, secure econo-
mizer damper assembly to unit. See Fig. 10.
10. Reinstall 25% air/economizer hood. Refer to unit In-
stallation Instructions. See Fig. 11.
Fig. 6 — Sheet Metal Barrier
Fig. 7 — Barrier Installation Details
Fig. 8 — Sheet Metal Barrier Installation
Fig. 9 — Economizer Damper Assembly — End View
—4—