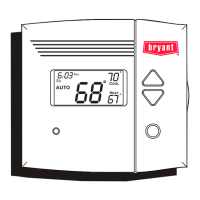
III. SET THERMOSTAT CONFIGURATION
Available thermostat configuration options and their numbers are:
Option 1 -- Anticipator adjustment
Option 2 -- Not available
Option 3 -- Fahrenheit or Celsius operation
Option 4 -- Enable fan (G) ON with heat (W)
Options 5 through 9 -- Not available
Option 10 -- O (reversing valve) On with Heat or Cool (present on
Heat Pump model only)
Options 11 and 12 -- Not available
Option 13 -- Room temperature offset adjustment
An explanation for each configuration option is as follows.
A. To Enter the Configuration Mode:
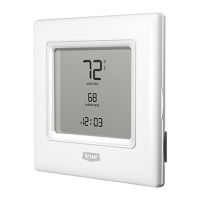
Press and hold FAN button for approximately 10 sec until room
temperature disappears and the display reads "1" and is flashing.
You are now in configuration mode.
NOTE: If HOLD/END button is pressed, or if no button is
pressed for 2 minutes, the thermostat will exit configuration mode
and return to normal operation. To re-enter configuration mode,
the FAN button must be pressed and held for 10 sec again.
While in configuration mode, the following options are available:
OPTION 1—ANTICIPATOR VALUE ADJUSTMENT
This adjustment controls the sensitivity and cycle rate of the
thermostat. Higher numbers decrease the cycle rate. Lower num-
bers increase the cycle rate. However, this feature will not allow
more than 4 equipment cycles per hour (or 1 cycle every 15
minutes), regardless of setting. Values can range from 1 to 3.
Factory default setting is 2. This default selection will provide
optimum performance in nearly all installations. Try this setting
first. Do not change setting unless there is evidence or need to do
so. Unlike conventional anticipators, this setting is not to be
determined by current draw. There is no need to measure, know, or
compensate for current.
TO SELECT:
1. Enter configuration mode if not already there (see above).
2. Use UP and DOWN buttons to make the large (now
flashing) display indicate 1.
3. Press the TIME/TEMP button once to flash the small
display.
4. Use UP and DOWN buttons to move between 1, 2, or 3 on
the small display. Factory default is 2.
5. Press TIME/TEMP button again to flash the large display
for selection of another option, or press HOLD/END TO
exit the configuration mode.
OPTION 3—FAHRENHEIT/CELSIUS SELECTION
This selection operates the thermostat in either Fahrenheit or
Celsius.
TO SELECT:
1. Enter configuration mode if not already there (see above).
2. Use UP and DOWN buttons to make the large (now
flashing) display indicate 3.
3. Press TIME/TEMP button once to flash the small display.
4. Use UP and DOWN buttons to move between F or C on the
small display. Factory default is F.
5. Press TIME/TEMP button again to flash the large display
for selection of another option, or press HOLD/END to exit
the configuration mode.
OPTION 4—G (FAN) ON WITH W (HEAT) SELECTION
This selection determines whether G (fan) output is to be ON or
OFF when W (furnace or strip heat) output is ON. Most furnaces
and fan coils manage their own blowers and do not require a
separate G signal. For these applications, select OFF. Some
auxiliary heaters require a separate G signal from the thermostat to
turn on the blower. In this case, select ON.
TO SELECT:
1. Enter configuration mode if not already there (see above).
2. Use UP and DOWN buttons to make the large (now
flashing) display indicate 4.
3. Press TIME/TEMP button once to flash the small display.
4. Use UP and DOWN buttons to move between ON or OF on
the small display. Factory default is OF.
5. Press TIME/TEMP button again to flash the large display
for selection of another option, or press HOLD/END to exit
the configuration mode.
OPTION 10—O (REVERSING VALVE) ON WITH HEAT OR
COOL SELECTION
This selection is only available on heat pump model thermostats.
This selection determines whether the reversing valve is energized
in the heating or cooling mode.
TO SELECT:
1. Enter configuration mode if not already there (see above).
2. Use UP and DOWN buttons to make the large (now
flashing) display indicate 10.
3. Press TIME/TEMP button once to flash the small display.
4. Use UP and DOWN buttons to move between H (energized
in heating) or C (energized in cooling) on the small display.
Factory default is C.
5. Press TIME/TEMP button again to flash the large display
for selection of another option, or press HOLD/END to exit
the configuration mode.
OPTION 13—ROOM TEMPERATURE OFFSET ADJUST-
MENT
This option allows calibration (or deliberate miscalibration) of the
room temperature sensor. There are various reasons why home-
owners may want to have displayed temperature adjusted to a
higher or lower value. The selected number is the number of
degrees, plus or minus, which will be added to actual temperature.
The numbers can range between -5 and +5.
TO SELECT:
1. Enter configuration mode if not already there (see above).
2. Use UP and DOWN buttons to make the large (now
flashing) display indicate 13.
3. Press the TIME/TEMP button once to flash the small
display.
4. Use UP and DOWN buttons to move between -5 and 5 in 1
degree steps on the small display. Factory default is 0.
5. Press TIME/TEMP button again to flash the large display
for selection of another option, or press HOLD/END to exit
the configuration mode.
—4—

 Loading...
