Okay, the fuselage fairing is actually a part of the wing, but it's like an extension of the fuselage, right? To be
honest, the fairing requires some tedious cutting and fitting and is not actually required from a structural standpoint.
For those reasons, I consider it optional, but the model wouldn't look right without it! Start by bolting the wing in place.
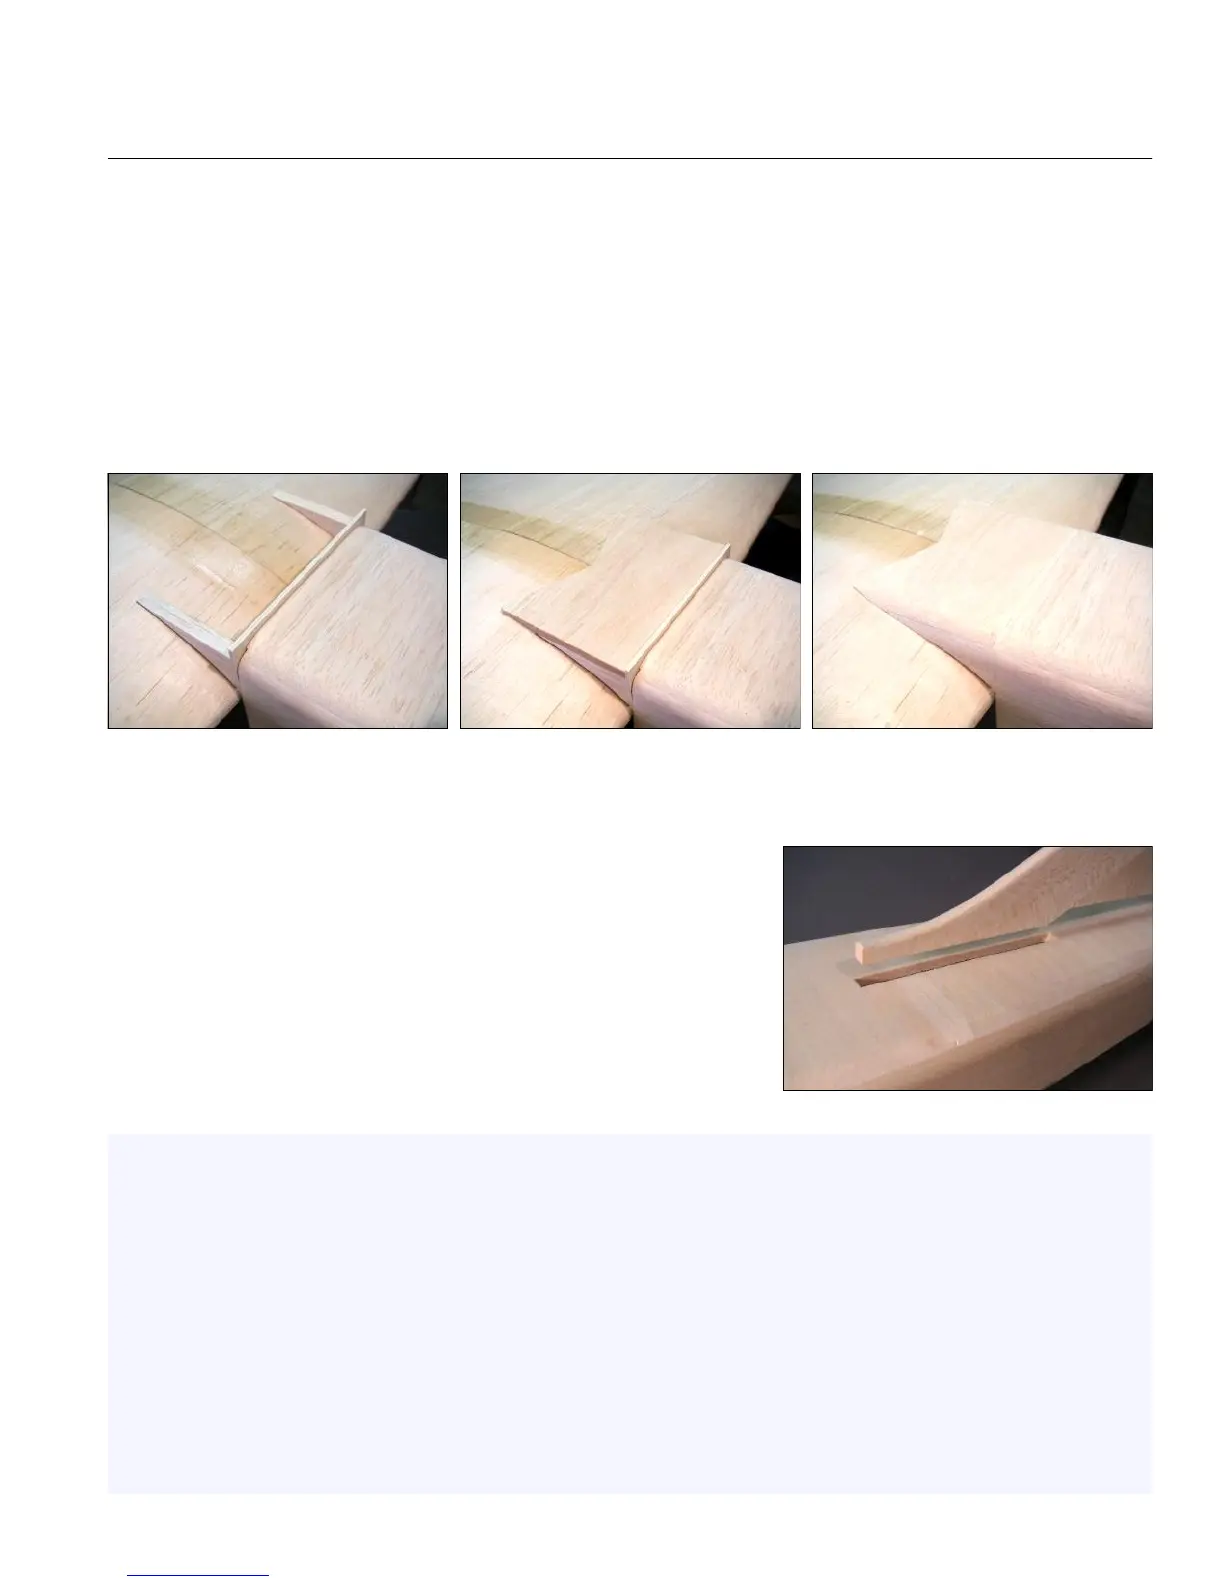
The fuselage fairing face plate is cut from the lite-ply rectangle supplied in the kit. You need to trim the long edge
where it contacts the wing to match the dihedral. Glue it to the wing, leaving a small gap for clearance (again, two
strips of tape works well as a spacer).
Use the supplied template to cut two fairing sides from the piece of 3/8" balsa included in the kit. Glue the fairing
sides to the wing and the face plate. The outer edges of the fairing sides should be in line with the fuselage sides.
Add 1/4" balsa to the top of the fairing sides. At the front, the balsa will seat against the fairing plate. At the rear,
you will need to trim and taper the sheeting carefully as shown in the center photo so it flows smoothly into the wing.
When dry, carefully shape the fairing to flow smoothly into the contour
of the fuselage. Apply masking tape to the wing to protect it during the
sanding process. Most likely, the fairing will require some filler around its
edges to finish it off properly.
Cut a slot in the fuselage top sheeting for the front of the fin. Make
sure the slot is centered on the fuselage and try for a snug fit. R54
Congratulations, your airframe is now complete!
Covering - I recommend using a high-quality plastic film covering like Monokote or Ultracoat. BTE offers full-size
templates for the color scheme used on the prototype if you wish to duplicate it. Plan your overlaps and seams so
they are all facing rearward to avoid any chance of lifting during flight. At the field, keep an eye on the open rib bays.
Any punctures or tears must be repaired before attempting another flight.
Easy Hinges - Easy Hinges are designed to be installed after covering. Cut accurate slots with a sharp knife, and
install all the hinges dry - no glue yet! Make sure the control surface is positioned exactly where you want it, deflect it
in both directions, then apply THIN CA to both sides of every hinge. You must use thin CA, the fresher the better, for
maximum penetration of the hinges and wood. I like to apply at least five big drops, but I watch the hinge carefully to
be sure it is still soaking the glue in. The first few drops will absorb quickly, then it will begin to slow down. I stop
when the last drop takes about five seconds to flow in. Do not over-glue, and do not apply a second layer. When
done properly, the hinges should actually appear dry.
FINISH THE FUSELAGE, continued...
27


 To Next Page