3
BT00875-a- 24/03/2016
322052
EN
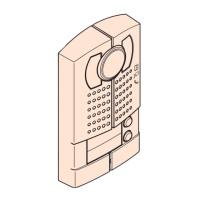
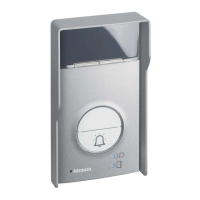
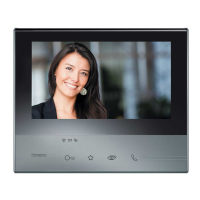
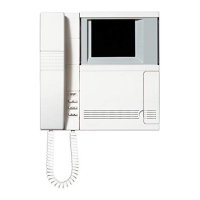
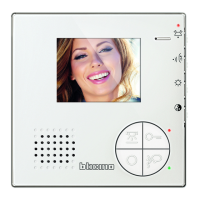
Hands-free colour internal unit
Example: the lnternal Unit can connect up to 4 defence areas, but in fact, if just
defence areas 1, 2, 3 have the alarm sensor connected then just defence areas 1, 2,
3 can be set by the “ shortcut key”. If defence areas 1, 2, 3 are all enabled, a
long tone will be heard, if just defence areas 1 and 3, are enabled, but defence area
2 is disabled, 3 short tones will be heard. The alarm sensor is in the alarm status
because of the failure to enable the defence areas (the detail shown in 3.1.3).
4.1.2 Enable defence area 1: in stand-by status, press the “ Setup” key until a
long tone is heard, input the correct password (the password is 2000, press “
Thousands” twice), then press “ OK”. The internal unit enters the main setup
menu after a long tone is heard, then press “ SOS” (Ones digit) input number
“1”, press the “ OK” key to enter the defence submenu setting and press “
SOS” to change the sensor detective mode (A Logic Electrical Level for Sensor
testing mode. High: Sensor connected and Low: not connected and vice-versa). In
enabled defence area status, with the enabled defence area “ LED” ON (red)
and disabled defence area status LED OFF, press the “ OK” key to finish. If the
operation is successful, a long tone will be heard. If the defence area is not enabled,
3 short tones will be heard. If the setting has failed please check the connection.
(The reason for failure is shown in 3.1.3 - Annotations).
4.1.3 Defence area 2, 3 and 4 can be enabled in a similar operation.
Notes:
(1) The reason why the defence area cannot be enabled: if the alarm sensor is in
alarm status, the defence cannot be enabled. E.g.: when the internal unit checks
the door magnetic alarm sensor is in alarm status, it may mean that the door or
window is not properly closed. So please make sure that the door or window is
closed properly. Then try to enable the defence area again.
(2) Digits lnput: please read “Configuration Setting” carefully before operation. lt is
the second main section of SPEC.
4.2 Disable defence area
4.2.1 Disable the shortcut key: in stand-by status, press the “ Setup” key
until a long tone is heard, input the correct password (Password is 2000, press
“ Thousands place” twice), then press “ OK” , the internal unit enters the
setup main menu after a long tone is heard; if no defence areas are enabled, press
the “ shortcut key” to disable all the thief alarm defence areas. A long tone
will be heard after the operation is ended.
Note: defence areas 3 and 4 (fire alarm areas) cannot be disabled by the shortcut key.
4.2.2 Disable defence area 1 by the number keyboard: at stand-by status, press the
“ Setup” key until a long tone is heard, input the correct password (the
password is 2000, press “ Thousands” twice), then press “ OK”. The
internal unit enters the main setup menu after a long tone is heard. Then press
“ SOS” (One digit) input number “1” and press the “ ” key to enter the
defence setting submenu and press “ SOS” to change the sensor detection
mode (A Logic Electrical Level for Sensors testing mode. High: Sensor connected
and Low: not connected and vice-versa). In enabled defence area status, the
defence area “ LED” ON (red), disabled defence area status, LED OFF, press the
“ OK” key to finish. If the defence area is successfully disabled, a long tone
will be heard.
4.2.3 Defence area 2, 3 and 4 can be enabled in a similar operation.
4.3 Alarm Sensors entering the activated status: after the lnternal Unit exits the
setup status, the enabled defence area “ LED” will flash slowly after a delay
(the default delay time is 100 seconds for all defence areas) and the alarm sensor
will be activated. The lnternal Unit will not detect the alarm sensor status before
the alarm sensors are activated.
4.4 Alarm indication:
4.4.1 Global testing of the sensor indication: in the status, after entering the
defence status, if no alarm sensors are activated, the defence area “ LED”
flashes slowly. If they are activated, the defence area “ LED” flashes quickly.
Meanwhile, the fire defence area alarm is activated accompanied by an alarm
sound. For other defence areas the alarm sound will not be heard if the default
setup value is used.
4.4.2 Single testing of the sensor indication: at stand-by status, press the “
Setup” key until a long tone is heard, input the correct password (the password is
2000, press “ Thousands” twice) , then press “ OK”. The internal unit
enters the main menu setting after a long tone is heard, then press “ SOS” (One
digit) input number “1” and “ OK” key to enter the defence setting submenu
to check the alarm status. In enabled defence area status, the defence Area “
LED” ON (red) means the defence area status is enabled, OFF means the defence
area status is disabled and fast flashing means there is an alarm. Meanwhile,
the defence areas can be enabled or disabled. Press “ OK” to return to the
previous menu.
Note: Defence area 2, 3 and 4 can be enabled in a similar operation.
4.4.3 Alarm condition reporting and disabled defence areas:
If the defence area is not disabled within the set-time of 40 seconds when the
alarm was given then the internal unit will send the alarm information messages to
the Management Center. During the time the alarm is given, if you need to disable
the defence areas refer to section 3.3.2 for setting the disabled defence areas . If
the alarm defence areas are disabled within the set-time of 40 seconds no alarm
messages will be sent to the management center.
Configuration

 Loading...