1-33
HANDLEBARS
INSPECTION
Check handlebar adjustment:
Before every ride.
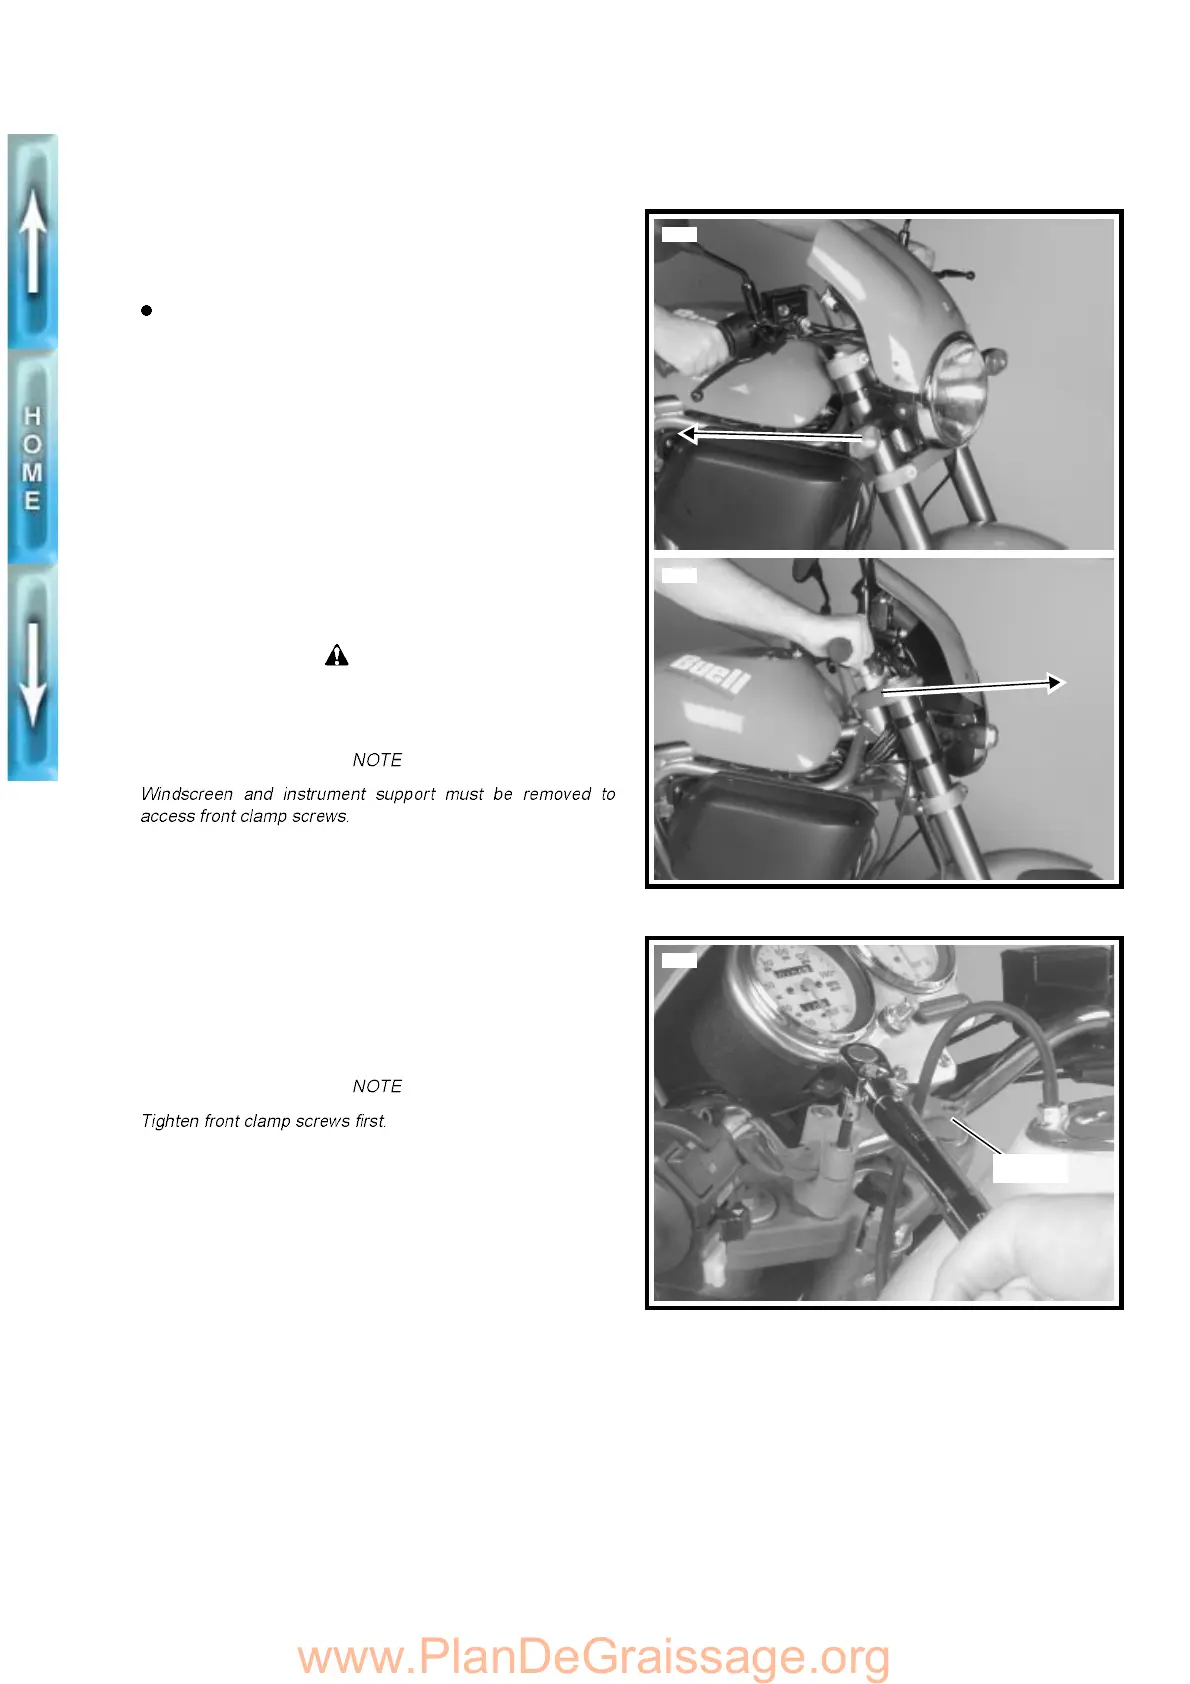
1. See Figure 1-46. Check steering motion range to both
fork stops. Each handlebar should be spaced equally
between the windscreen and fuel tank and parts should
not make contact.
2. Handlebars should be equally spaced between outside
edge of handlebar clamp and inside edge of mirror
mounts.
If necessary, adjust handlebars as described below.
ADJUSTMENT
CAUTION
Never adjust handlebars using excessive force or dam-
age to handlebars might result.
1. Remove windscreen. See WINDSCREEN in Section 2.
2. Remove instrument support. See SPEEDOMETER AND
TACHOMETER in Section 2.
3. See Figure 1-47. Loosen clamp screws.
4. Move handlebar to desired position.
5. Tighten clamp screws to 10-12 ft-lbs (13.6-16.2 Nm).
6. Install instrument support. See SPEEDOMETER AND
TACHOMETER in Section 2.
7. Install windscreen. See WINDSCREEN in Section 2.
8. Check steering motion range to both fork stops. Each
handlebar should be spaced equally between wind-
screen and fuel tank and parts should not make contact.
If handlebar needs further adjustment, repeat ADJUST-
MENT beginning with Step 1.
Figure 1-46. Testing Handlebars
Figure 1-47. Adjusting Handlebars
5589
5590
5576
Clamp

 Loading...


