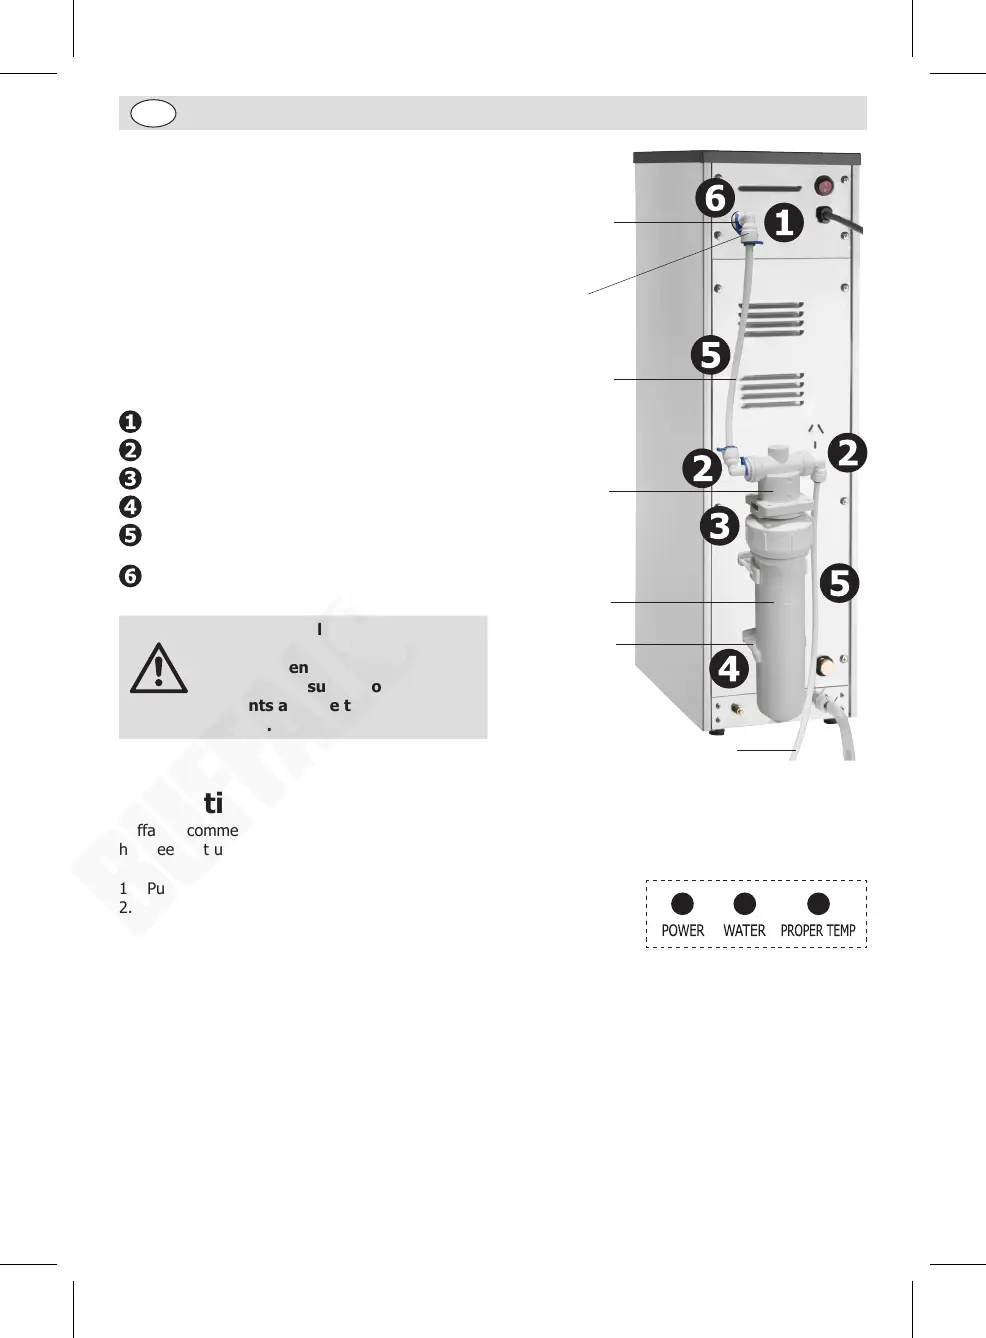
6
Installing the water filter cartridge
and water inlet hose
For the best water quality, this boiler is designed to
be used in conjunction with a separate water filter
cartridge (supplied, item code AP299). Doing so will
reduce the build up of limescale and contaminants
in the water tank, thus maintaining energy
efficiency and prolonging the life of the appliance
particularly in hard water areas.
Connect the filter cartridge and water inlet as
shown in the image and follow the steps 1-6:
Joint adapter to water inlet
Joint adapter to filter head
Filter cartridge to filter head
Filter cartridge clicked into brackets
Install the water inlet hoses to the joint
adapters, then to the water supply
Secure each joint with a clip
Warning
After all installation completed,
check all joints connection are
secure. Open the water valve
at the water supply to check
all joints and the tap have no
leakage.
Joint adaptor
Clip
Filter head
Bracket
Filter cartridge
Water inlet hose
Water inlet
hose
Operation
Buffalo recommend that the appliance is cleaned out before using for the first time, or if the appliance
has been sat unused for an extended period of time.
1. Put the drip tray in place.
2. Open the water valve at the water supply.
3. Connect to the mains power supply and press the On/Off switch to
turn on (I position). The “POWER” indicator light illuminates.
4. The “WATER” indicator light starts to flash, indicating the appliance starts automatic filling. After
filling, the “WATER” indicator light turns on stably.
5. The appliance now starts to heat water.
6. When the “PROPER TEMP” indicator light illuminates, the water has reached pre-set temperature and
is ready for drinking.
7. Dispensing water: Place a vessel beneath the tap and pull the tap handle towards you to begin
dispensing. Raise the tap handle to close the tap.
8. Use the first 2 and 3 boiling cycles to test the water connection and flush out the system. Discard the
hot water from these initial cycles.
9. To turn off the appliance, press the On/Off switch (O position).
CJ787_ML_A5_v1_20231227.indb 6CJ787_ML_A5_v1_20231227.indb 6 2023/12/27 14:142023/12/27 14:14