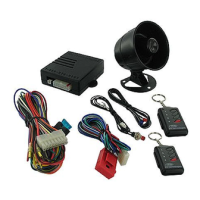
Need help?
Do you have a question about the Bulldog Security DELUXE 500 and is the answer not in the manual?
Details the limited lifetime warranty on the main control module and two-year warranty on other parts.
Outlines purchaser's remedy, limiting it to repair/replacement and disclaiming consequential damages.
Lists safety precautions for using automatic functions, including keeping transmitters away from children and not leaving the vehicle unattended.
Explains how to use the transmitter buttons for various functions like locking doors, arming the system, and panic function.
Details the functions of the two-way LCD remote control transceiver, including system status check and monitoring indoor temperature.
Provides a chart explaining the meaning of different LED status indicators (Off, Slow Flash, Fast Flash, On).
Explains the audible chirp signals used by the system for different functions like arming, disarming, and warnings.
Describes the parking light flash patterns and their corresponding system states (Arm, Disarm, Car Locator).
Details the system's behavior under various conditions like arming, disarming, trigger, panic, and car locator.
Explains the process of actively arming the security system using the transmitter button and its confirmation signals.
Describes how to arm or disarm the system silently using a combination of transmitter buttons.
Explains the feature designed to prevent vehicle theft by disabling the starter 60 seconds after ignition off.
Details the optional passive arming feature, where the system arms automatically 30 seconds after the last door is closed.
Explains how to temporarily bypass passive arming and how to exit this bypass mode.
Explains how to disarm the system using the transmitter, including door unlock and dome light activation.
Describes the feature allowing independent unlocking of the driver's door first, then other doors within 3 seconds.
Details the procedure to disarm the alarm using the ignition switch and valet switch if the transmitter is lost.
Explains how to use the valet switch to bypass alarm and remote starter functions for service personnel.
Step-by-step instructions on how to enter Valet Mode using the ignition and valet/program switch.
Instructions on how to exit Valet Mode, returning the system to normal operation.
Describes how to enter/exit valet mode using the remote transmitter, confirmed by parking light flashes.
Explains how to use the car finder function via the transmitter to locate the vehicle by siren chirps and parking light flashes.
Details how to manually trigger the alarm in an emergency using the transmitter, and how to stop it.
Explains how to check the system's current status via the LCD screen using the transceiver button.
Describes the feature where the dome light turns on upon disarming or flashes during an intrusion.
Explains automatic door locking when ignition is turned ON and unlocking when turned OFF.
Explains how to use the transmitter to remotely control the trunk release or other connected electronic devices.
Describes Channel 4 as a user-programmable timer output for functions like headlights or sunroofs.
Describes Channel 5 as a user-programmable timer output for functions like headlights or sunroofs.
Describes Channel 6 as a user-programmable timer output for functions like headlights or sunroofs.
Details how to operate a second vehicle's security system using the two-way LCD remote transceiver.
Explains how to switch back to controlling the first vehicle's security system from the LCD remote transceiver.
Step-by-step guide on how to remotely start the vehicle using the transmitter, including confirmation signals.
Describes the safe start feature to prevent accidental remote starts, requiring simultaneous button presses.
Explains the system's process for memorizing the neutral transmission position for manual transmission vehicles.
Instructions on how to start and operate the vehicle after it has been remotely started.
Details the feature allowing the vehicle to remain running after the key is removed, for short periods.
Explains the mode that keeps the engine running to cool down the turbocharger after driving.
Introduces programming the engine to start automatically at scheduled times or based on temperature.
Describes the timer start feature designed for extreme cold climates to prevent freezing.
Explains automatic engine start based on reaching or dropping below a pre-programmed temperature.
Details the daily timer start feature for punctual engine starts at the same time the next morning.
Step-by-step guide on how to program the Daily Timer Start feature.
Instructions on how to manually exit the timer start programming mode.
How to use the LCD screen to check the vehicle's interior temperature before cooling or heating.
Procedures for shutting down the engine when it is running in remote start mode.
Lists conditions that will prevent the engine from starting or cause it to shut down immediately.
Explains how to temporarily disable the remote starter system, typically for servicing or storage.
Instructions for replacing the AAA alkaline battery in the remote transceiver and resetting the clock.
A comprehensive chart explaining the meaning of various icons displayed on the LCD remote transceiver.
Describes the time monitor function on the LCD remote transceiver.
Explains how to set a morning call alarm using the remote transmitter.
Details the count down timer for parking reminders on the LCD remote.
Explains the power save mode on the LCD remote transceiver to conserve battery.
Describes how the remote control vibrates when the system is triggered.
How to disable transmission functions temporarily to prevent accidental button presses.
Indicates the low battery warning on the remote control.
Details how to program various features of the LCD remote transmitter using button combinations.
Instructions for programming the count down timer with various durations.
How to enable or disable the beep sound when pressing buttons on the LCD remote.
How to turn on the LCD screen lamp for 5 seconds.
Explains how to enter and exit power save mode on the LCD remote transceiver.
How to clear the flash icon and melody sound from the LCD screen transceiver.
How to stop the melody sound triggered by an alarm event.
How to activate or cancel the button lock function to prevent accidental presses.
How to select between vibration or melody mode for triggered events.
How to mute or enable the beep sound on the LCD screen transceiver.
Explains the indication for a weak battery in the remote control.
Step-by-step guide to setting fixed countdown timers (10 min to 2 hours).
Describes how the system indicates when it is out of range.
Chart for setting timer (Hour/Minute) using transmitter buttons.
How to set the hour and minute for the alert alarm.
How to turn the alert alarm setting on or off.
How to set the hour and minute for the count down timer.
How to turn the count down timer setting on or off.
How to set the daily timer start, including hours and flashing icons.
A practical example showing how to set the timer to AM 10:30.
A practical example showing how to set the alert alarm timer to PM 6:30.
A practical example showing how to set a count down timer for 2:30.
A practical example showing how to set the daily timer start for AM 6:30.
 General
| Number of Buttons on Remotes | 4 |
|---|---|
| Remote Start | Yes |
| Keyless Entry | Yes |
| Number of Remotes | 2 |
| Engine Immobilizer | Yes |
| Shock Sensor | Yes |
| Door Lock Control | Yes |
| Trunk Release | Yes |
| Alarm Features | Panic |
| Remote Range | 1500 ft |


 To Next Page