31
loosen all PVC pipe unions in the equipment compartment. Do
not replace the plugs or tighten the unions until the spa is de-
winterized.
Step 5: Clean the spa shell and JetPaks (if equiped).
Step 6: Remove lter cartridge(s), clean, and reinstall.
Step 7: Secure the cover to the spa utilizing the tie downs and
locking system. In areas where heavy snow is anticipated, place a
large piece of plywood (or its equivalent) on top of the spa cover
to assist in supporting the cover with the added weight of the
snow. Remove snow o the cover following each snow storm.
WARNING: To avoid water from becoming trapped between
the oor suction tting and the lter pipe . Use a wet/dry vacuum
to remove the remaining water out of pipe by placing the vacuum
end over the lter hole. In a two-pump spa, rst plug o one
lter using a tennis ball then vacuum out the water. Or pour ½-1
gallons (5-9 liters) of RV antifreeze into the lter hole.
NOTE: RV antifreeze is nontoxic and does not require
evacuation at start up.
Spa De-Winterization
To de-winterize the spa, reverse the winterization procedure.
Rell to the water level mark.
WARNING: Whenever relling the spa, it will be necessary
to Super Sanitize the new spa water. Instructions are found in the
Water Chemistry section.
Removing the Equipment
Door
STIL Door Removal
e STIL spa is designed so that there are no visible fasteners
from the exterior. is is accomplished by using an innovative
style of snap features in both the corners and the cabinet panels.
If properly removed using these instructions, servicing this spa is
easy to do.
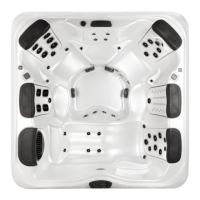
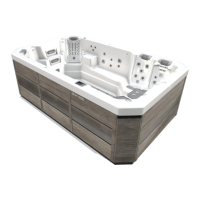
Step 1: Remove Corners – It is important to remove the front
two corners overlapping the door before attempting to remove
the door itself. is is done by placing a short athead screwdriver
below the corner and slipping it up partway behind the corner
and using it as a lever to pry out the bottom half of the corner
outward.Once this is done, grab the corner by the bottom and
pull it straight out allowing the top snap to come free. Pull
corner down and out of the groove on the top.
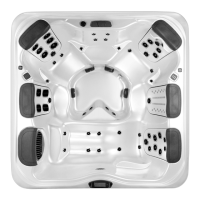
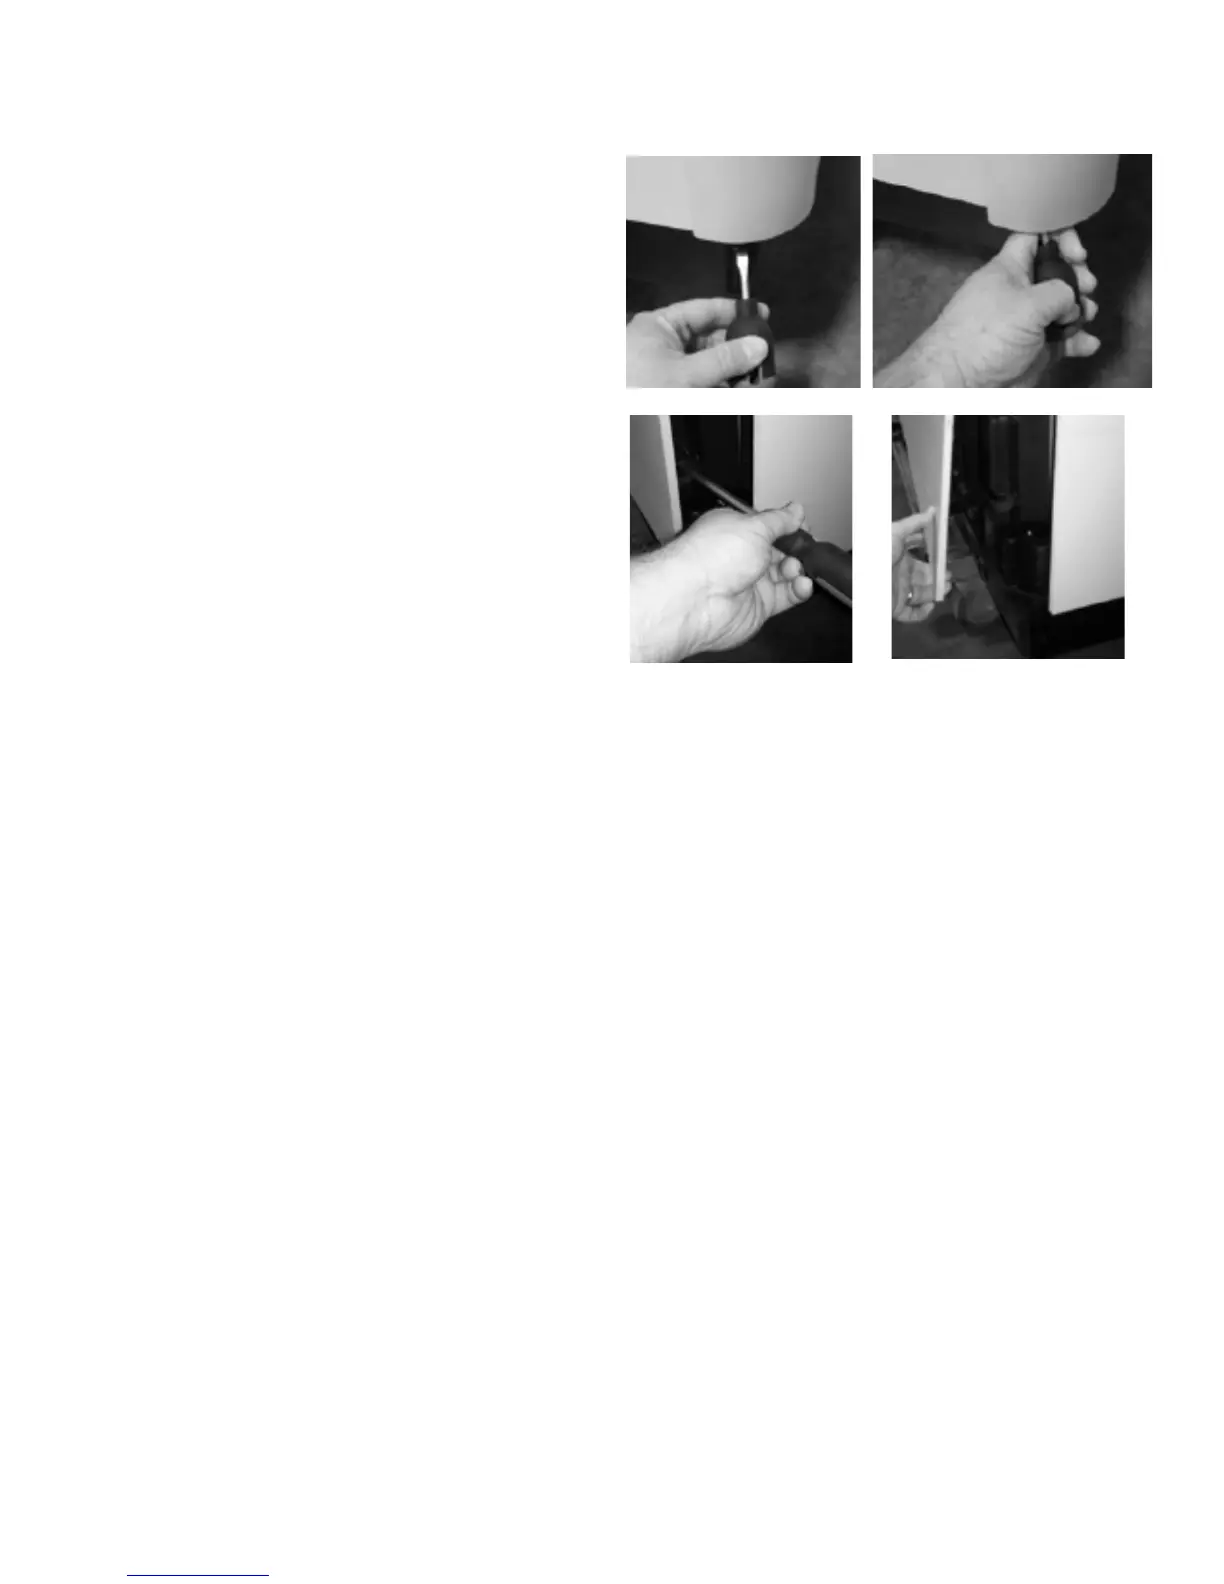
Step 2: Remove Door – Once both front corners are removed,
look on each side of the front door to see the snap feature built
into the cabinet. To remove the door, start by placing a longer
athead screwdriver or short pry bar into the center of the snap
feature and use it as a lever to pop the door out of the rst snap.
Grab the base of the door and carefully begin pulling it out such
that the rest of the snaps come free one by one across the length
of the door. e door can then be dropped out of the groove on
top and removed from the spa.
Step 3: Electrical Disconnect – be sure to disconnect any
lighting or any other electrical wiring that is mounted onto the
door before completely removing it.
STIL Door Installation
Step 1: Electrical –Reconnect any lighting or electrical devices
on the door before installing.
Step 2: Door – Slip the upper lip of the door into the top
groove of the extrusion. Lower the door while gently pushing
on it until you feel the snaps line up with the snap features in
the ribs. Starting from one side, force the rst snap into place.
Continue down the length of the door and forcefully push the
cabinet into each of the snaps until the door is completely in and
secured. You can feel along the bottom to make sure all are in
place and no gaps are present.
 Loading...