10
Update USB Programming
1. Press and hold right hidden button to enter set up menus. (Reference page 10 of Installation and Operating
manual.) Scroll to “REVIEW RECIPES?” screen, and push the button under “YES”. The scroll to each coffee
name corresponding to the names on the hoppers being used, and press the button under “SHOW”. Record
the grind times for each batch size of each coffee used, for later use.
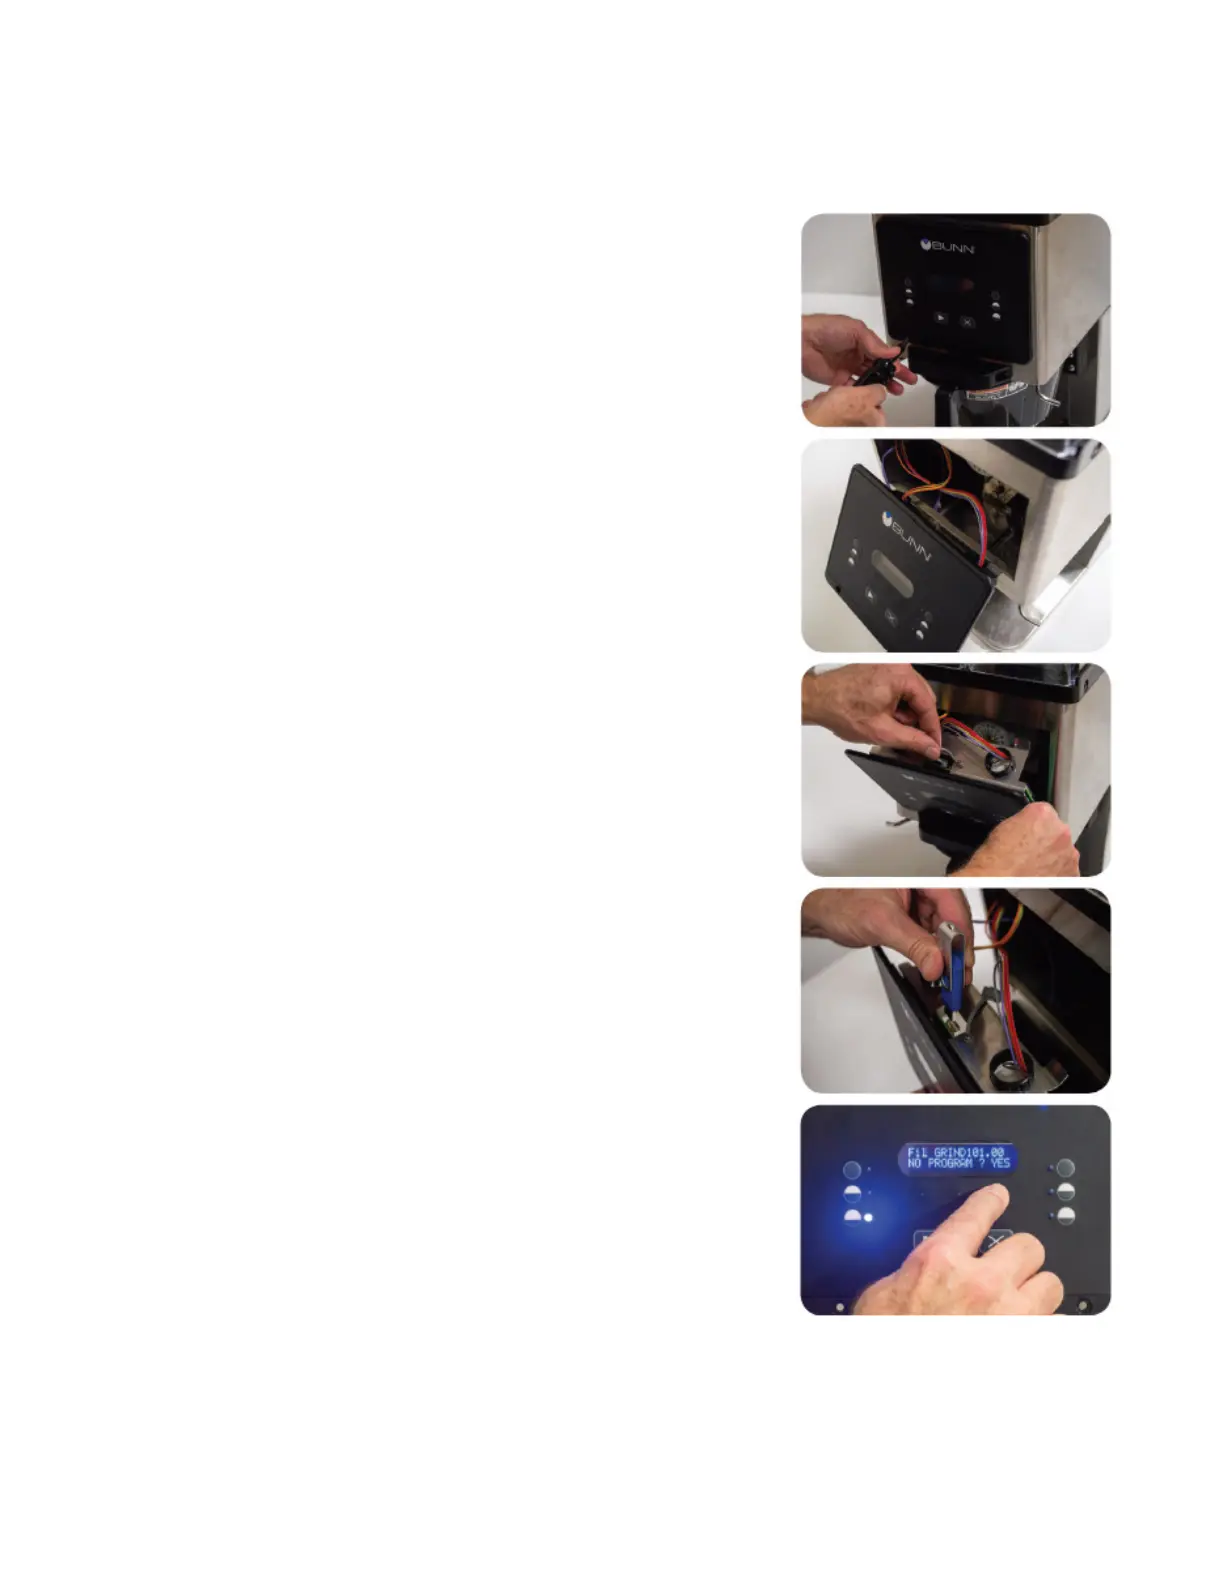
2. Disconnect grinder from power source.
3. Remove two (2) screws holding control panel on the front of the grinder,
and set screws aside.
4. Hang the control panel on the designated tab holders as shown.
5. Remove the protective cover on the USB port on the control board.
6. Insert the USB stick into the port.
7. Plug in the grinder. When prompted on the display to proceed with soft-
ware update, select the right hidden switch under the display.
8. Allow time for the software update to finish.
9. When complete, remove the USB from the port.
10. Place the protective cover back onto the USB port on the control board.
11. Reinstall the control panel and secure using the two screws.
12. Power cycle the grinder, the new software version will display on the
screen before initializing the home screen.
 Loading...