Page 9
SERVICE (cont.)
CONTROL THERMOSTAT (cont.)
41667 102708
Removal and Replacement:
1. Remove leads from control thermostat termi-
nals.
2. Remove the thermostat capillary bulb by firmly
pulling-up on the capillary at the tank lid. This
will disengage the grommet from the tank lid.
3. Remove the two #6-32 screws securing the control
thermostat to the mounting bracket inside the
hood. EARLY MODELS: Remove the two #8-32
screws securing the control thermostat/bracket
assembly to the tank lid bracket.
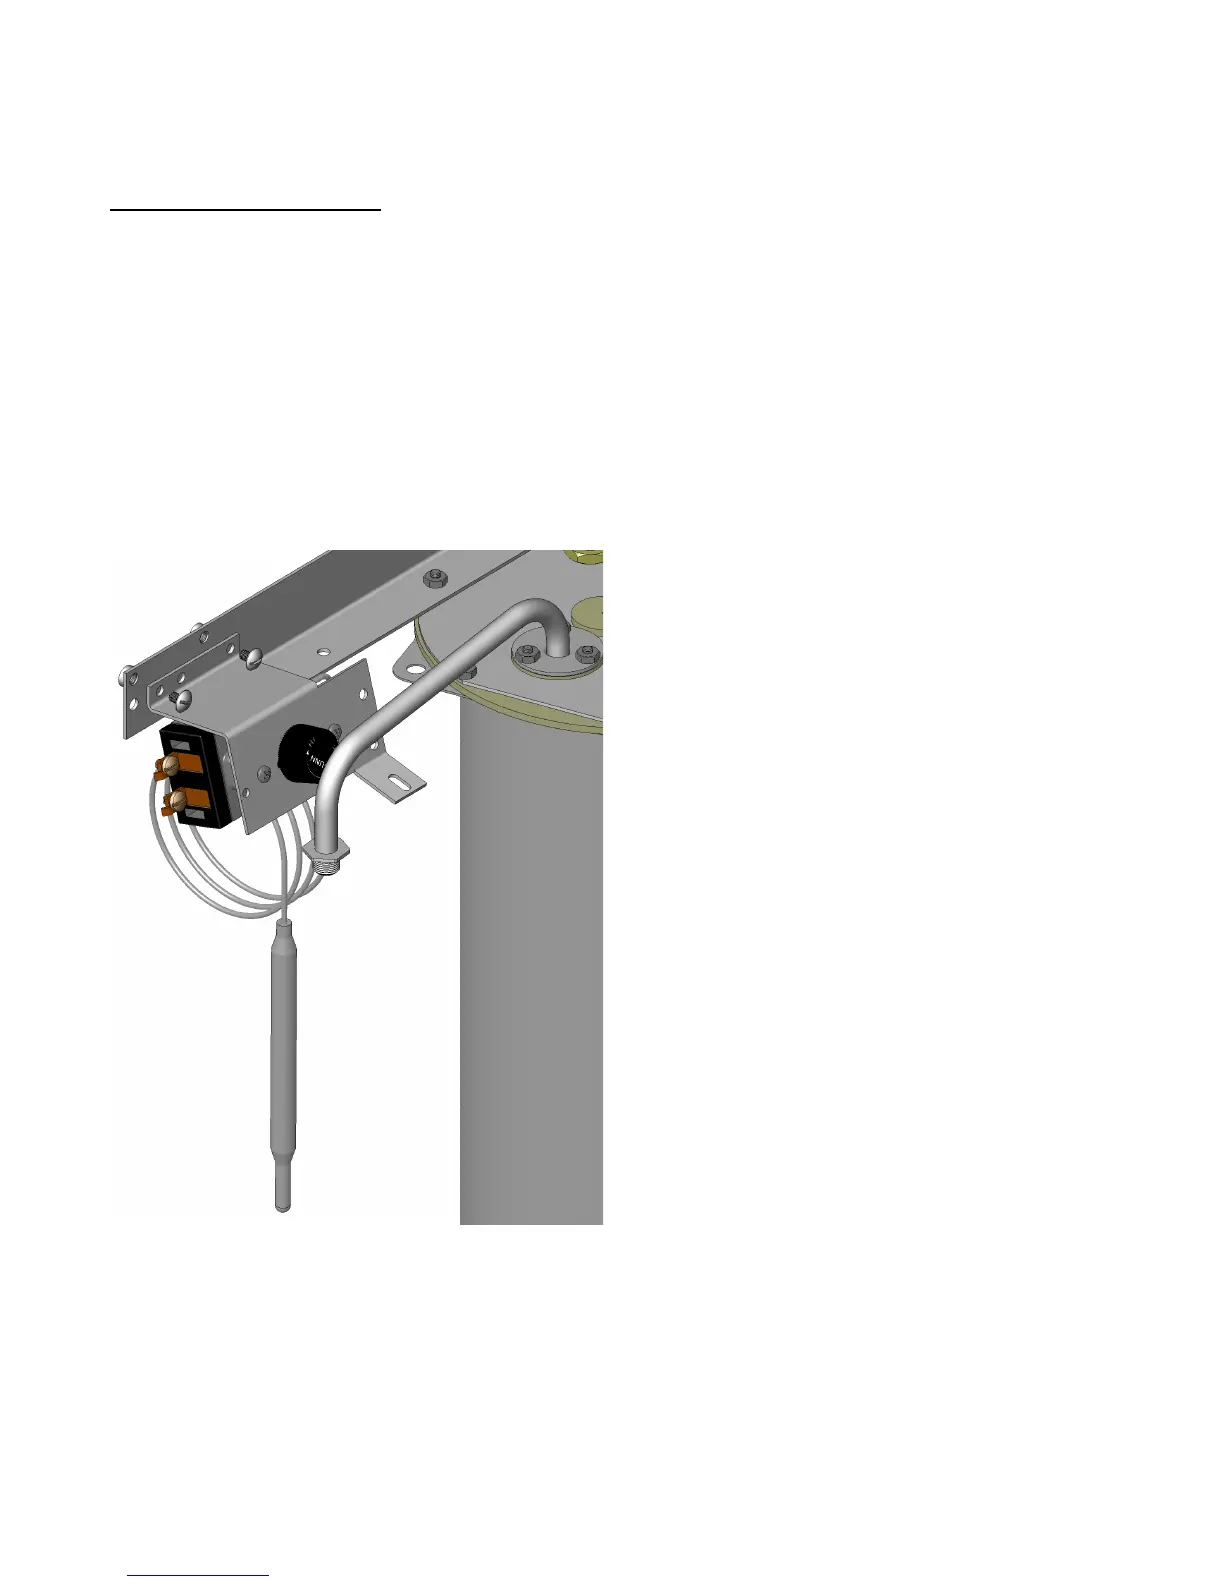
FIG. 9-1 CONTROL THERMOSTAT EARLY MODELS
4. Slide the grommet to the line 4.5" above the bulb
on the new capillary tube.
5. Insert the capillary bulb through the hole in the
tank lid and press the grommet firmly and evenly
so that the groove in the grommet fits into the
tank lid.
6. Carefully bend the capillary tube so that the tube
and bulb inside the tank are in the vertical posi-
tion.
NOTE - The capillary tube must be clear of any electri-
cal termination and not kinked.
7. Secure the control thermostat to the mounting
bracket.
8. Adjust the control thermostat as required