36
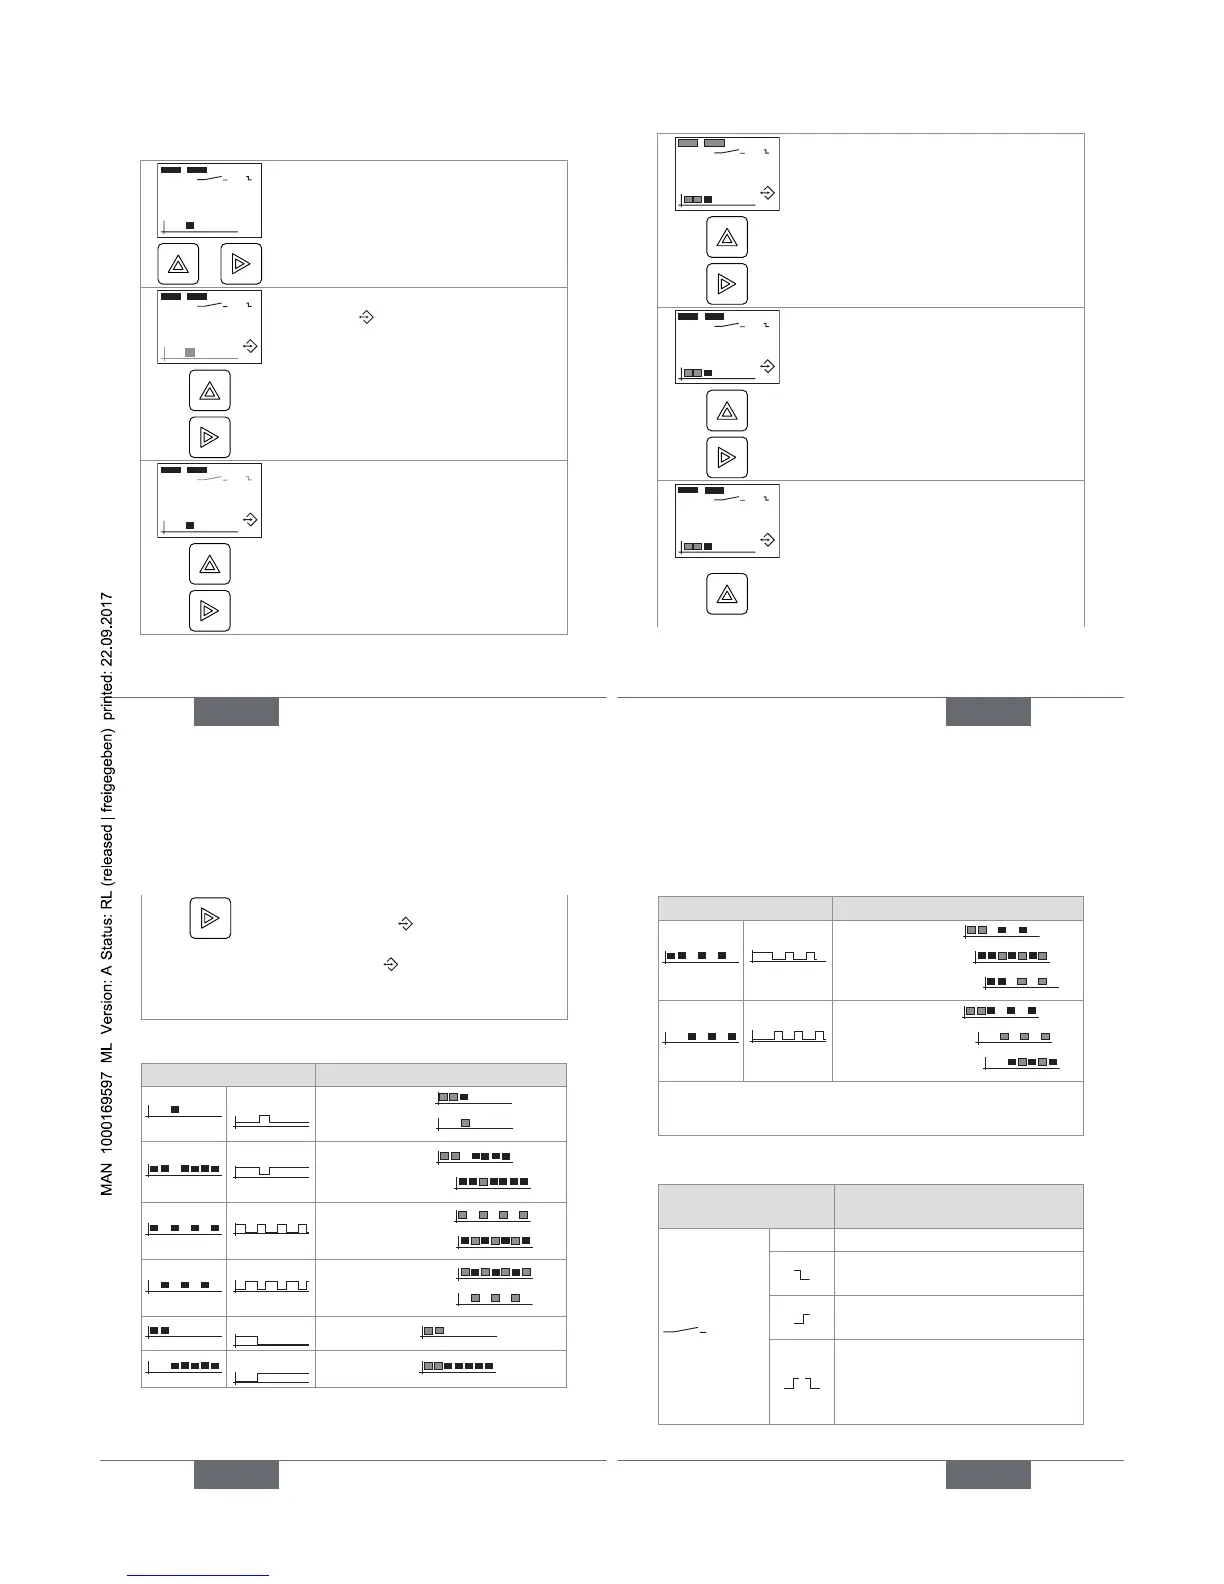
9.3.5. Accessing the Settings level
99:00
Read level
+
To access the Settings level.
99:01
a) Symbol is dispalyed and the
operating mode flashes.
→ Change the operating mode. See
Fig. 16.
→ Validate the displayed choice and
go to the next function.
99:01
b) The reset type flashes.
→ Change the reset type. See Fig.
17.
→ Validate the displayed choice and
go to the next function.
37
99:01
c) The time units and the first time to
be set flash.
→ Choose the time units for the first
time to be set. See Fig. 18.
→ Validate the displayed choice and
go to the next function.
99:01
d) The part of the time, that is asso-
ciated to the greatest time unit, flashes.
→ Set the time associated to the
greatest time unit. See Fig. 18.
→ Validate the set value and go to the
next function.
99:01
d) The part of the time, that is asso-
ciated to the smallest time unit, flashes.
→ Set the time associated to the
smallest time unit. See Fig. 18.
38
→ Validate the set value and end the
adjustment ( goes out and the
settings are saved) or go to the
next time ( is still displayed).
→ To set each additional time, repeat
steps c), d) and e).
Fig. 15: Adjustment of the 1078-2
Function Values to be set
on
T
off
• the delay T
off
( )
• the pulse T
on
( )
T
off
T
on
• the pulse T
on
( )
• the duration T
off
( )
on
T
off
• the duration T
on
( )
• the duration T
off
( )
off
• the duration T
off
( )
• the duration T
on
( )
39
Function Values to be set
T
off
• the pulse T
on
1 ( )
• the duration T
off
( )
• the duration T
on
2 ( ).
on
T
off
1T
off
2
• the delay T
off
1 ( )
• the duration T
on
( )
• the duration T
off
2 ( ).
T
on
= ON duration of the valve
T
off
= OFF duration of the valve
Fig. 16: Operating modes
Symbols chosen at the
Settings level
The reset occurs...
No reset.
when the ON/OFF contact is
opened.
when the ON/OFF contact is
closed.
when the ON/OFF contact is
closed but the parametered
cycle only begins when the ON/
OFF contact is opened.
 Loading...