Page 2 of 16
INTRODUCTION
Thank you for choosing this burley product. All of our products carry a CE mark which is awarded
by an independent test house (notified body) and shows the fires have been type tested to meet
the essential requirements of the European Gas Appliance Directive and the appropriate British
Standards.
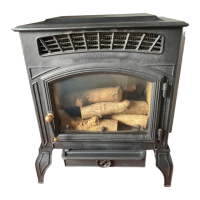
This is a highly efficient Flueless Inset Live Fuel Effect Appliance. The burner system is very clean
burning and a catalyst cleans the combustion products even further.
A thermostat in the burner control system adjusts heat output to maintain a room temperature,
which can easily be set by the user. There is also a separate control to adjust the flame effect as
required. Please demonstrate its operation to the customer before leaving.
An oxygen depletion sensing pilot light is also fitted and will sense any significant oxygen
depletion in the room and shut the fire down safely.
1.
APPLIANCE DATA
Refer to the appliance data (affixed beside control knob)
ENSURE THAT THE LOCAL CONDITIONS OF USE CORRESPOND TO THE DATA ON THE BADGE
Natural Gas G20 LPG (Propane) G31
Category I2H I3P
Supply Pressure 20mBar 37mBar
Inlet Pressure 20mBar* 37mBar*
Heat Input (net) (High) 2.5kW 2.5kW (180g/h)
(Low) 1.5kW 1.5kW (107g/h)
Inlet Connection 8mm Compression 8mm Compression
Injector (manual valve) Elbow 92/300 Elbow 92/90
Injector (remote) Elbow 92/170 Elbow 92/85
*The inlet pressure must be within +/- 1mBar of specification with all gas appliances in the house
switched on and also with just the Burley heater operating. If outside of this tolerance the fault is
most likely to be in the installation pipe work or service governor at the meter. If the problem is
the meter governor, this is the property of the gas service provider (such as Transco / National
Grid 0800 111999 or Bord Gais) and they should be called to rectify this. The fire will not operate
correctly if the pressures are incorrect.
2.
UNPACKING THE APPLIANCE
2.1 Carefully examine the carton for damage before unpacking. If it is obviously damaged,
consult the supplier as to whether to proceed with the installation.
2.2 Make sure the carton is stood upright and open the top. Remove the cardboard top fitting
and place to one side; this box can be used as a hearth protector when installing the fire.
2.3 Remove the fittings boxes contained within and open them and check the condition of the
contents. Remove the fire and examine its general condition, paying particular attention
to the frame, the glass front and fire box flanges.
2.4 If satisfied by the general condition, place the decorative components to one side and
proceed with the installation. If in any doubt, seek advice from the supplier. Read these
instructions fully before proceeding even if you have fitted this model before.