Induction zone
The information given in the following table is for guidance
only.
Settings Use for
0 Element off
1-3 Delicate warming
4-5 Gentle simmering, slow warming
6-7 Reheating and rapid simmering
8 Boiling, saute and searing
9 Maximum heat
P Boost function
Cookware
• Use thick, flat, smooth-bottomed cookware that has
the same diameter as the element. This will help reduce
cooking times.
• Cookware made of steel, enamelled steel, cast iron
and stainless steel (if appropriately labelled by the
manufacturer) will give the best results.
• Cookware with enamelled steel, aluminium or copper
bottoms can cause a metallic residue to remain on the
hob. If left, this becomes difficult to remove. Clean the
hob after every use.
• Cookware is suitable for induction cooking if a magnet
sticks to the bottom of it.
• Cookware must be placed centrally on the cooktop.
The following image displays incorrect placement of
cookware.
• When using certain pans, you may hear various noises
coming from them, this is due to the design of the pans
and does not effect the performance or safety of the hob.
Circular Saucepan
Base
Small Saucepan
Diameter
Saucepan base that
has not settled
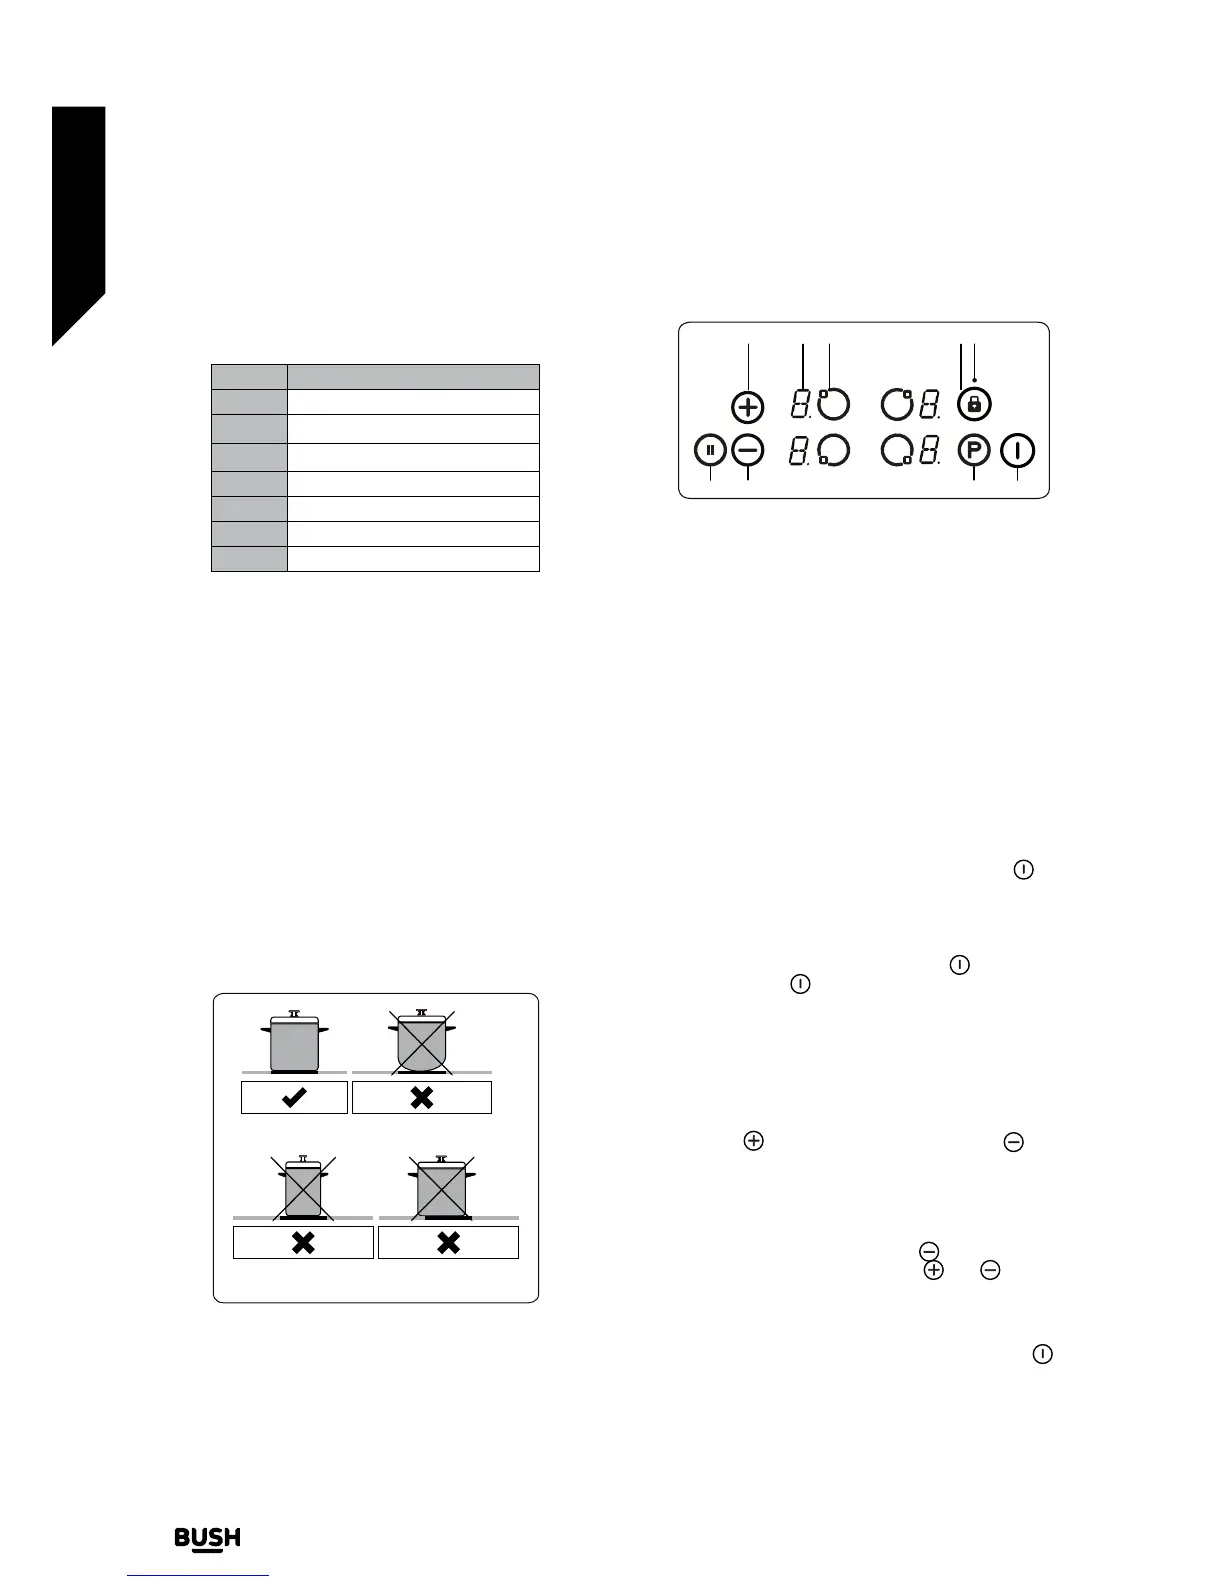
The appliance is operated by pressing buttons and the
functions are confirmed by displays and audible sounds.
Touch control unit
1
2
3
4
5
6
7
8
9
1- Increase heat setting/timer (optional)
2- Heater display
3- Heater selection
4- Key lock
5- Key lock indicator
6- Smart pause
7- Decrease heat setting
8- Boost
9- On/Off
Use the induction cooking zones with suitable cookware.
After mains voltage is applied, all displays are illuminated
briefly. After this, the hob is in stand-by mode and ready for
operation.
The hob is controlled by pressing the appropriate electronic
button. Each button pressed is followed by a buzzer sound.
Switching the Appliance On
Switch the hob on by pressing the ON/OFF button
. All
heater displays will show a static “0” and the bottom right
dots blink. (If a cooking-zone is not selected within 20
seconds, the hob will automatically switch off).
Switching the Appliance Off
Switch the hob off at any time by pressing
.
The ON/OFF button
always has priority over the switch-
off function.
Switching the cooking zones on
Press the heater selection button that corresponds to the
heater you wish to use. A static dot will be shown on the
selected heater display and the blinking dots on all other
heater displays will no longer illuminate.
Select the temperature setting by using the increase heat
setting button
or decrease heat setting button . The
element is now ready to use. For faster boil times, select the
desired cooking level, then touch the ‘P’ button to activate
the Boost function.
Switching the cooking zones off
Select the element you want to switch off by pressing
the heater selection button. Using the
button, turn the
temperature down to “0”. (Pressing the and buttons
simultaneously also turns the temperature to “0”).
If the cooking zone is hot, “H” will be displayed instead of “0”.
Switching all Cooking Zones Off
To switch all the cooking zones off at once, press the
button.
In the stand-by mode, a “H” will appear on all cooking zones
which are hot.