Page 6
User instructions
Stop / start alignment
In order to ensure the automatic stop / start functions
operate efficiently for your own record collection some
adjustments maybe required. Follow the below steps to
fine tune.
NOTE: Before making any adjustments please
remove any records from the platter and secure
the tone arm with the supplied cable tie.
Auto stop alignment
If the tone arm does not lift and return to the rest
position in time or returns too soon (before the record is
finished) follow the instructions below.
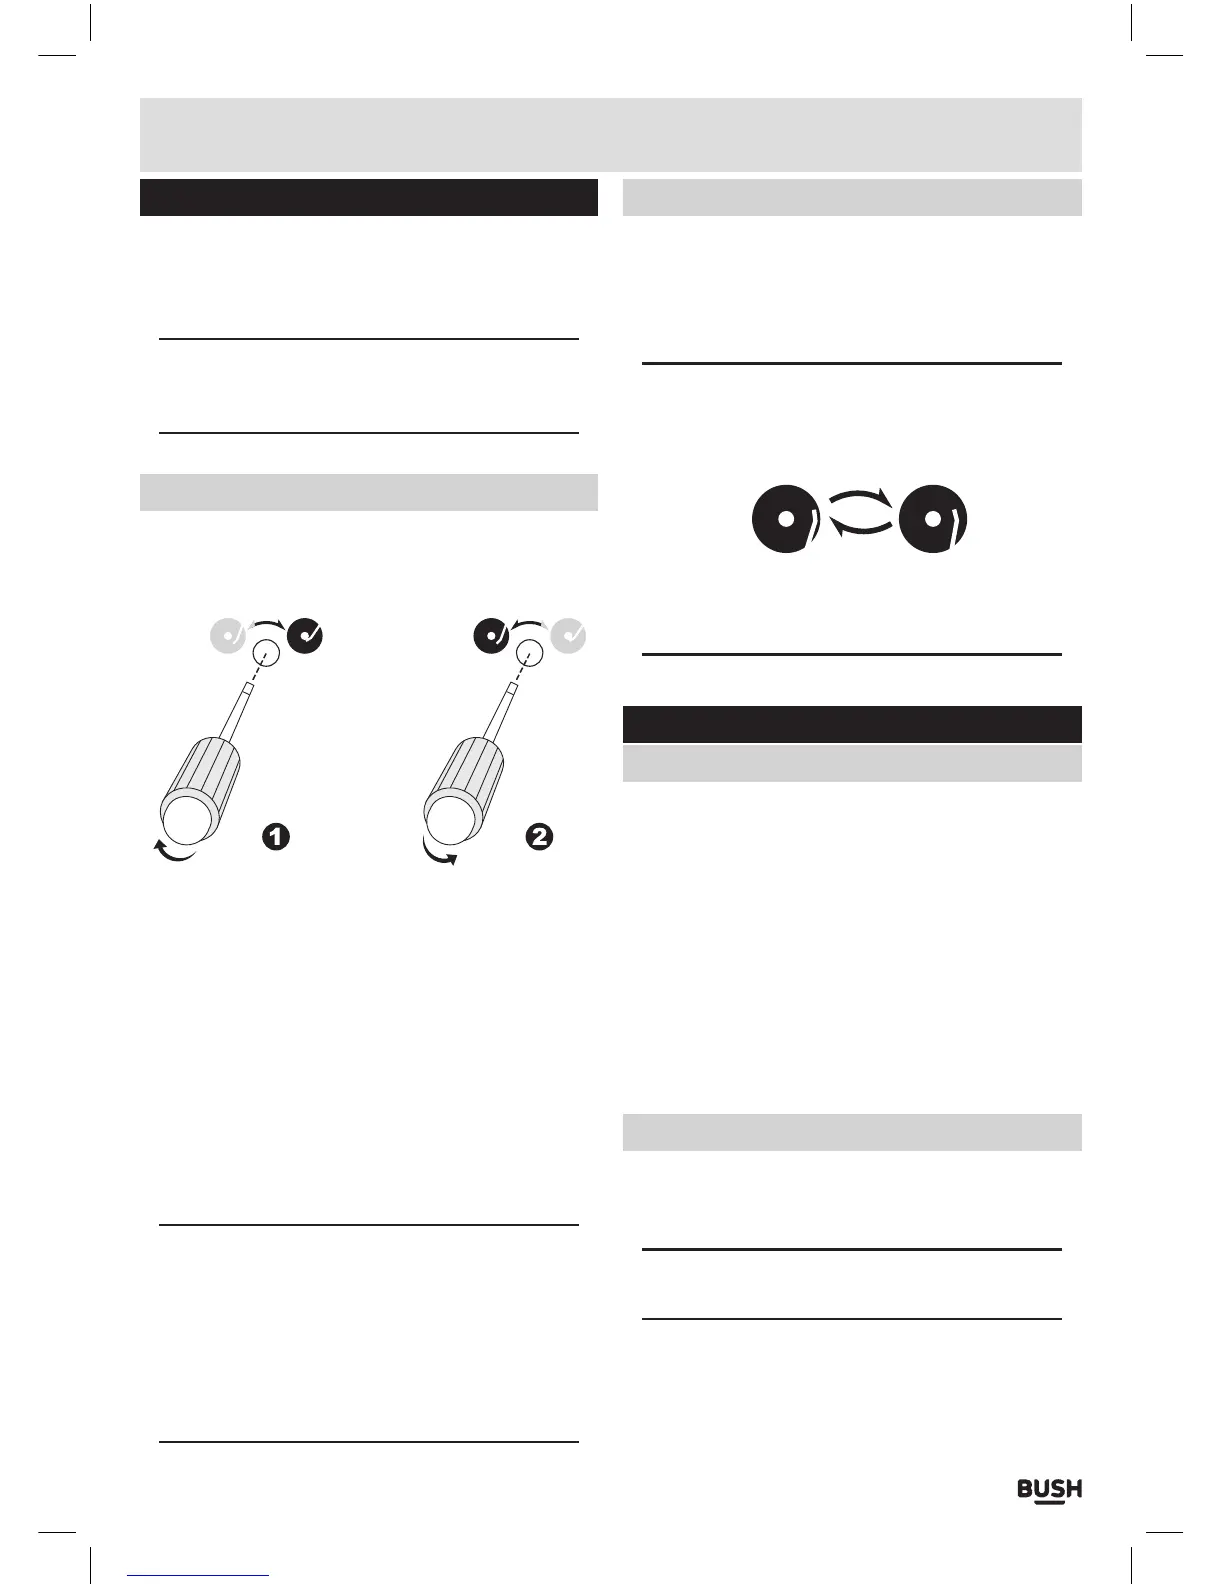
THE TONE ARM RETURNS BEFORE THE RECORD IS
FINISHED
1: Using a small flat head screw driver turn the AUTO
STOP alignment screw (16) clockwise. the stopping
position of the tone arm will move closer to the centre
of the record.
THE TONE ARM WONT RETURN TO THE REST
POSITION.
1: Using a small flat head screw driver turn the AUTO
STOP alignment screw (16) anti-clockwise. the
stopping position of the tone arm will move further
away from the centre of the record.
NOTE: Take note of the engraved diagrams to
ensure you are turning the screws the correct
direction.
The stop position can vary on some vinyl so
may need adjustment from time to time, find an
acceptable position or manually press the EJECT
button (3).
Start position alignment
If the tone arm does not align with the start position
correctly follow the below steps to fine tune.
1: Using a small cross head screw driver adjust each
alignment screw according to the size of record.
NOTE: Please refer to the engraved diagrams next
to each adjustment screw for the adjustment
directions.
CLOCKWISE = TOWARDS CENTRE
Remember to set the SIZE SELECT adjuster to the
correct size when testing alignment.
Transferring to a computer
Preparation for connection to a computer
Before getting started please download and install
the recommended software package ‘Audacity’. The
application is available for the Windows or macintosh
platform. At the time of writing this manual version
2.1.1 is the latest version as such all instructions will be
written for this version.
http://audacityteam.org
Should you wish to encode your recordings to the MP3
format a seperate plug in called ‘Lame MP3 encoder’
will also need to be downloaded and installed.
http://lame.buanzo.org/#lamewindl
Connecting to a computer
1: Power ON your computer.
2: Connect the supplied USB cable to the USB input (13)
on the rear of the turntable.
NOTE: Only the square shaped plug end of the
cable will fit the socket.
3: Connect the other end of the cable to a USB input
socket on your computer.
4: Once detected a device driver will be automatically
installed to allow your computer to recognise the
turntable as a USB device.