- 9 -
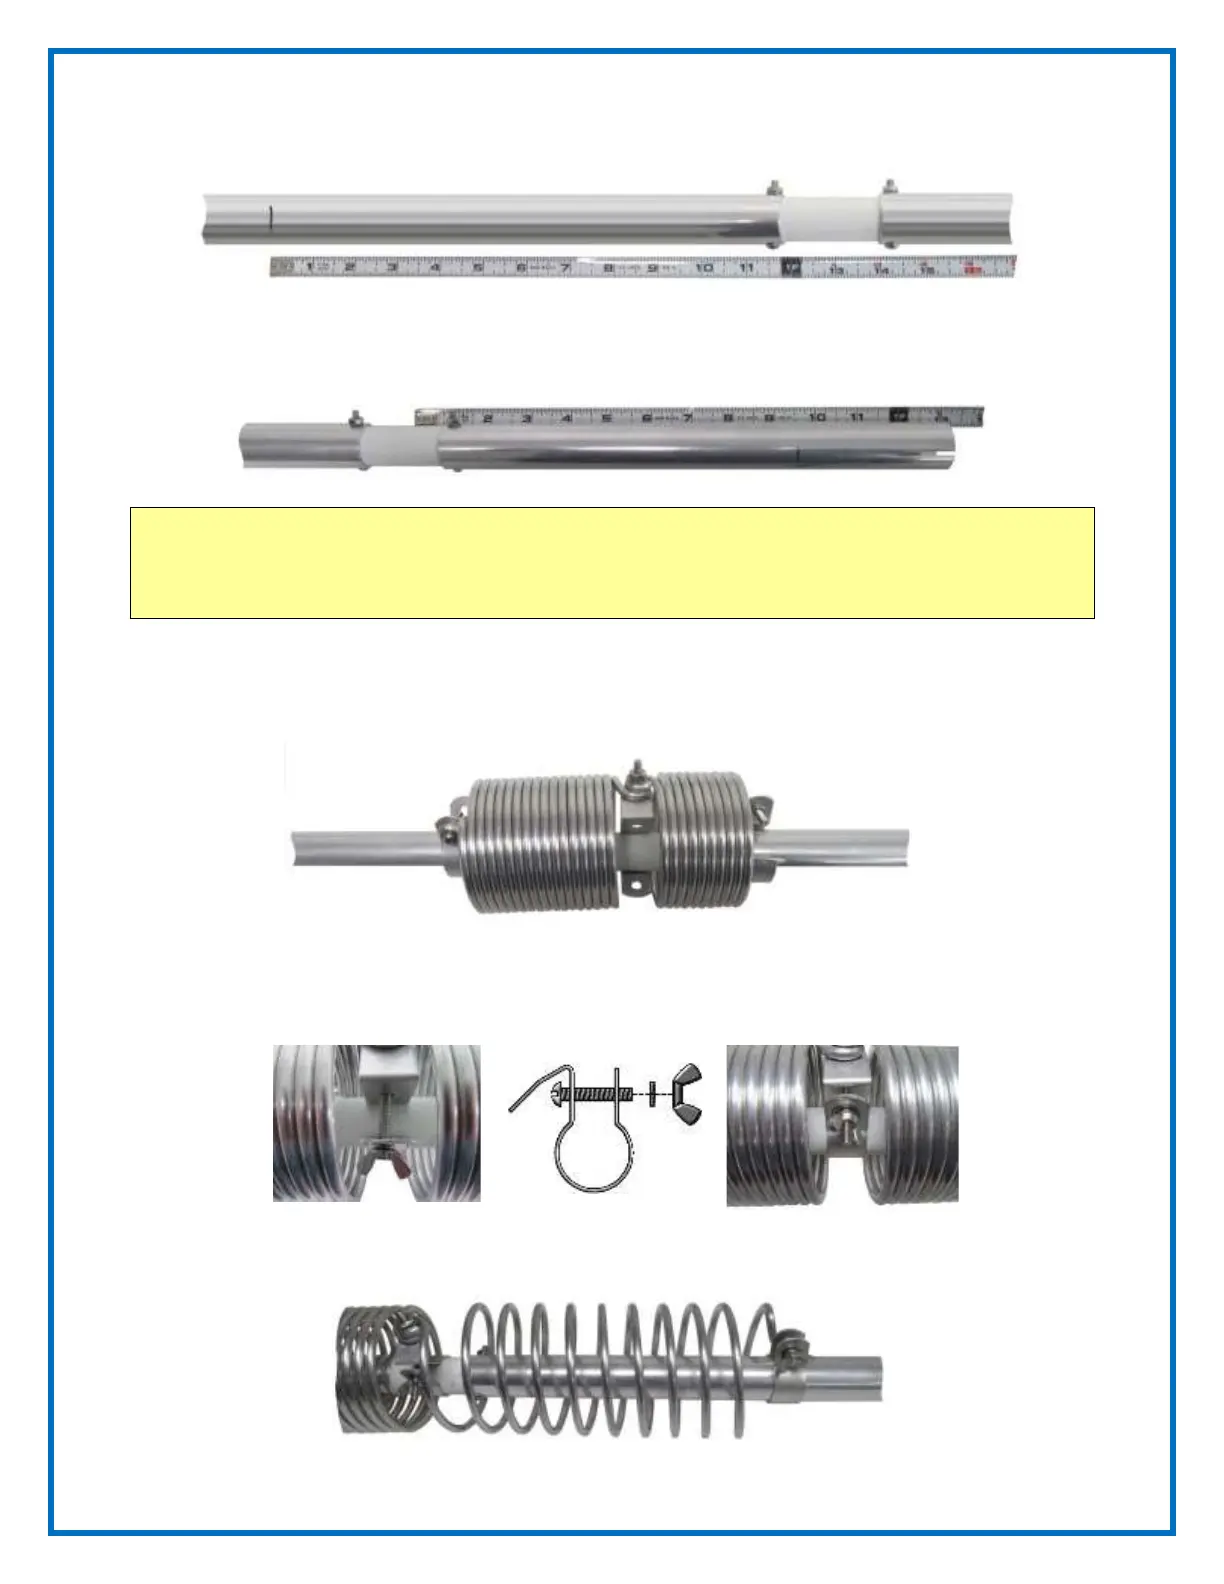
4. From the center of the insulator, measure downward to a point that is 13” along tube (B) and
make a pencil mark.
5. From the center of the insulator, measure upward to a point that is 9-3/8" along tube (B1) and
make a pencil mark.
Note: Jet-Lube
™
SS-30 Anti-Oxidant should be used on all coil clamps, element clamps,
bolts and stainless steel threaded hardware to provide good electrical contact,
prevent galling, allow easier disassembly and to ensure proper tightening.
6. Locate coil assembly 80/40 meter (C) and slide the clamp at the outer end of the larger 80 meter
coil over tube (B1), lowering the entire assembly until the middle clamp can be positioned
around the insulator between tube (B) and tube (B1). NOTE: The middle clamp may have to be
pulled open slightly to pass the bolt that goes through tube (B1) and the insulator.
7. Position the center coil clamp of coil assembly 80/40 meter (C) in the center of the insulator
between tube (B) and tube (B1). Pass a #10 x 1" screw through the clamp as shown. Secure with
a flat washer, lock washer and wing nut. NOTE: The outer tab of this clamp may be bent back
slightly to provide clearance for the bolt, bending it back into place after assembly.
8. Stretch the 40 meter (smaller) coil on the coil assembly 80/40 meter (C) until the top of the
upper clamp is even with the upper mark. Secure with a #10 flat washer, lock washer and wing
nut.