Do you have a question about the caddytrek R2 and is the answer not in the manual?
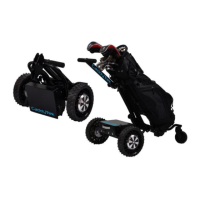
Steps for removing the pull handle, screws, and upper joint assembly from the CaddyTrek.
Loosen the upper two screws from each joint using a Phillips screwdriver.
Loosen black knob, squeeze joint, and use needle nose pliers to pull out screws.
Gently tap upward with a rubber mallet to remove the pull handle.
Loosen and remove the lower two screws from each joint using a screwdriver.
Gently tap upward with a rubber mallet to remove the upper joint assembly.
Steps for installing the bag support bar and upper joint assembly onto the CaddyTrek.
Loosen the set screw inside the joint(s) using a 2.5 mm hex wrench to remove the bar.
Replace the identified defective part, which may be the bag support bar or joint(s).
Align set screw to screw hole on bag support bar, tighten. Repeat for other joint.
Tap into place with mallet, align holes, insert screws, and tighten.
Tap into place with mallet, align holes, insert screws, and tighten.
Loosen knobs, squeeze joint, insert screws, then tighten. Repeat for other joint.
| Control | Remote Control |
|---|---|
| Remote Control Range | Up to 100 yards |
| Speed Control | Variable speed control |
| Range | Up to 36 holes |
| Foldable | Yes |
| Wheel Size | 10 inches |
| Drive System | Rear-wheel drive |
| Material | Aluminum |
| Battery | 24V/10Ah Lithium-Ion |
| Display | LCD |
| Battery Life | 27+ holes |