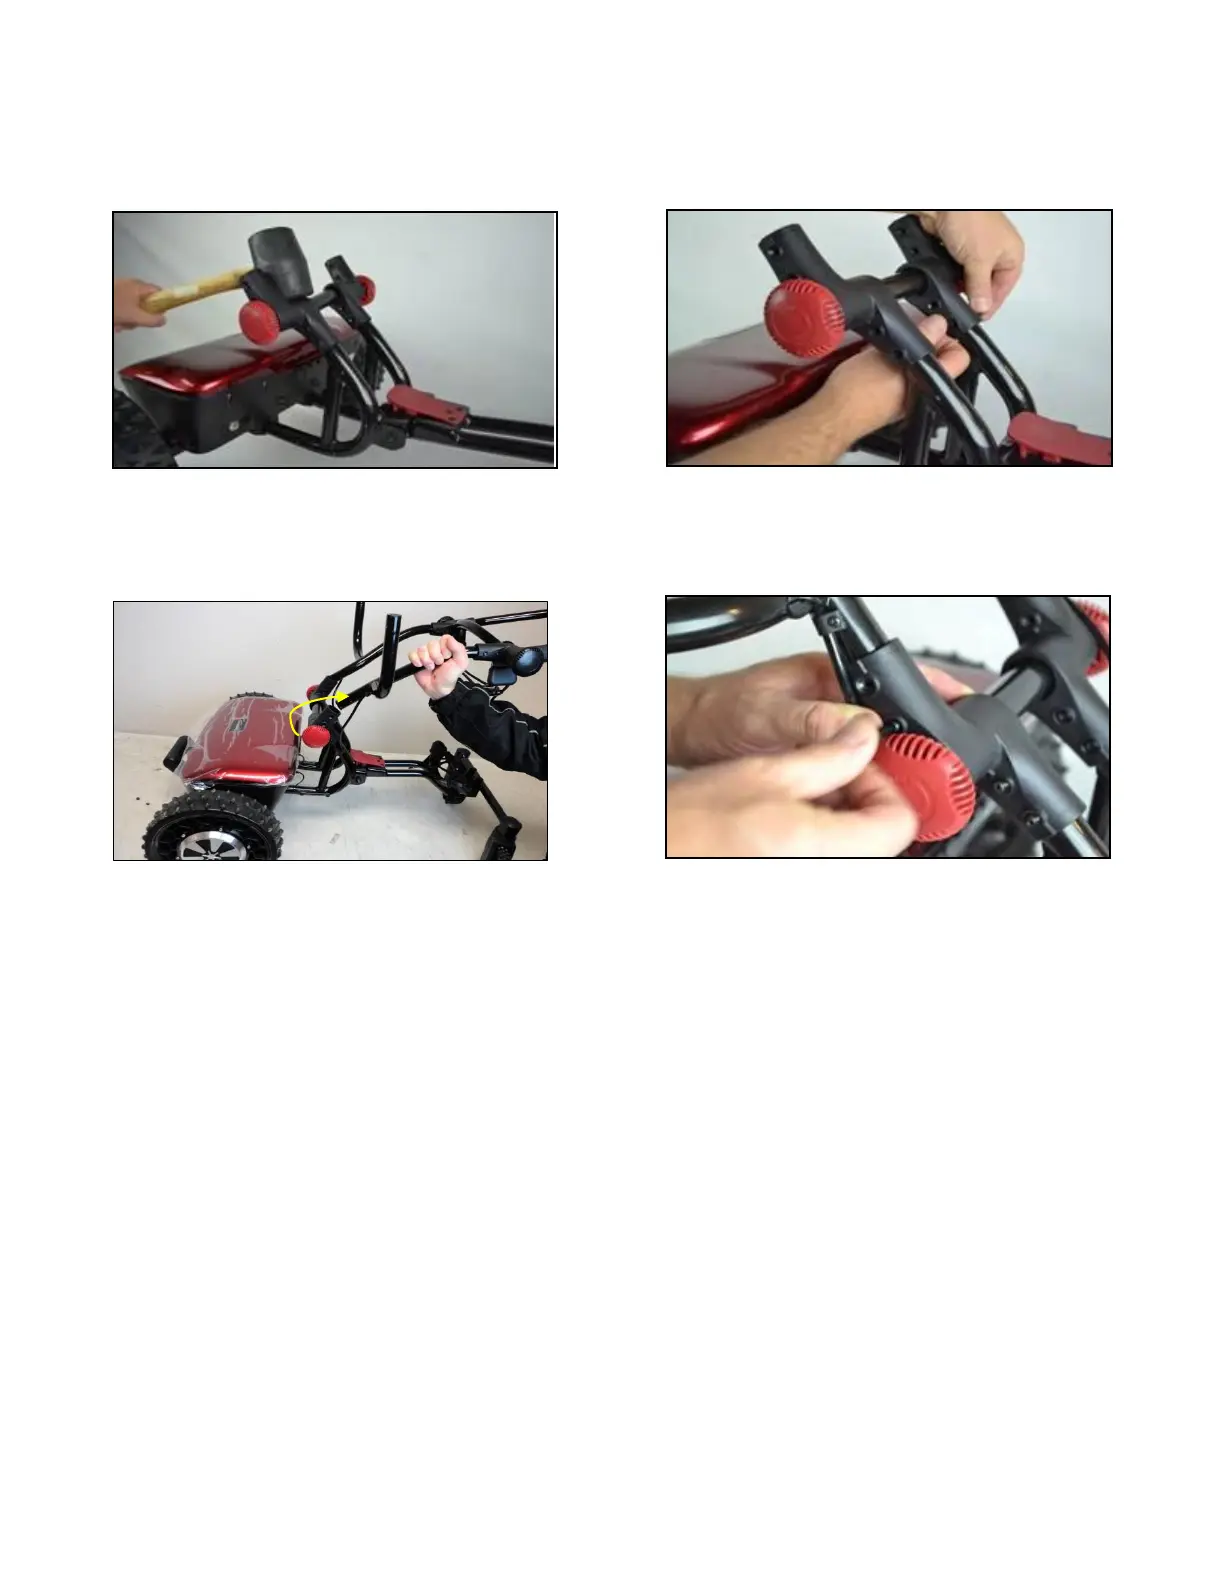
Step 7: Replace the replacement lower joints.
Make sure the lower joints are in a locked
position.
Step 9: Install the top half of the frame to the
lower joints. IMPORTANT: Roll the lower joints
to prevent overextending the sensor wires.
Step 8: Align the screw holes (lower) of the
lower joints to the holes on the frame and
install the (4) screws.
Step 10: Align the screw holes (upper) of the
lower joints to the holes on the top half of the
frame and install the (4) screws.
Pg. 2 of 2

 Loading...