3. Water heater installation
Mounting the appliance
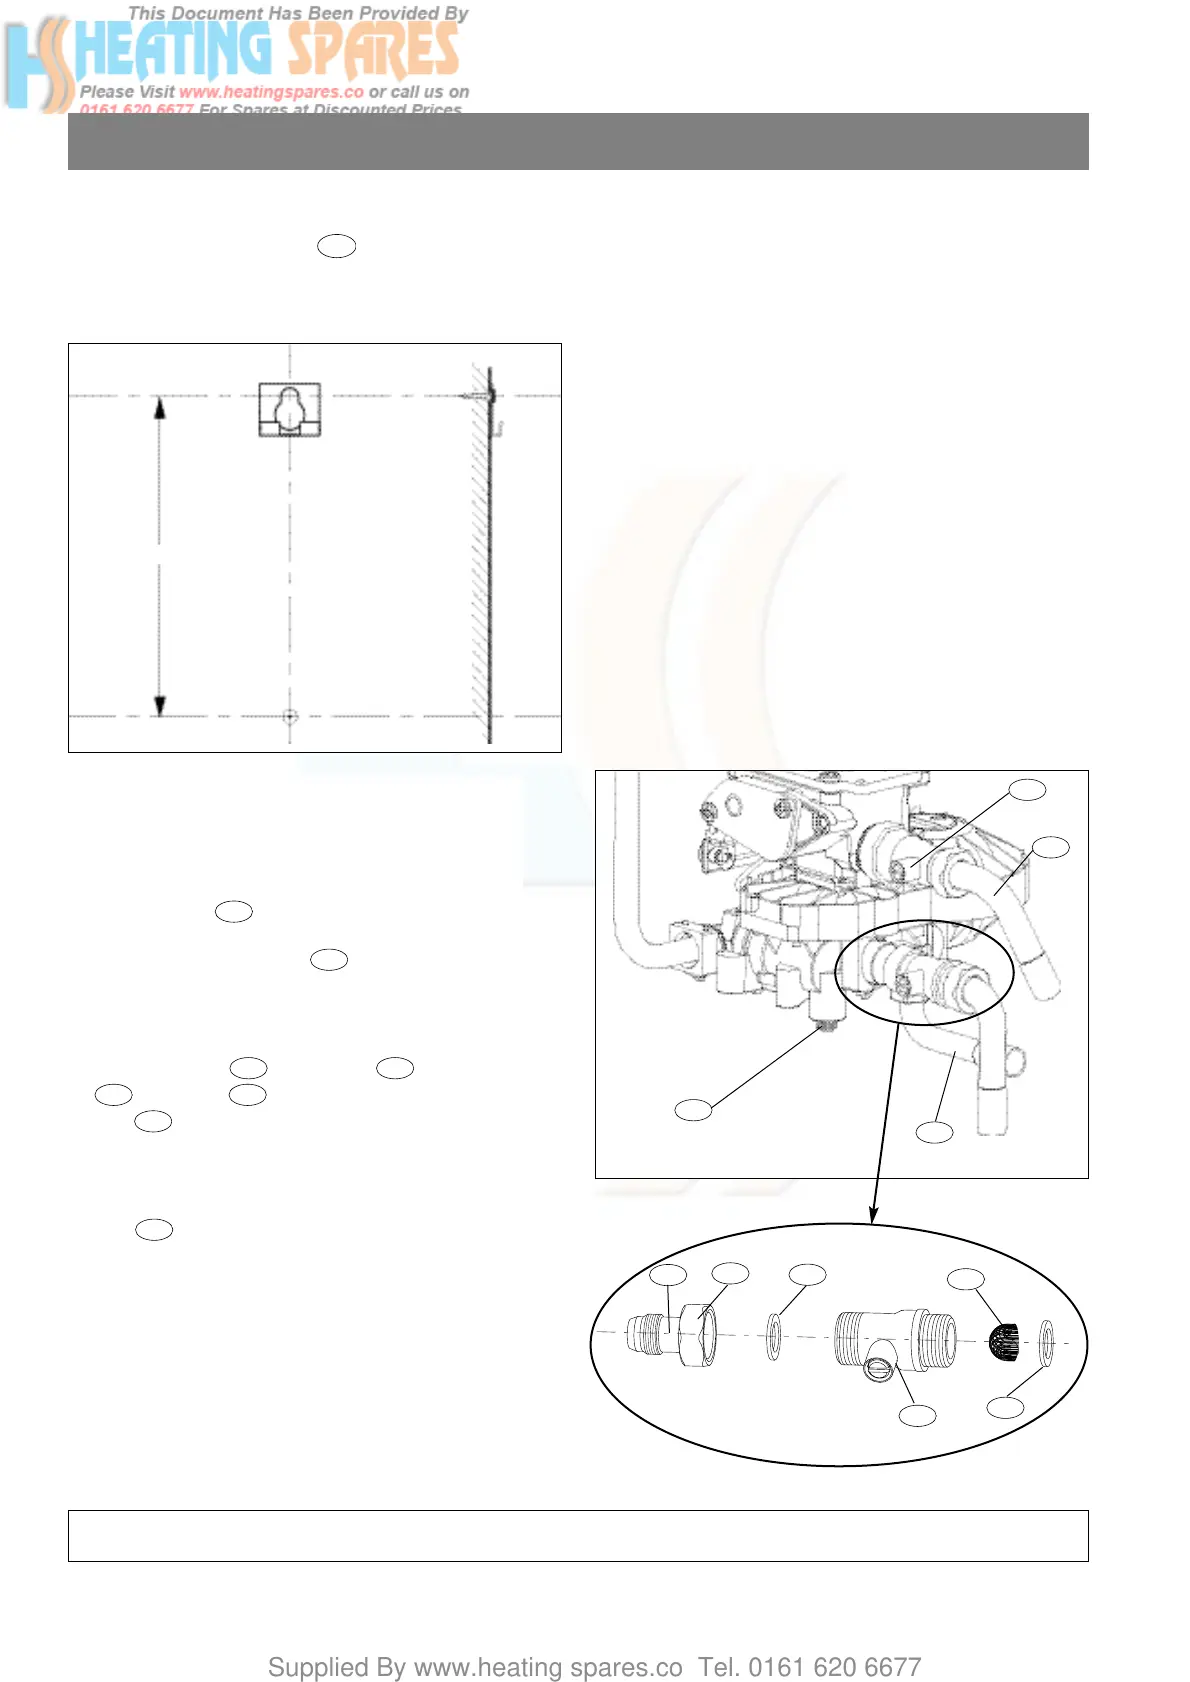
- fix the wood screw of the support bracket 395 mm above the centreline of the water outlet
- remove the gas control knob (fig. 2) pulling it towards you
- remove the four screws "V" (fig. 10) securing the case
- remove the case
- position the appliance, engaging the slot cut in the chassis on the support bracket (fig. 4).
9
395
EF
Water axes
Fig. 4
4
Connections
The appliance is delivered complete, ready to install. The
accessories pouch contains the following items :
Natural gas connection (fig. 5) :
- one valve Ø 3/4" F / Ø 1/2" M with
1/2" gasket
- one brazed angle socket Ø 14 x 0,75 with nut
and gasket.
Cold water connection (fig. 6) :
- one M16 union
,
one 1/2 nut
,
two gaskets
, one valve Ø 1/2" M / Ø 1/2" M, one water
filter (with built-in mixer AMI only).
Hot water connection (fig. 5) :
- one blanking disc with 3/8" nut and gasket or one
tube Ø 12 x 1 with 3/8" nut and gasket.
23
20
1918
1716
15
14
Fig. 5
14
23
22
15
Fig. 6
16
18
17
19
20
18
Important : Clean the inside of the water and gas pipes of the installation thoroughly before connecting the appliance.