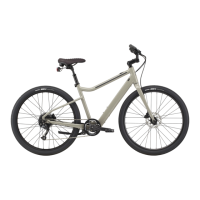
This document is a Quick Start Guide for the Cannondale Treadwell bicycle, designed to assist new owners in assembling and performing initial checks on their bike. It emphasizes an easy-to-follow, step-by-step process, suitable for home assembly, and encourages users to involve a friend for an even smoother experience.
Function Description:
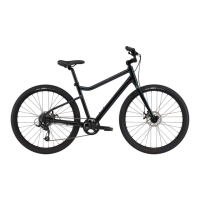
The Cannondale Treadwell is a bicycle designed for active use, offering a blend of functionality and user-friendly features for everyday riding. This guide focuses on the initial setup, ensuring the bike is safely assembled and ready for its first ride. The assembly process is broken down into four main steps: installing the handlebars, installing the seat post, installing the front wheel, and installing the pedals. Each step is accompanied by clear instructions and illustrative images to guide the user.
Usage Features (Assembly and Setup):
Getting Your Bike Out of the Box:
The guide begins with detailed instructions on how to safely unbox the Treadwell. This involves:
- Removing Staples: Carefully locating and removing staples from the top of the box using a screwdriver, with a caution about sharp edges.
- Locating Small Parts Box: Identifying and setting aside a smaller box containing parts, necessary tools, documentation, and manuals. Users are reminded to read the owner's manual before riding.
- Removing Seatpost: Taking the seatpost out of its packaging and setting it aside.
- Preparing the Box: Pushing hand flaps from the inside to the outside of the box to facilitate easier bike removal.
- Lifting the Bike: Carefully lifting the bike out of the box and placing it on top, ensuring the attached wheel faces upwards.
- Removing Front Wheel: Detaching the front wheel by cutting zip ties or Velcro, removing all packaging, and setting it aside.
- Removing Additional Packaging: Taking off any remaining packaging from the bike, allowing the handlebar to hang gently from the frame.
- Orienting the Bike: Carefully lifting and rotating the bike, then gently lowering it back into the box with the fork overhanging the side. The stem should point forward, and the disc brake caliper should be on the left (non-drivetrain) side.
- Warranty Card and Manual: Locating and removing the warranty card and setting it aside with the owner's manual.
Step 1. Install Your Handlebars:
This section guides users through attaching the handlebars to the bike's stem.
- Loosening Stem Bolts: Using the included Allen wrench to loosen and remove the bolts and faceplate from the stem, which connects the handlebar to the fork. These parts should be set aside together to prevent loss.
- Placing Handlebar: Inserting the handlebar into the stem and verifying that brake hoses and shift cables wrap cleanly around the frame without kinks.
- Reattaching Faceplate: Loosely reattaching the faceplate to the stem, ensuring an even gap between the stem and faceplate without overtightening any single bolt.
- Centering and Positioning: Centering the handlebar in the stem using its markings and rolling it back into a comfortable riding position.
- Hand-Tightening Bolts: Hand-tightening the stem bolts with the Allen key, maintaining an even gap between the stem body and faceplate at both the top and bottom. Full tightening will occur later during pre-ride checks.
Step 2. Install Your Seat Post:
Instructions for securing the seat post are provided here.
- Loosening Seatpost Clamp: Using the Allen key to loosen the seatpost clamp and locating the minimum insertion line on the seatpost.
- Inserting Seatpost: Inserting the seatpost into the frame beyond the minimum insertion line.
- Hand-Tightening Clamp: Hand-tightening the clamp with the Allen key just enough to prevent the seatpost from being pulled out. Final tightening is reserved for later.
Step 3. Install Your Front Wheel:
This step details the process of attaching the front wheel.
- Skewer Components: Locating the skewer and its five parts: the skewer itself, a washer, two conical springs, and the adjusting nut.
- Removing Skewer Parts: Unthreading and removing the adjusting nut and its neighboring conical spring from the skewer.
- Inserting Skewer: Inserting the skewer into the wheel axle from the side opposite the disc brake rotor, pushing it through the hub to the other side.
- Reattaching Spring and Nut: Placing the conical spring back onto the skewer with its narrow end pointing toward the wheel, then threading on the adjusting nut.
- Removing Fork Protector: Taking off the fork protector from the fork dropouts.
- Positioning the Bike: Carefully lifting the bike from the box and gently placing the fork ends on the ground.
- Removing Packaging: Removing any remaining packaging from the bike.
- Removing Brake Pad Spacer: Taking out the disc brake pad spacer from the front caliper. A crucial caution is given: do not pull the front brake lever if the pad spacer or disc brake rotor is not in the caliper.
- Mounting the Wheel: Gently lifting the front end of the bike and rolling the wheel between the fork legs.
- Aligning and Seating: Carefully aligning the disc brake rotor within the brake caliper and lowering the fork dropout onto the wheel axle, ensuring the wheel is fully seated into the fork dropouts on both sides.
- Tightening Skewer: Holding the skewer adjusting nut with one hand and using a hex key in the other to tighten the skewer.
- Verifying Tightness: Confirming the skewer is very tight (the Allen wrench should leave an imprint in your hand when properly tightened) and that the wheel is centered in the fork legs.
Step 4. Install Your Pedals:
This section covers the installation of the pedals.
- Right Pedal Installation: Inserting the right pedal (marked with 'R' on a sticker) into the right/drive side crank arm and tightening it with fingers.
- Pedal Spindle Direction: Installing the pedals by turning the pedal spindles in the direction of the front wheel.
- Left Pedal Installation: Repeating the process for the left pedal (marked with 'L').
- Final Tightening: Very firmly tightening both pedals using the provided pedal wrench.
Maintenance Features (Pre-Ride Checks):
The guide concludes with essential pre-ride checks to ensure the bike is safe and ready for use.
The guide also provides contact information for Cannondale rider support (1-800-245-3872) and an email address (ridersupport@cannondale.com) for further assistance. It encourages users to tag #ridecannondale on social media. A prominent warning states that this is a Quick Start Guide, not an Owner's manual, and emphasizes the inherent risks of bicycling, urging users to read the complete Cannondale Bicycle Owner's manual for "IMPORTANT SAFETY INFORMATION."