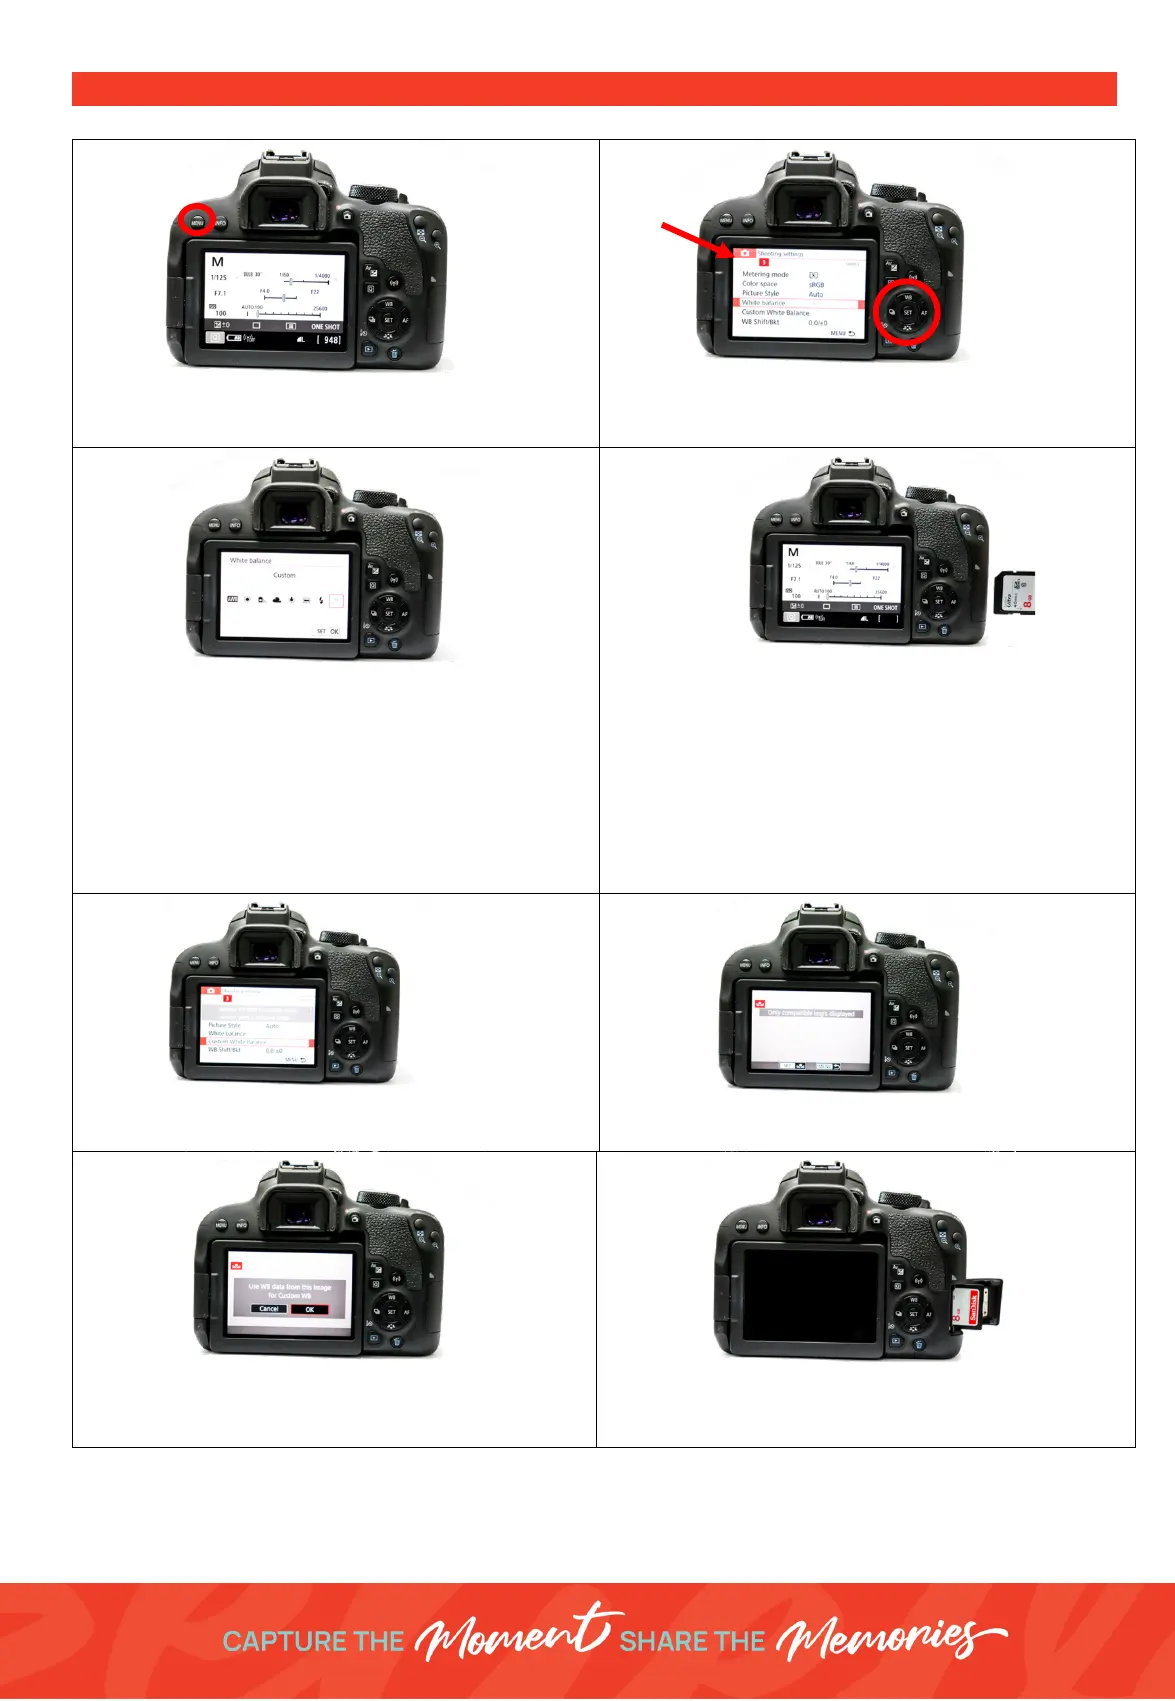
PRESET MANUAL WHITE BALANCE PROCEDURE
1. Press the
Menu
button (top left above LCD
screen)
2. Using the multi selector to navigate to the
Shooting Settings
- Tab
3
Select
White Balance
3. Select the option
Custom
4. Insert a SD Card into the Camera -
Unplug the
tethered camera cable
5. Take a photo of your white balance sheet. We are
measuring the white balance for our on-location
lighting set up and everyday can be different
Hold the white sheet where the customers will be
standing/seated. Zoom in using the lens to make
the white sheet fill the camera frame.
6. Now go back to
Shooting Settings
-
Tab 3
and
click on
Custom White Balance
7. Select the photo you just took of your white
balance sheet
8.
“Use WB Data From this image”
– Click
Set
and
OK
to use the selected photo as your custom
white balance
9. Remove SD Card
Insert the camera cable back into the camera
10. Take a test photo – check results