Do you have a question about the Canon CR-1 Mark II and is the answer not in the manual?
Explains the software's purpose, capabilities, and DICOM compliance for retinal imaging.
Details the hardware and software requirements for the system.
Provides essential notes on user accounts, access rights, and OS settings for software operation.
Covers necessary settings for the digital camera to ensure proper image capture.
Brief instruction regarding the non-use of CF cards with the digital camera.
Guides users on launching the application and logging in with appropriate credentials.
Details the procedure for safely closing the software application.
Describes how to access and view the main operational interface of the software.
Explains various methods for inputting patient and study data into the system.
Provides a shortcut to initiate a study without initial patient data entry.
Guides on the process of capturing retinal images using the connected camera.
Details the steps to complete a study and initiate image transfer.
Explains how to monitor the status of image data transfers.
Provides guidance on troubleshooting and resolving image transfer errors.
Describes the procedure for safely logging out of the software.
Explains how to manage study logs that are temporarily stored in the database.
Details how to search and filter study logs based on various criteria.
Covers the process of selecting and transferring study data from logs.
Describes how to save study log data to a designated location.
Guides on how to remove study logs from the system.
Allows customization of which items are displayed in the study logs list.
Explains how to access and manage study logs saved as files.
Details the interface and functionality of the study log viewing screens.
Provides an overview of the main application interface and its components.
Covers different ways to view images and access their properties.
Details various operations that can be performed on images.
Explains how to view and compare multiple studies side-by-side.
Details the process for measuring the cup-to-disc ratio of the optic nerve.
Describes how to view images in stereo, side-by-side.
Covers the process of printing captured retinal images.
Details the Quality Assurance (QA) functions for image adjustment.
Explains how to mark images for rejection, preventing their transfer.
Guides on how to edit patient details associated with a study.
Describes how to save images in JPEG format.
Explains how to change the user account password.
Shows how to view the software version and copyright details.
Overview of the main settings menu and its available categories.
Configuration settings related to DICOM information and image output.
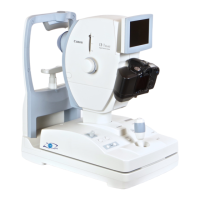
Settings for connecting and configuring the retinal camera and digital camera.
Settings for managing image storage directories and save periods.
Configuration for study input modules and screen behavior.
Settings for defining storage locations for DICOM and JPEG files.
Settings for managing DICOM information associated with images.
Management of user accounts, including registration and privileges.
Settings for customizing screen displays and information panels.
Settings for configuring print operations and the print icon behavior.
Sets the number of days for displaying study logs.
Settings for magnetic card/barcode reader communication and data.
Explains the different message screen types (Error, Warning, Information) and their icons.
Lists common error messages, their causes, and troubleshooting steps.
Lists common warning messages, their causes, and recommended actions.
Lists common informational messages displayed during successful operations.