ArcSoft PhotoImpression 5 Quick Start Guide
- 3 -
- INTRODUCTION -
Welcome to ArcSoft PhotoImpression 5! This tutorial will walk you through the six program
“modules.” Each module offers you commands to perform various imaging tasks. The six modules
are:
Get Photo - Locate photos on your computer within various folders or ArcSoft albums.
Enhance - Quickly touch-up and modify your photos.
Create - Add text, frames, special effects, and more to any picture.
Project - Make your own calendars or “PhotoBooks.”
Print - Print out single or multiple photos in a variety of ways.
Send - Share your photos with friends and family.
Don’t forget about the built-in Help file. You can access it from the Help menu along the top of
the program screen. It will explain each button and option. This tutorial will show you how to
perform the most common operations and may not cover every individual command. Use the
tutorial and Help files together and you’ll be fine.
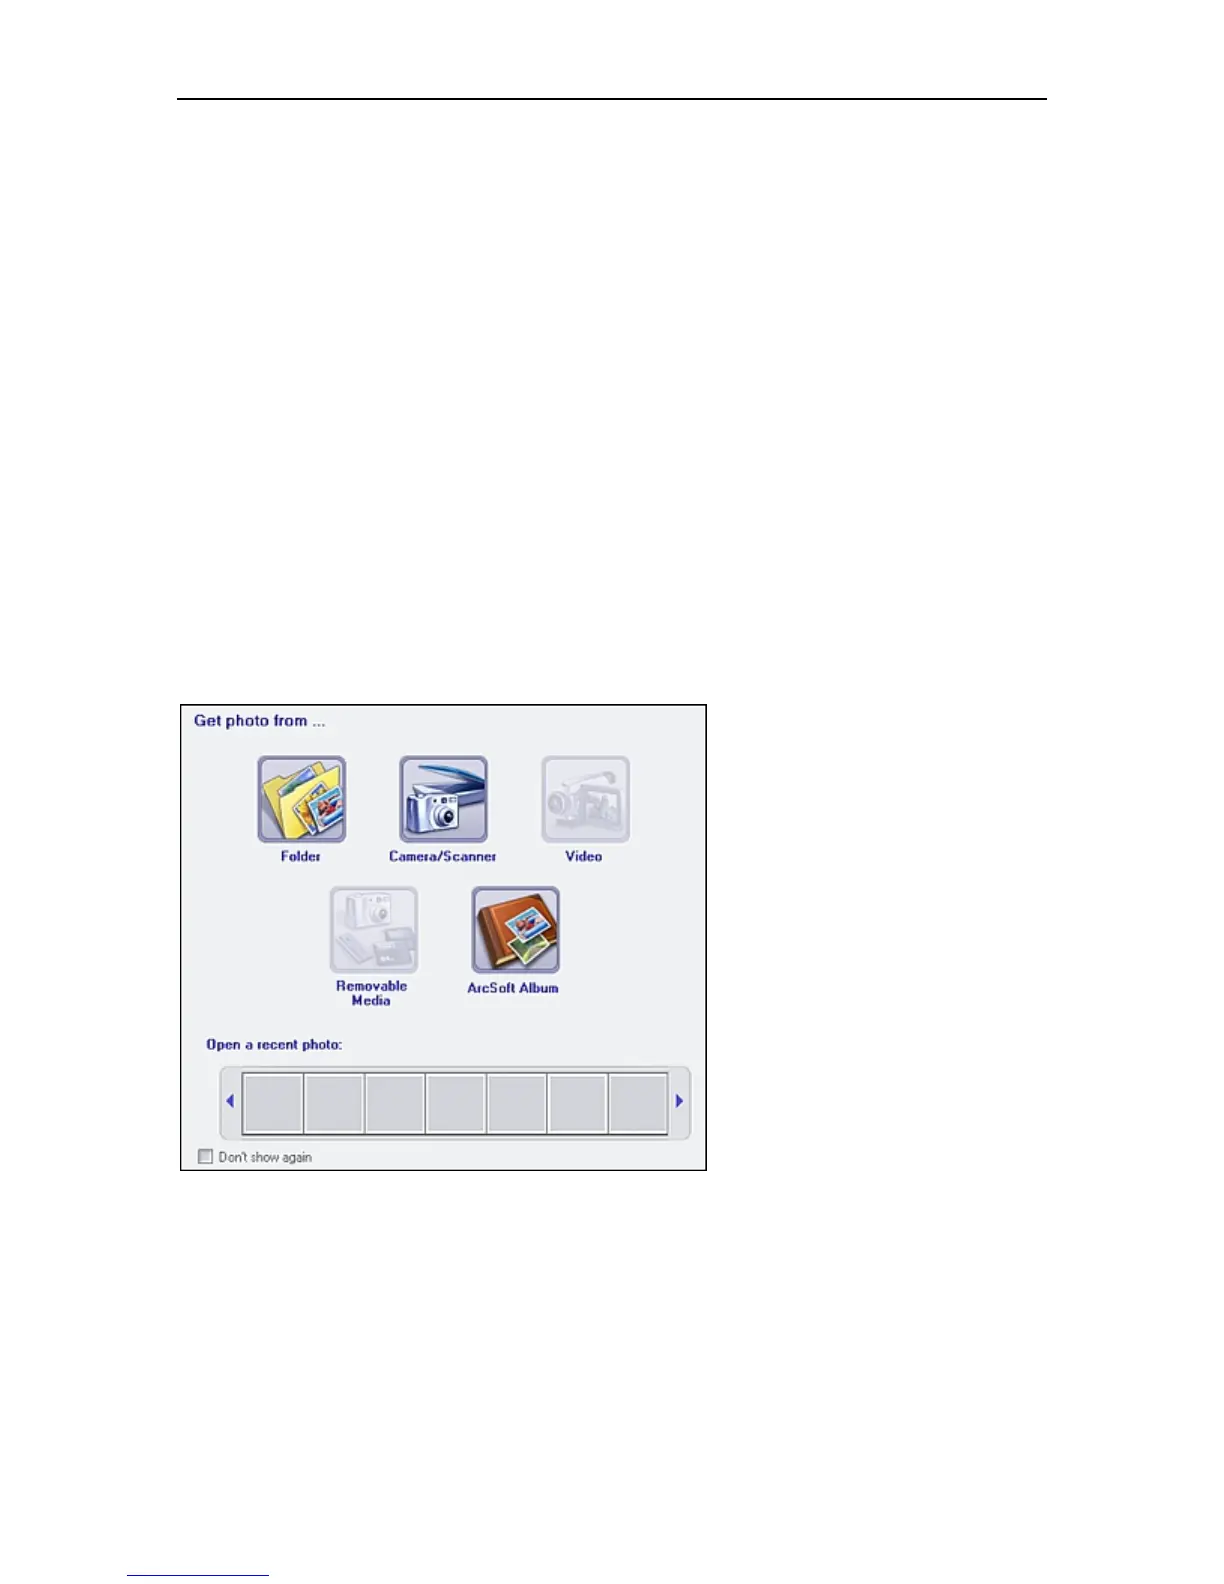
GETTING STARTED
When the program initially starts, you’re prompted with a window that offers you various ways to
acquire photos. This window will appear each time you start the program or go to the Get Photo
module.
Note: Graphics and procedures may vary slightly between Windows and Macintosh versions.
 Loading...