EasyManua.ls Logo

Canon HG-10 - User Manual

Canon HG-10
20 pages
Print Icon
To Next Page IconTo Next Page
Loading...
1
Quick Reference Guide to the Canon HG-10
UB Media Lab
Quick Reference Guide
to the
Canon HG-10
High Definition Hard Disk Camcorder
Please remember to TRANSFER YOUR FOOTAGE OFF THE CAMERA before
returning it to the media lab. (See Transferring Footage Instructions)
The Canon HG-10 is a tapeless camcorder. All footage is recorded onto a hard drive that is built into
the camera. This has many advantages, two of which are no more money spent on tapes and a much
easier and faster capturing process for editing. However, you need to be extra careful with the
camera because there are no tapes - any carelessness or harm to the camera will not only damage
the camera (and cost you money) but also destroy all your footage. You will also need to be very
diligent with keeping back up copies of your footage files on your
external hard drives and/or DVDs.
Files are easier to be misplaced and corrupted than tapes are, so
please be smart about your recording and be organized with your files!
(Please see the Transferring Footage Instructions for more information.)
Question and Answer IconNeed help?

Do you have a question about the Canon HG-10 and is the answer not in the manual?

Summary

Navigating Camera Menus

Menu Navigation Controls

Explains using the SET dial and arrow buttons for menu navigation.

HDD Operations and System Setup

Details HDD status, initialization, speaker volume, and AV/Phone settings.

Play Mode Operations

Viewing and Navigating Clips

Explains viewing footage and navigating clips in PLAY mode.

Camera Mode Overview

Monitoring HDD Recording Space

Explains how to check remaining hard drive space for recording.

Camera Mode Controls

Button Functions in Camera Mode

Details the functions of buttons like W&T, START/STOP, BLC, and FUNC.

White Balance Adjustment

Importance of White Balance

Explains why white balancing is crucial for accurate color reproduction.

Performing White Balance

Step-by-step guide on how to perform manual white balance.

Camera Setup Configuration

Key Setup Parameters

Highlights essential settings like Frame Rate, Image Stabilization, and Focus Assist.

Focus and Exposure Control

Manual Exposure Adjustment

Explains how to manually adjust exposure using camera controls.

Manual Focus Adjustment Technique

Details how to set and adjust focus manually for optimal clarity.

Footage Import and Transfer

Camera to Computer Connection

Steps for connecting the camera to a computer for data transfer.

Final Cut Pro Workflow

Overview

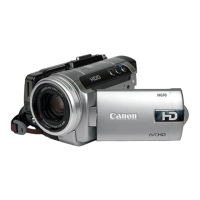
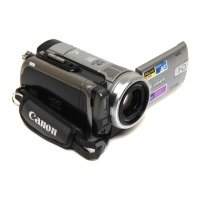
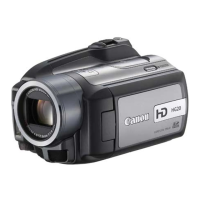
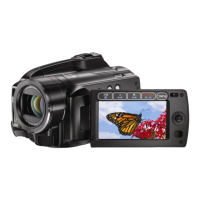
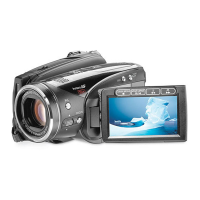
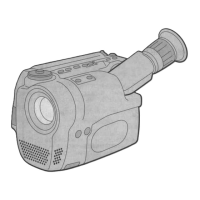
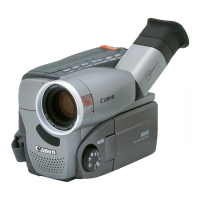
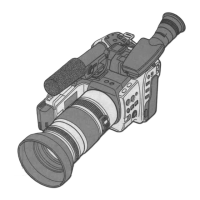
The Canon HG-10 is a high-definition hard disk camcorder designed for recording video footage directly onto an internal hard drive, eliminating the need for traditional tapes. This tapeless design offers advantages such as cost savings on media and a faster, easier capturing process for editing. However, it necessitates careful handling to prevent damage to the camera and loss of footage, emphasizing the importance of diligent backup practices.

Function Description:

The HG-10 primarily functions as a video recorder, capturing high-definition footage onto its built-in hard drive. It also has the capability to capture still images, though this requires a mini-SD card and is not the camera's primary function. The camcorder features both automatic and manual control modes, allowing users to adjust settings like white balance, exposure, and focus. It supports various video capturing modes, with recommended settings for optimal quality. The device includes an LCD screen for framing shots, reviewing footage, and navigating menus, which can tilt and swivel for flexible viewing angles. Audio recording is managed automatically, with ports for external microphones and headphones for monitoring.

Important Technical Specifications:

  • Recording Medium: Internal Hard Disk Drive (HDD).
  • Video Quality: Supports High Definition (HD) recording, with recommended settings of HXP (15mbps) or XP (9mbps) for optimal quality.
  • Frame Rate: Primarily records at 60i (30fps), with an option for 24p (though noted as not professional quality).
  • Lens: Canon HD Video Lens with 10x zoom (6.1-61mm, 1:1.8, Φ43).
  • Connectivity:
    • USB 2.0 port (Type A) for connecting to a computer for footage transfer.
    • AC Adapter port for power and battery charging.
    • XLR-mini cable port for external microphones.
    • AV/Headphone jack for audio monitoring.
  • Still Image Capture: Requires a mini-SD card.
  • Power: Operates on rechargeable batteries or AC power via an adapter.
  • Safety Feature: "DROP SENSOR" to protect the hard drive, which should always be kept ON.

Usage Features:

  • Power On/Off: Controlled by a mode dial at the rear, requiring a small grey lock button to be pressed.
  • Recording Modes:
    • CAMERA Mode: For recording new footage.
    • PLAY Mode: For reviewing recorded footage, functioning like a DVD player with rewind, fast-forward, start/pause, and stop controls.
  • Navigation: All menu navigation is controlled by the SET dial and arrow buttons (Up, Down, Left, Right) located on the left side of the LCD screen. The FUNC. button accesses on-screen menus.
  • Quick Start: A button that puts the camcorder into a low-power stand-by mode, allowing for quick resumption of shooting.
  • DISP. Button: Toggles on-screen icons on/off for an unhindered view on the LCD.
  • Zoom Control: A variable speed zoom toggle on top of the camera, or W & T buttons on the LCD panel for fixed-speed zoom.
  • White Balance: Manual white balance is recommended for accurate color representation. This involves zooming into a white object and using the "SET EVAL. WB" option until the White Balance Symbol becomes solid.
  • Exposure Adjustment: Accessed via the "EXP" menu in Camera Mode, allowing manual adjustment using left and right arrows.
  • Focus Adjustment: Accessed via the "FOCUS" menu in Camera Mode, allowing manual adjustment using left and right arrows. It's recommended to zoom into a detail, focus, then zoom out for best results.
  • Image Stabilization (IMG STAB): Can be turned ON in the CAMERA SETUP menu.
  • Microphone Input: A hidden panel on the front reveals the microphone jack for external mics. Note that audio levels are automatically managed by the camera.
  • Headphone Monitoring: A hidden panel on the right side reveals the AV/Headphone jack. Ensure "AV/PHONES" is set to "PHONES" in the SYSTEM SETUP menu for proper audio monitoring.
  • Footage Transfer: Connect the camera to a computer via USB 2.0 cable and AC adapter. Turn the camera to "PLAY" mode. The "CANON_HDD" icon will appear on the desktop. Drag the "AVCHD" folder to the desktop for backup.
  • Final Cut Pro Integration: For editing, use "Log and Transfer" in Final Cut Pro with the "HDV-Apple ProRes 422 1080p24" Easy Setup.

Maintenance Features:

  • Battery Charging: Insert a battery into the camera, then plug the camera into a wall outlet using the AC adapter. A blinking light indicates charging, and a solid light indicates a full charge.
  • Hard Drive Management: The "HDD Operations" submenu allows users to check available space and initialize (erase) the drive. However, users are advised not to initialize the drive themselves, as the Media Lab handles this.
  • Footage Deletion: Clips can be deleted in PLAY mode via the FUNC. menu. Users are cautioned to be careful and ensure the camera is not moved during this process.
  • Lens Cap: The built-in lens cap automatically opens when the camera is turned on. Users should keep fingers and objects away from the lens.
  • Backups: Due to the tapeless nature and potential for data corruption, users are strongly advised to make backup copies of their footage files on external hard drives and/or DVDs.
  • Media Lab Protocol: Users are reminded to transfer footage off the camera before returning it to the media lab and to include transfer/backup time in their sign-up period. Lab assistants will delete footage from the camera before each checkout.

Canon HG-10 Specifications

General IconGeneral
BrandCanon
ModelHG-10
CategoryCamcorder
LanguageEnglish

Related product manuals