2
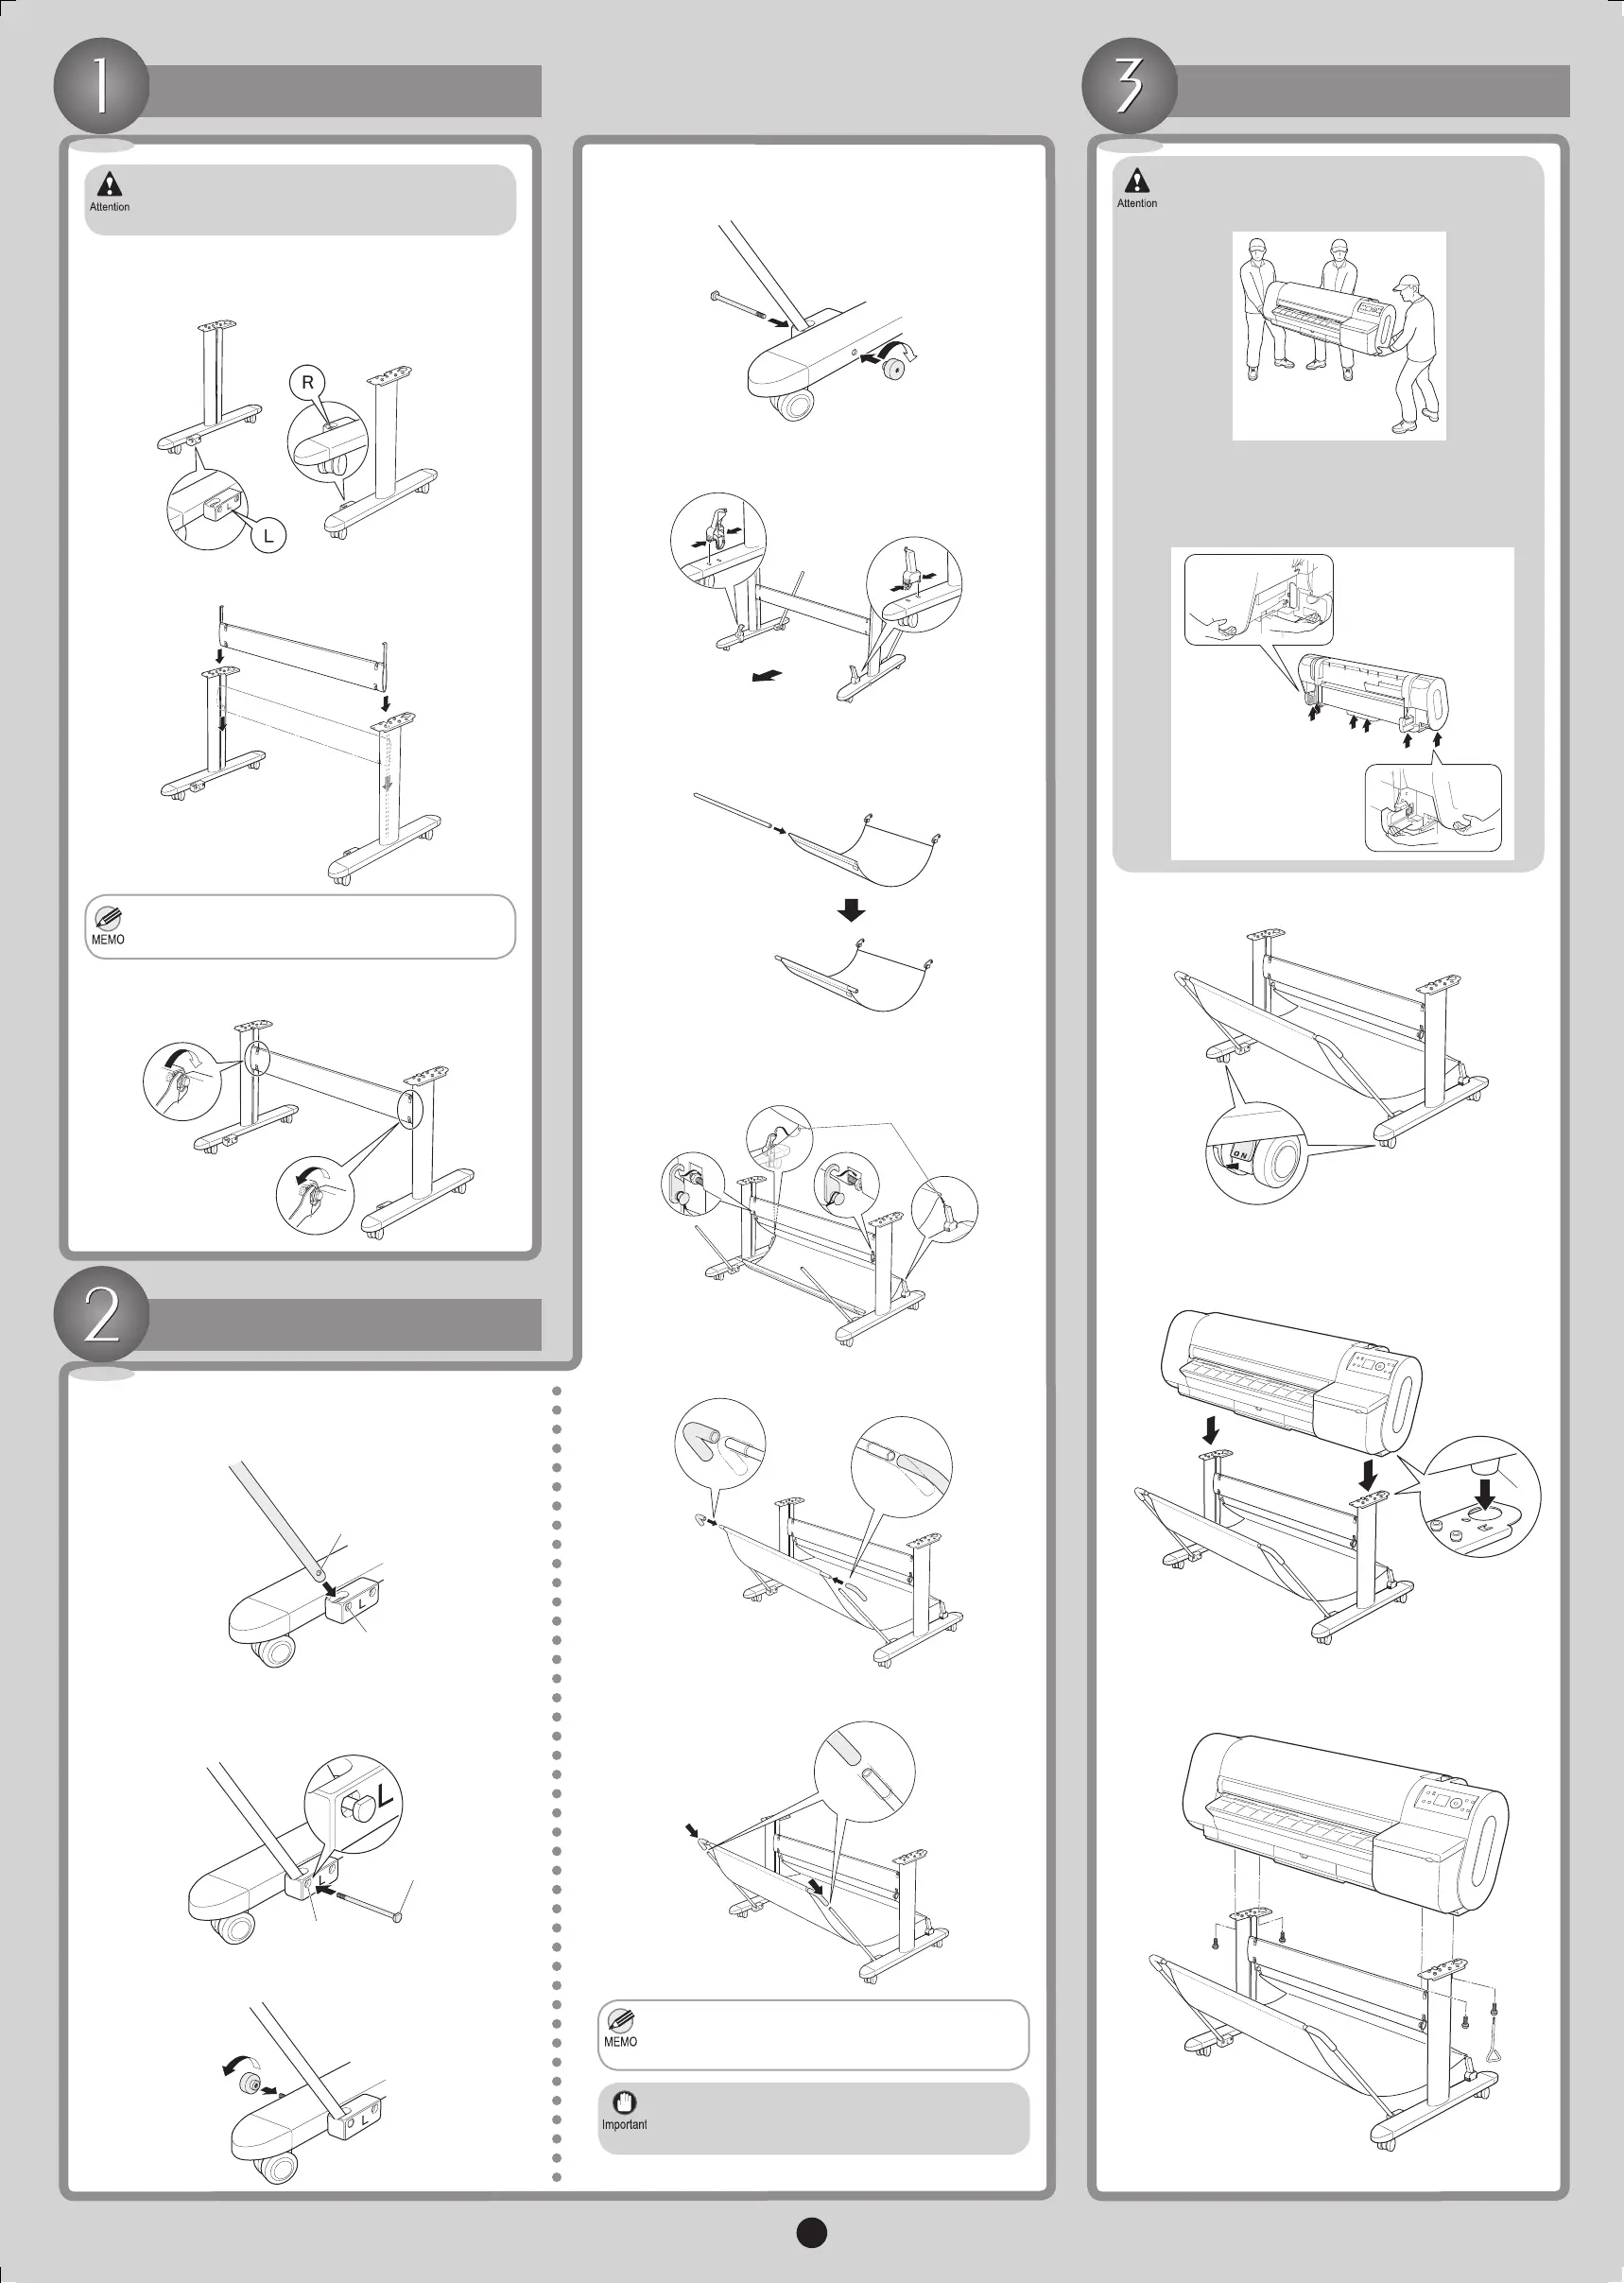
Assemble the Stand
Stand assembly requires two or more people.
Assembling the Stand alone poses a risk of
injury or accidental bending of the stand.
•
Position the Stand L and Stand R so that the
Bascket Fastner L and Bascket Fastner R are on
the inside toward the front.
1.
Insert the Stand Stay fully into the grooves of the
Stand L and Stand R until it stops.
2.
While squeezing the Basket Holder in the position
indicated with both hands, insert it in the hole on the
back of Stand L and Stand R.
5.
Use the Wrench to tighten the hex screws on the top
and bottom of both sides and secure the Stand Stay.
3.
Insert Basket Rod #2 in the front holes of the Output
Stacker, opening the Output Stacker with the white
tag at the front on the right and Basket Fastener A
on the back.
6.
Attach the side holes (a) in the middle of the Output
Stacker to the Basket Holder, and attach both
Basket Fastner L and Basket Fastner R to the
Stand Stay.
7.
Be careful not to put your ngers between the
Stand Stay xtures and the groove of Stand.
•
Repeat steps 1-3 to insert the other Basket Rod #1
into the Stand R. Insert Basket Bolts and secure
them with Basket Decorative Nuts.
4.
Attach the Output Stacker
Move the Stand into position and make sure the front
casters are locked.
1.
Insert Basket Bolts into the hole of Bascket Fastner
L, tting the head of Basket Bolts (b) in the hole of
Bascket Fastner L (a).
2.
Insert one Basket Rod #1 into the hole of Bascket
Fastner L so that the hole of Basket Rod #1 (a) is
aligned with the hole of Bascket Fastner L (b).
1.
Use Basket Decorative Nuts to secure the Basket
Bolts.
3.
Insert Basket Rod Caps on both ends of Basket
Rod #2 until they cover the lines.
8.
Insert Basket Rod Caps on both ends of Basket
Rod #1 until they cover the lines.
9.
When using the Output Stacker, push down
both Basket Rods #1 fully toward the front,
keeping Basket Rod #2 level.
•
Moving the printer requires at least three
people. Be careful to avoid back strain and other
injuries.
•
Install the Printer
When moving the printer, rmly grasp the
carrying handles under each side. Holding the
printer at other positions is dangerous and
poses a risk of injury and damage if the printer
is dropped.
•
With three people holding the printer carrying
handles, align the legs of the printer (a) with the
round holes on the Stand as you set the printer down
on the Stand.
2.
To secure the printer to the stand, use the Allen
Wrench to tighten the two Main Unit Securing Bolts
on either side from under the printer.
3.
Always unlock the casters before moving the
printer. Moving the printer while the casters are
locked may scratch the casters or the oor.
•
000_AB7-5374-V1_J531QSG_E.indd 2 2006/05/26 13:40:46

 Loading...