Chapter 9
9-13
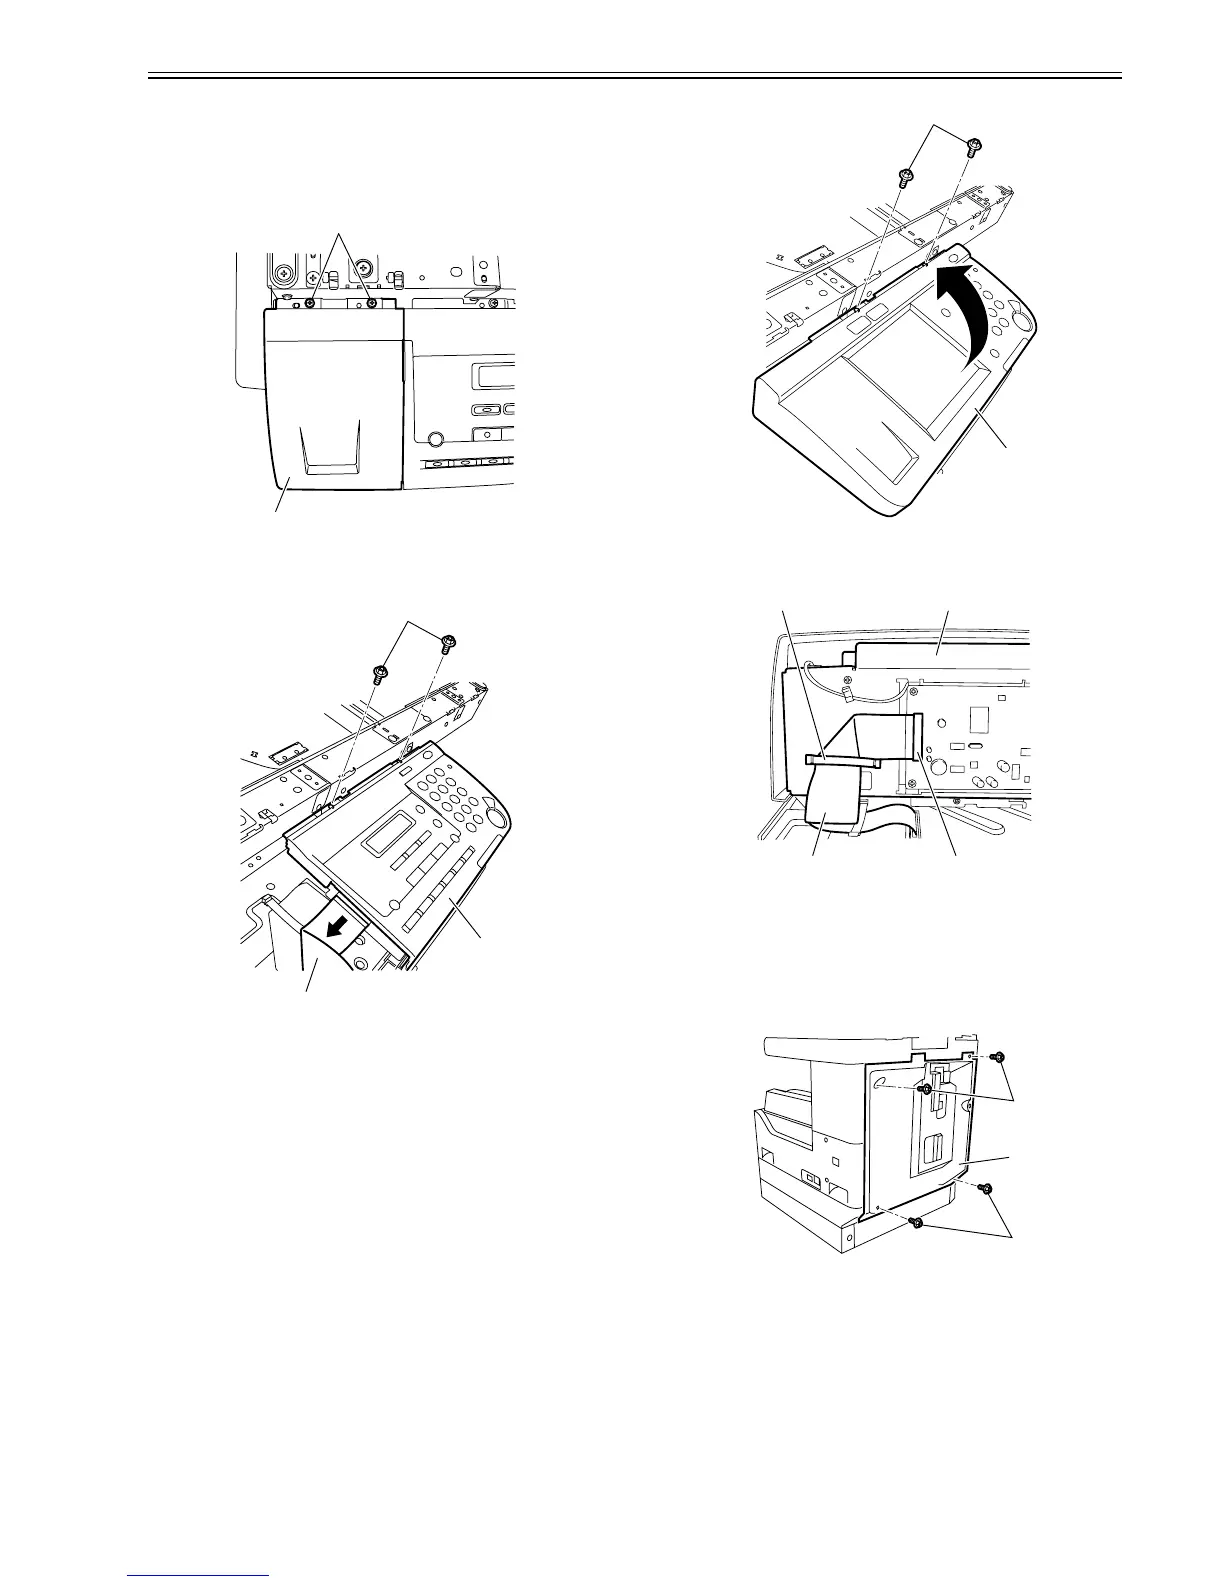
9.4.4.2 Removing the Operation Panel Unit (iR2020/
iR2020J/iR2016/iR2016J)
0010-9979
iR2016J / iR2016 / iR2020 /
1) Remove the two screw [1], and then detach the left cover [2] of the
operation panel unit.
F-9-57
2) Remove the flat cable [1] and two screws [2], and then remove the
operation panel unit [3].
F-9-58
9.4.4.3 Removing the Operation Panel Unit (iR2020i/
iR2016i)
0012-6081
iR2016i / iR2020i
1) Remove the two screws [1], and then turn over the operation panel unit[2].
F-9-59
2) Disconnect the flexible cable holder [1] and disconnect the connector [3]
of the flexible cable [2] to remove the operation panel unit [4].
F-9-60
9.4.5 DC Controller PCB
9.4.5.1 Removing the Rear Cover
0010-9963
iR2016J / iR2016 / iR2020 / / iR2016i / iR2020i
1) Remove the four screws [1], and then detach the rear cover [2].
F-9-61
9.4.5.2 Removing the DC Controller PCB
0010-9964
iR2016J / iR2016 / iR2020 / / iR2016i / iR2020i
1) Disconnect all connectors [1]. Remove the four screws [2], and then
remove the DC controller PCB [3].
[2]
[1]
[3]
[2]
[1]
[2]
[1]
[3][2]
[1] [4]
[1]
[2]
[1]




 To Next Page