D
denise81Aug 8, 2025
How to fix sluggish camera operation on a Canon Digital Camera?
- CChristopher ThompsonAug 8, 2025
If your Canon Digital Camera operation becomes sluggish, try setting [Eye-Fi trans.] to [Disable].
How to fix sluggish camera operation on a Canon Digital Camera?
If your Canon Digital Camera operation becomes sluggish, try setting [Eye-Fi trans.] to [Disable].
What to do if I have image transfer issues with my Canon IXUS 162 Digital Camera?
To troubleshoot image transfer issues on your Canon Digital Camera, check the card and computer settings. For details, refer to the card’s user manual.
What to do if my Canon Digital Camera has an error acquiring Eye-Fi card information?
Restart the Canon Digital Camera. Repeated display of this icon may indicate a problem with the card.
Instructions for shooting still images and movies.
How to view images and movies on the camera screen.
Steps to print images directly from the camera.
Instructions for saving images to a computer.
Essential steps before using the camera for the first time.
Basic instructions for turning on, shooting, and viewing.
Covers fundamental camera operations and features.
Explains how the camera automatically selects settings for optimal shots.
Useful features for easier shooting, like digital zoom and self-timer.
Options to adjust image resolution, red-eye, and movie quality.
Features that assist in capturing better shots, like blink detection.
How to customize camera functions for user preference.
Customize image brightness and color during live view shooting.
Select scene modes for optimal settings in various shooting situations.
Minimize camera shake and noise by combining consecutive shots.
Add creative effects to images while shooting.
Creates a miniature model effect by blurring image areas above and below the selected area.
Mimics a toy camera look with vignetting and color changes.
Shoot images in black and white, sepia, or blue and white.
Modes for group photos or timed shots, like the face self-timer.
Capture long exposures by specifying shutter speeds from 1-15 seconds.
Customize settings for preferred shooting style in Program AE mode.
Adjust image brightness using exposure compensation.
Lock exposure to maintain focus and brightness settings.
Adjust how camera brightness is measured for better exposure.
Adjust sensitivity to light for different shooting conditions.
Automatically adjust excessively dark or bright image areas.
Adjust white balance to make image colors look more natural.
Configure focus for close-up or distant subjects.
Change auto focus frame mode based on shooting conditions.
Display grid lines on screen for shooting reference.
Disable digital zoom if you prefer not to use it.
Customize how images are displayed after shooting.
How to view images and movies on the camera screen.
Navigate and find images using index display and filters.
Prevent accidental erasure of important images.
Choose and erase unneeded images one by one or multiple at once.
Change the orientation of images and save them.
Resize images or correct brightness and red-eye.
Display multiple images in an index to quickly find desired photos.
Detects washed-out highlights in images during detailed information display.
Shows image brightness distribution to check exposure levels.
Filter and find images based on specified criteria like date or file type.
Zoom in on images to view details or check focus.
Automatically play back images from the memory card.
Customize slideshow repeat, transitions, and display duration.
Select and erase multiple unwanted images simultaneously.
Save a copy of images at a lower resolution.
Adjust image brightness and contrast automatically.
Automatically correct images affected by red-eye.
Customize camera operations like sounds, volume, and hints.
Set destination time zones for accurate shot timestamps when traveling.
Adjust when the camera lens retracts after use.
Adjust auto power-off and screen deactivation timings.
Adjust the brightness of the LCD screen.
Disable the startup screen displayed when turning on the camera.
Prepare new or used memory cards for use with the camera.
Perform deep formatting for memory cards with errors or slow performance.
Customize how image files are numbered sequentially.
Create folders based on shooting date for easier image organization.
View camera certification logos on the screen.
Change the camera's display language.
Adjust miscellaneous settings like video system and Eye-Fi.
Reset camera settings to their original default values.
Diagram showing included and optional accessories and their connections.
Lists and describes separately sold accessories like battery packs and chargers.
Instructions for using optional accessories like AV cables for TV playback.
Download and install software for managing camera images.
Instructions for printing images directly from the camera.
Enables automatic wireless transfer of images using an Eye-Fi card.
Simple steps to print photos by connecting to a PictBridge printer.
Customize print options like date/file number addition and paper settings.
Specify print format, date/file number addition, and other settings.
Select how to choose images for photobook setup.
View Wi-Fi access point SSID and connection status for Eye-Fi cards.
Turn off automatic Eye-Fi transfer if necessary.
Solutions for common camera problems and error messages.
Explains messages displayed on the camera screen.
Details about icons and information displayed during shooting and playback.
Tables showing function availability across shooting modes and menu structures.
Important guidelines for safely using and maintaining the camera.
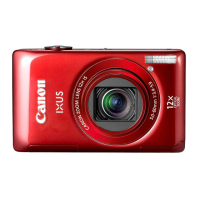
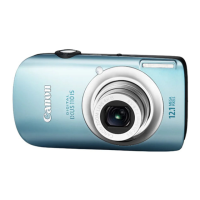
Technical details and specifications of the camera.
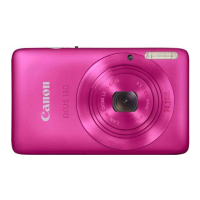
| Brand | Canon |
|---|---|
| Model | IXUS 162 |
| Category | Digital Camera |
| Language | English |