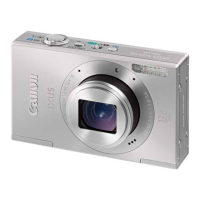
Do you have a question about the Canon IXUS 500 HS and is the answer not in the manual?
Lists the manuals provided on the DIGITAL CAMERA Manuals Disk.
Denotes the possibility of serious injury or death.
Denotes the possibility of injury or damage to equipment.
Instructions on how to attach the camera strap correctly.
Guide on how to charge the camera battery using the provided charger.
Step-by-step instructions for inserting a memory card into the camera.
Guide to setting the camera's date, time, and time zone for accurate image tagging.
Instructions on how to change the camera's display language settings.
Basic guide to turning on the camera and shooting in automatic mode.
How to view captured images and movies on the camera screen.
Steps to erase unwanted images individually from the camera.
Details the system requirements for using the included software on Windows and Macintosh.
Lists camera accessories sold separately, such as power supplies and flash units.
Provides estimates for the number of shots, recording time, and playback duration.
Instructions on how to turn the camera on and off in shooting and playback modes.
Explains the two-stage operation of the shutter button for focusing and shooting.
Introduces different shooting modes available on the camera.
Guide on how to configure commonly used functions via the FUNC. menu.
Details how to shoot using the camera's fully automatic Smart Auto mode.
Explains the various scene icons displayed in Smart Auto mode.
Guide on using the self-timer for group photos or timed shots.
Explains how to register and use Face ID for personalized shooting settings.
How to adjust the image aspect ratio (width to height) for different display or print needs.
Details the automatic correction of red-eye that occurs during flash photography.
How to magnify the focus area on the screen to check focus accuracy.
Explains how the camera detects and warns about closed eyes in shots.
Guide to selecting scene modes that automatically optimize settings for various shooting situations.
Adds a variety of effects to images when shooting, such as vivid colors or poster effects.
Automatically records short movie clips of each shot, combining them into a single file.
Specifying shutter speeds from 1 to 15 seconds for long exposure photography.
Shooting a series of shots rapidly by holding down the shutter button.
Capturing fast-moving subjects for playback in slow motion.
Customizing settings in Program AE mode for a preferred shooting style.
Adjusting the standard exposure set by the camera in 1/3-stop increments.
Locking focus and exposure separately before shooting to recompose.
Adjusting how the camera measures brightness to suit shooting conditions.
Adjusting the ISO speed to suit shooting mode and conditions for brightness control.
Adjusting white balance to make image colors look natural for the scene.
Setting a custom white balance based on a white subject for accurate color.
Adjusting image color tones, like converting to sepia or black and white.
Restricting focus to subjects at close range using the Macro setting.
Adjusting the auto focus frame mode to suit different shooting conditions.
Continuously focusing on subjects in motion and adjusting exposure while shutter is pressed halfway.
Locking the camera's focus position until the shutter button is released.
Instructions on how to enable the flash for each shot.
Using flash with a slow shutter speed to brighten the background.
Selecting image compression ratios (Super Fine or Fine) to adjust image quality.
Adjusting image stabilization modes (Continuous, Shoot Only, Off) for different shooting scenarios.
How to enter playback mode and browse through images and movies.
Viewing names of detected people registered in Face ID on images.
Changing the amount of information displayed on the screen during playback.
Displaying multiple images in an index for quick browsing and selection.
Specifying search conditions to find specific images on the memory card.
How to change or edit names associated with Face ID information.
Instructions on how to erase names recorded for Face ID.
Magnifying images to check details and then moving the display position.
Automatically playing back images from the memory card as a slideshow.
Protecting specific images from accidental erasure by the camera.
Protecting all images on the memory card simultaneously.
Erasing all images from the memory card at once, with protection for important files.
Erasing specific unwanted images one by one.
Turning off the camera's automatic rotation of vertically shot images.
Marking images as favorites for easier organization and searching.
Categorizing images automatically based on shooting conditions or manually.
Saving a copy of an image at a lower resolution.
Specifying a portion of an image to save as a separate file.
Automatically adjusting dark/bright areas and contrast to improve image appearance.
Configuring basic camera functions for greater convenience via the setup menu.
Formatting memory cards before use to ensure proper camera compatibility.
Adjusting the timing for automatic camera and screen deactivation to conserve power.
Instructions for adjusting the camera's date and time settings.
Resetting camera settings to their default values if accidentally changed.
Advice on effectively using included accessories, especially the battery and charger.
Instructions on connecting and using optional accessories like TVs and printers.
Using the AC adapter kit to power the camera directly from household power.
Simple steps for printing shots directly by connecting to a PictBridge-compatible printer.
Setting up print options such as date, file number, copies, and paper settings.
Cropping images to print a desired area instead of the entire image.
Adding images to a print list (DPOF) for batch printing or photo service orders.
Provides solutions for common problems encountered while using the camera.
Important precautions to take when handling and using the camera.
Explains error messages and how to respond to them for troubleshooting.
Explains various icons and information displayed on the camera screen during shooting.
Tables showing functions available in different shooting modes and menu options.
| Sensor Type | CMOS |
|---|---|
| Sensor Size | 1/2.3 inch |
| Megapixels | 10.1 MP |
| Image Processor | DIGIC 5 |
| Optical Zoom | 12x |
| Display Size | 3.0 inch |
| LCD Screen Resolution | 461, 000 dots |
| Video Resolution | 1920 x 1080 (Full HD) |
| Video Frame Rate | 24 fps |
| Storage Media | SD/SDHC/SDXC |
| Battery Type | NB-9L |
| ISO Range | 100 - 3200 |
| Shutter Speed | 15 - 1/4000 sec |
| Weight | 155 g (including battery and memory card) |