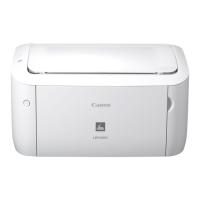
Do you have a question about the Canon Laser Shot LBP3200 and is the answer not in the manual?
Verify all items are present in the printer package before installation.
Transport the printer to its designated location after unpacking.
Detach tapes and packing materials protecting the printer.
Join the front and rear parts of the paper cassette.
Insert the assembled cassette into the printer.
Access the toner cartridge area by opening the front cover.
Carefully remove the toner cartridge from its protective packaging.
Shake the toner cartridge and pull out the sealing tape.
Align and push the toner cartridge into the printer.
Secure the printer by closing the front cover.
Verify the printer's power switch is in the OFF position.
Plug the power cord into the printer's power socket.
Connect the power cord plug to an AC power outlet.
Load plain paper into the printer's paper cassette.
Load single sheets of paper into the manual feed slot.
Choose the output area for printed documents.
Change the paper output path between face-up and face-down.
Install the printer driver and necessary software.
Connect the printer to the computer using a USB cable.
Follow prompts to install software on Windows 98/Me.
Follow prompts to install software on Windows 2000/XP.
Verify installation and locate printer icons and folders.
Print a test page to confirm printer functionality.
| Internal memory | 2 MB |
|---|---|
| Sound power level (standby) | 55 dB |
| Color | No |
| Print technology | Laser |
| Maximum resolution | 600 x 600 DPI |
| Time to first page (black, normal) | 10 s |
| Print speed (black, normal quality, A4/US Letter) | 18 ppm |
| Print speed (color, normal quality, A4/US Letter) | 8 ppm |
| Maximum print size | 210 x 297 mm |
| Media types supported | A4, B5, A5, LTR, Executive, Envelope C5/COM10/DL, Monarch |
| Maximum ISO A-series paper size | A4 |
| Power requirements | 220-240V (±10%) 50/60Hz (±2Hz) |
| Compatible operating systems | Windows XP/98/ME/2000 |
| Non-operating relative humidity (non-condensing) | 35 - 85 % |
| Sustainability certificates | ENERGY STAR |
| Total input capacity | 250 sheets |
| Storage temperature (T-T) | 0 - 35 °C |
| Operating temperature (T-T) | 7.5 - 32.5 °C |
| Operating relative humidity (H-H) | 5 - 90 % |
| Maximum duty cycle | 10000 pages per month |
| Power consumption (standby) | 7 W |
| Power consumption (printing) | 360 W |
| Dimensions (WxDxH) | 367 x 376.3 x 245 mm |
|---|



 Loading...