EasyManua.ls Logo

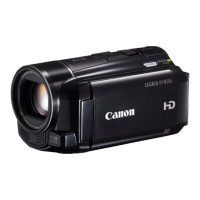
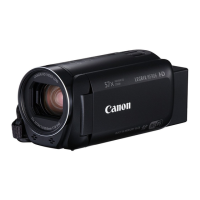
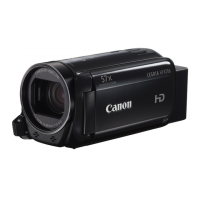
Canon LEGRIA HF R306 User Manual

Canon LEGRIA HF R306
222 pages
To Next Page IconTo Next Page
Page #1 background imageLoading...
Page #1 background image
PUB. DIE-0414-000A
HD Camcorder
Instruction Manual
*)(
COPY

Table of Contents

Other manuals for Canon LEGRIA HF R306

Question and Answer IconNeed help?

Do you have a question about the Canon LEGRIA HF R306 and is the answer not in the manual?

Canon LEGRIA HF R306 Specifications

General IconGeneral
Sensor typeCMOS
Total megapixels3.28 MP
Optical sensor size1/4.85 \
Effective megapixels (image)2.07 MP
Digital zoom1020 x
Optical zoom32 x
Image stabilizerYes
Focal length range2.8 - 89.6 mm
Interchangeable lens-
Image stabilizer typeOptical Image Stabilization (OIS)
Maximum aperture number4.5
Minimum aperture number1.8
Focal length (35mm film equivalent)38.5 - 1232 mm
Maximum focal length (35mm film equiv)1232 mm
Minimum focal length (35mm film equiv)38.5 mm
Memory slots1
Camcorder media typeMemory card
Compatible memory cardsSD, SDHC, SDXC
Maximum memory card size64 GB
Internal storage capacity0 GB
Focus adjustmentAuto/Manual
Closest focusing distance0.1 m
Scene modesBeach, Fireworks, Night, Portrait, Snow, Sports, Spotlight, Sunset
Built-in flashNo
Shutter speed (video)0.001 s
Display diagonal3 \
Display resolution (numeric)230000 pixels
Viewfinder typeNot available
Camcorder typeHandheld camcorder
Image processorDIGIC DV III
Self-timer delay10 s
Minimum illumination4 lx
Product colorBlack
Capture modesFXP, MXP, SP, XP+
Video resolutions1280 x 720, 1440 x 1080, 1920 x 1080 pixels
Video formats supportedAVCHD, MP4
Maximum video resolution1920 x 1080 pixels
Audio systemDolby Digital 2.0
USB 2.0 ports quantityUSB 2.0 ports have a data transmission speed of 480 Mbps, and are backwards compatible with USB 1.1 ports. You can connect all kinds of peripheral devices to them.
USB 3.2 Gen 1 (3.1 Gen 1) Type-A ports quantity0
Battery capacity- mAh
Battery life (max)- h
Video recording time1 h
Cables includedUSB
Weight and Dimensions IconWeight and Dimensions
Depth115 mm
Width54 mm
Height55 mm
Weight250 g

Summary

Important Usage Instructions

European Union and EEA Waste Disposal

Information on proper disposal of product in the EU/EEA according to WEEE Directive.

Regions of Use

Statement on EC Directive

Declaration of conformity with essential requirements of Directive 1999/5/EC.

Trademark Acknowledgements

Exciting Features and New Functions

Wi-Fi Functions

Enables wireless transfer of recordings for sharing and backup.

Story Creator

Create compelling video stories using pre-scripted suggestions.

Cinema-Look Filters

Apply professional filters to create unique movie looks.

AVCHD and MP4 Recording

Record in AVCHD for HDTV or MP4 for web and mobile.

Smart AUTO Mode

Video Snapshot

Record short scenes and arrange into a clip with background music.

Face Detection

Automatically detects faces and adjusts settings for beautiful results.

Memory Save

Save camcorder memory content to an external hard drive.

Image Stabilization

Compensates for camcorder shake for stable shots.

About this Manual

Conventions Used in this Manual

Explains symbols, notes, and terms used throughout the manual.

Getting to Know the Camcorder

Supplied Accessories and CD-ROMs

Lists and illustrates the accessories and CD-ROMs included with the camcorder.

Names of Parts

Identifies and labels the various parts and terminals of the camcorder.

Preparations

Getting Started

Basic steps to start using the camcorder.

Charging the Battery Pack

Instructions on how to charge the camcorder's battery pack.

Lens Cover and LCD Screen Adjustment

Rotating the LCD Panel

Details on how to rotate the LCD panel for different viewing angles.

Basic Operation of the Camcorder

Using the Touch Screen

Explains how to interact with the camcorder using the touch screen.

Using the Menus

HOME Menu

Overview of the HOME menu and its available control buttons.

[Main Functions] Panel

Access commonly used shooting functions like focus and exposure.

[Other Settings] Menus

Access settings like video quality and LCD brightness.

Operating Modes

Camera Mode Settings

Select between AUTO, Manual, or Cinema modes for recording.

Recording Standard Selection

Choose between AVCHD or MP4 recording standards for movies.

First Time Settings

Setting the Date and Time

Guide to setting the camcorder's internal clock and date.

Changing the Language

Instructions for changing the camcorder's display language from default English.

Changing the Time Zone

How to set the camcorder's time zone to match your location.

Using a Memory Card

Memory Cards Compatible for Use

Details on compatible SD, SDHC, and SDXC memory card types and speed classes.

Inserting and Removing a Memory Card

Step-by-step guide on how to insert and remove memory cards.

Selecting the Memory for Recordings

How to choose between built-in memory or a memory card for recording.

Initializing the Memory

How to initialize memory cards or built-in memory to delete data.

AUTO Mode

Basic Recording

How to record video and take photos using AUTO mode.

Smart AUTO Function

Explains how the camcorder automatically detects scene characteristics.

Intelligent IS (Image Stabilization)

Zooming

Using the Zoom Lever

How to use the physical zoom lever on the camcorder.

Using the Touch Screen’s Zoom Controls

How to operate zoom using the touch screen controls.

Selecting the Zoom Type

Quick Start Function

Video

Basic Playback

How to play back recorded movies on the camcorder.

Playing Back Video

Steps to select and play back recorded video scenes.

3D Flip View

Index Selection Screen for Playback

Deleting Scenes and Stories

Deleting a Single Scene

How to delete individual video scenes from playback.

Deleting Scenes from the Index Screen

How to delete multiple scenes directly from the index screen.

Selecting Playback Starting Point

Onscreen Displays and Data Code

Video Stories and Cinema Style

Using Story Creator to Create Compelling Stories

Guide to using Story Creator for making themed video stories.

Creating a New Story

Steps to start a new video story using the Story Creator function.

Cinema Mode and Cinema-Look Filters

Video Snapshot

Decoration: Adding a Personal Touch

Decorating Scenes while Recording

How to add decorations to scenes while recording video.

Playing Back Stories from the Gallery

Open the gallery

Instructions to access the story gallery for playback.

Select the story you want to play back

How to choose a story from the gallery for playback.

Rating Scenes

Rating Scenes Immediately After Recording

How to rate scenes right after recording them.

Rating Scenes from the List of Scenes

How to rate scenes by accessing them from the list.

Playback with Background Music

Copying and Moving Scenes

Copy or move the scene

Step-by-step guide for copying or moving scenes within or between stories.

Selecting a Story’s Thumbnail Image

Changing a Story’s Title

Advanced Functions

Recording in Manual Mode

How to manually adjust settings like exposure and focus.

Reviewing the Latest Scene Recorded

Selecting Video Quality (Recording Mode)

Selecting the Frame Rate

Special Scene and Programmed AE Modes

Advanced Image Stabilization

Powered IS

How to use Powered IS for enhanced image stabilization.

Pre-Recording Function

Face Detection

To select the main subject

How to select the main subject for optimized focus and settings.

Touch & Track Function

Faders (Transition Effects)

Manual Exposure Adjustment

Manual Focus Adjustment

Tele Macro Function

White Balance Adjustment

To set the custom white balance

Procedure to set a custom white balance using a white object.

Self Timer Function

Audio Recording Level Adjustment

Using Headphones

Capturing Video Snapshot Scenes and Photos from Movies

Capturing a Video Snapshot Scene

How to capture short scenes from a movie as video snapshots.

Dividing Scenes

Photos

Viewing Photos

How to view photos stored on the camcorder or memory card.

Photo Jump Function

Jump easily through photos using the scroll bar for quick browsing.

Deleting Photos

Deleting a Single Photo

How to delete individual photos from single photo view.

Deleting Photos from the Index Screen

How to delete multiple photos from the index screen.

Slideshow Function

External Connections

Terminals on the Camcorder

Identifies the AV OUT, HDMI OUT, and USB terminals on the camcorder.

Connection Diagrams

Illustrates how to connect the camcorder to external devices via HDMI.

Connection: Composite Video

How to connect the camcorder to a standard TV or VCR using composite video.

Connection: USB

How to connect the camcorder to a computer or external hard drive via USB.

Playback on a TV Screen

Steps to connect the camcorder to a TV for playback.

Saving and Sharing Your Recordings

Copying Movies and Photos to a Memory Card

How to copy recordings from built-in memory to a memory card.

Saving Recordings on a Computer

Instructions for saving recordings to a computer using USB connection.

Saving AVCHD Movies (Windows)

Installation

Guide to installing PIXELA software for saving AVCHD movies.

Connecting the Camcorder to a Computer

Steps to connect the camcorder to a computer for file transfer.

Saving MP4 Movies and Photos (Windows/Mac OS)

Installation

How to install ImageBrowser EX software for saving MP4 files.

Connecting the Camcorder to a Computer

Steps to connect the camcorder for saving recordings via USB.

Memory Save to External Hard Drive

Saving a Memory onto an External Hard Drive

How to save entire memory contents to an external hard drive.

Before disconnecting the external hard drive

Procedure to safely end the connection before disconnecting the external hard drive.

Playing Back Previously Saved Recordings from the External Hard Drive

How to play back recordings saved on an external hard drive.

Initializing the External Hard Drive

Instructions for initializing an external hard drive for use with the camcorder.

Copying Recordings to External Video Recorder

In High Definition

Copying movies in high definition to Blu-ray recorders via USB.

In Standard Definition

Copying movies to VCRs or digital recorders using analog inputs.

Uploading AVCHD Movies to the Web

Converting Scenes to Standard Definition

Installation

Install software for converting scenes to standard definition.

Converting multiple scenes

How to convert multiple scenes, select bit rate, or auto divide.

Connecting to Computer and Uploading Videos

Uploading Videos Using an Eye-Fi Card

Wi-Fi Functions

Introduction to Wi-Fi

Explains wireless connectivity for sending files without cables.

Wi-Fi connection: Infrastructure mode

Connect via an access point (router) to a Wi-Fi network.

Wi-Fi connection: Ad hoc mode

Connect directly to an iOS device without an access point.

Connecting to a Wi-Fi Network

General requirements

Ensures a correctly configured Wi-Fi network or hotspot is available.

Wi-Fi Protected Setup (WPS)

Easy, automatic setup using a wireless router's WPS button or PIN code.

Manual Setup

Manually configure settings if WPS is not supported or network is hidden.

Transferring Files to Computer or FTP Server

File Transfer Destination Setup for Windows Computers

Set destination for wireless file transfers to a Windows computer.

File Transfer Destination Setup for FTP Servers

Configure settings for transferring files wirelessly to an FTP server.

Uploading Recordings to YouTube and Facebook

Uploading Videos Using an iOS Device

Setting Up Wi-Fi Connection (Ad hoc Mode)

Uploading Videos

Wireless Playback on DLNA Device

Glossary

Appendix: Menu Options Lists

[Main Functions] Panel - Recording Modes

Lists functions available in the Main Functions panel for recording modes.

[Edit] Panel - Mode Options

[Edit] Panel - Mode Options (cont.)

[Other Settings] Menus

Camera Setup

Lists available camera setup options and their functions.

[Focus Assistance] Details

Playback Setup Options

Recording & Connections Setup

[File Numbering] Settings

[External Hard Drive Info]

System Setup Options

[Power Saving Mode] Settings

[LCD Brightness] and [LCD Backlight]

[Custom Control Button] Settings

Appendix: Onscreen Icons and Displays

Recording Movies Modes

Playing Movies (during playback)

Viewing Photos

Memory Operation Icons

Troubleshooting

CHECK THIS FIRST

Essential checks before proceeding to detailed troubleshooting steps.

Power supply Issues

Solutions for camcorder not turning on or turning off by itself.

Recording Issues

Troubleshooting recording mode, memory card insertion, and general issues.

Playback Issues

Troubleshooting playback mode and memory card issues.

Battery Pack Charging Issues

Recording Problems

Pressing START/STOP will not start recording.

Solutions for failure to start recording, full memory, or scene limits.

The camcorder will not focus.

Troubleshooting autofocus issues and lens cleaning.

Recording Movies or Photos Improperly

Playback Issues

Cannot copy/move scenes in a story.

Solutions for inability to copy/move scenes due to full memory.

Cannot delete a scene.

Cannot delete scenes recorded or edited on other devices.

Cannot capture a video snapshot scene from a movie.

Reasons why video snapshot scenes cannot be captured from movies.

Music Track Playback Issues

Cannot Divide Scenes

Cannot Mark Individual Scenes/Photos

Indicators and Onscreen Displays

Red ON/OFF (CHG) Indicator Flashing

Eye-Fi Card Error Icon (‹)

Picture and Sound Issues

The screen appears too dark.

Solutions for a dim LCD screen, adjust backlight settings.

Screen displays turn on and off repeatedly.

Troubleshooting screen display issues related to battery pack.

Abnormal characters appear on the screen and the camcorder does not operate properly.

Steps to resolve abnormal characters and operational problems.

Video noise appears on screen.

How to reduce video noise by adjusting camcorder placement.

Horizontal bands appear on the screen.

Solutions for horizontal bands caused by fluorescent lighting.

Sound is distorted or is recorded at lower levels.

How to prevent audio distortion with loud sounds or low levels.

No Sound from Built-in Speaker

Memory Card and Accessories Issues

Cannot insert the memory card.

Correcting issues with memory card insertion direction.

Cannot record on the memory card.

Solutions for full memory cards, incorrect initialization, or LOCK switch.

Cannot upload files wirelessly using an Eye-Fi card.

Troubleshooting Eye-Fi card wireless upload issues.

Connections with External Devices Issues

Video noise appears on the TV screen.

Reducing video noise by adjusting distance from TV and power adapter.

Playback looks fine on the camcorder but there is no image on the TV screen.

Ensuring correct video input is selected on the TV.

Camcorder connected via HDMI, but no picture or sound.

Resolving HDMI connection issues by reconnecting or power cycling.

HDMI-CEC not working (cannot play back using TV remote).

Troubleshooting HDMI-CEC function and remote control issues.

Computer does not recognize the camcorder.

Resolving computer connection issues by changing USB port or reconnecting.

Cannot save photos on my computer

Troubleshooting photo transfer limits and using card readers.

List of Messages

Back up recordings regularly

Message indicating the importance of backing up recordings regularly.

Built-in memory error

Error indicating built-in memory could not be read; contact service.

Built-in memory is full

Message indicating built-in memory is full; delete or save recordings.

Built-in memory writing error Attempt to recover the data?

Message for interrupted writing to built-in memory; prompts data recovery.

Cannot access the built-in memory

Error indicating a problem with built-in memory; contact service.

Cannot communicate with the battery pack. Continue using this battery pack?

Message about incompatible or faulty battery packs.

Cannot convert

Errors related to memory card access, file name creation, or MMC insertion.

Cannot Copy Content

Cannot Divide Scene (Initialize Camcorder)

Cannot Enter Standby Mode

Cannot Load Canvas

Cannot Play Back Content

Cannot Play Back - Memory Problem

Memory issues preventing playback; contact service if persistent.

Cannot Play Back - Check Memory Card

Memory card issues; save recordings, initialize, or use different card.

Cannot Play Movies in Built-in Memory (Initialize Camcorder)

Built-in memory initialized by computer; re-initialize with camcorder.

Cannot Play Movies on This Memory Card

Memory card compatibility or initialization issues.

Cannot Record Content

Cannot Record Movies in Built-in Memory

Cannot Record Movies on Memory Card

Cannot Save Canvas

Battery Pack Issues

Memory Card Issues

USB Connection Safety Precautions

File Name Error

Initialize Memory Using Camcorder

LCD Screen Brightness Adjustment

Memory Card Not Suitable for Recording

Memory Card Scenes Limit Reached

Memory Card Data Recognition Error

Memory Card Cover Open Warning

Memory Card Full Warning

Memory Card Write-Protected

Memory Card Writing Error (Recover Data?)

Recover Files: Memory Card LOCK Switch

No Memory Card Detected

Not Enough Available Space on Memory Card

Maximum Number of Scenes Reached

Maximum Number of Stories Reached

Recording Stopped Due to Slow Memory Card Speed

Cannot Copy Scenes Recorded on Other Devices

Cannot Divide Scenes Recorded on Other Devices

Cannot Play Back Scenes Recorded on Other Devices

Select Desired Scene Number

Scenes Could Not Be Converted

Scenes Could Not Be Deleted

Cannot Copy Scenes Recorded with Another Device

Task in Progress: Do Not Disconnect Power

No Scenes Found for Selected Rating

Delete All Scenes for Relay Recording

Photo Cannot Be Displayed

Memory Card Recording Mode Recommendation

Too Many Photos/MP4 Movies: Disconnect USB

Total Play Time Too Long for Conversion

Unable to Recognize Data

Messages: External Hard Drive Connection

Error writing to external hard drive

Error during writing to external drive; prompts data recovery.

Quickly erases all files and deletes partitions from the external hard drive. Initialize?

Warning about initializing external hard drive; data will be lost.

Connection ended due to power loss; check for data corruption.

Connection ended due to power loss; check for data corruption.

Messages: Wi-Fi Functions

FTP transfer failure; retry after restarting devices.

FTP transfer failure; retry after restarting devices.

Network Utility transfer failure; retry after restarting devices.

Network Utility transfer failure; retry after restarting devices.

Cannot Connect to FTP Server

Cannot Log In to FTP Server

Cannot Transfer Files to FTP Server

Cannot Transfer Files to Computer (Network Utility)

Check Wi-Fi Settings

IP Address Conflict

Multiple Access Points Detected

No Access Points Found

Network Utility Computer Not Found

Configured Network Utility Computer Not Found

Transfer Speed Changed Before Connecting

Unable to Access Configuration Files

Unable to Complete WPS Setup

Unable to Connect Wirelessly

Unable to Obtain IP Address

Wi-Fi Authentication Unsuccessful

Wi-Fi Connection Terminated

Wi-Fi Error: Incorrect Authentication Method

Wi-Fi Error: Incorrect Encryption Key

Wi-Fi Error: Incorrect Encryption Method

Wireless Communication Not Working Correctly

Handling Precautions

Save your recordings periodically.

Regularly transfer and save recordings to an external device for protection.

Handle the touch screen with care.

Avoid excessive force and use only the stylus pen on the touch screen.

Do not attach protective film on the touch screen.

Do not use protective film as it may affect touch screen operation.

Avoid exposing the camcorder to extreme temperatures or humidity.

Avoid exposing the camcorder to extreme temperatures or humidity.

Avoid using the camcorder near strong electromagnetic fields like TVs or phones.

Avoid using the camcorder near strong electromagnetic fields like TVs or phones.

Avoid Wi-Fi use in sensitive environments like hospitals or aircraft.

Avoid Wi-Fi use in sensitive environments like hospitals or aircraft.

Keep distance from devices like cordless phones to reduce Wi-Fi interference.

Keep distance from devices like cordless phones to reduce Wi-Fi interference.

Avoid pointing the lens at strong light sources.

Avoid pointing the lens at strong light sources.

Avoid Dusty or Sandy Environments

Beware of Heat from Lighting Equipment

Do Not Disassemble the Camcorder

Handle the Camcorder with Care

Tripod Mounting Precautions

Recording Movies: Aim for Calm, Stable Pictures

Stylus Pen Safety Precautions

Long-term Storage

Battery Pack Care and Storage

Store battery packs in a dry place and discharge them before storing.

Store battery packs in a dry place and discharge them before storing.

Notes on battery time display accuracy with optional packs.

Notes on battery time display accuracy with optional packs.

Memory Card Care and Handling

Battery Pack Safety Dangers

Avoid High Humidity and Temperature for Memory Cards

Handle Memory Cards with Care

Memory Card Insertion Direction Check

Do Not Attach Labels/Stickers to Memory Card

Built-in Rechargeable Lithium Battery

How to recharge the built-in battery by connecting the compact power adapter.

How to recharge the built-in battery by connecting the compact power adapter.

Disposal

Maintenance and Other Information

Cleaning

Instructions for cleaning the camcorder body, lens, and LCD touch screen.

Condensation

How condensation forms and what to do when it is detected.

Avoiding Condensation

When Condensation is Detected

Using the Camcorder Abroad

Power Sources

Information on using the compact power adapter in different countries.

Playback on a TV Screen

Notes on PAL system TV compatibility for playback in various regions.

General Information

Accessories

Lists and illustrates supplied and optional camcorder accessories.

Optional Accessories

Battery Packs

Details on selecting and using optional battery models like BP-718/BP-727.

CG-700 Battery Charger

Information on using the CG-700 battery charger for battery packs.

Charging, Recording, and Playback Times

Recording AVCHD movies using the built-in memory

Approximate recording and playback times for AVCHD movies using built-in memory.

Recording AVCHD Movies Using a Memory Card

UA-100 USB Adapter

SC-2000 Soft Carrying Case

Specifications

System

Details on recording system, video compression, and audio compression.

Video Signal Configuration

Information on AVCHD and MP4 video signal configurations.

Recording Media

Details on built-in memory and compatible memory card types.

Maximum Recording Time

Approximate maximum recording times for AVCHD and MP4 movies.

Camcorder Terminals

AV OUT/× Terminal

Details on the AV OUT terminal for audio/video and headphone output.

USB Terminal

Specifications for the mini-AB, Hi-Speed USB output terminal.

HDMI OUT Terminal

Details on the HDMI mini connector output terminal with HDMI-CEC.
Wi-Fi Specifications

Power and Other Specifications

CA-110E Compact Power Adapter Specifications

BP-709 Battery Pack Specifications

About Music Files

About Image Files for Image Mix Function

Index

Related product manuals