This document is a user's guide for the Canon LX-D5500 Color Label Printer, providing comprehensive information on its operation, maintenance, and troubleshooting.
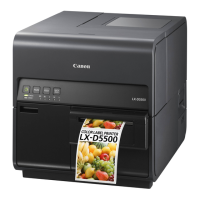
The Canon LX-D5500 is a color label printer designed for various applications, including printing on matte coated, glossy, and synthetic papers. It utilizes an inkjet printing method to produce full-color labels with a high output resolution of 1200 dpi x 1200 dpi. The printer supports both roll paper (label, tag) and dedicated fanfold paper.
Important Technical Specifications:
- Printing Method: Inkjet
- Print Colors: Full color
- Output Resolution: 1200 dpi x 1200 dpi
- Printing Speed:
- Auto printing speed: 200/160/120/80 mm/sec (7.8/6.2/4.7/3.1 in/sec)
- Preset printing speed: 200/160/120/100/90/80/70/60/50 mm/sec (7.8/6.2/4.7/3.9/3.5/3.1/2.7/2.3/1.9 in/sec)
- Printable Area (W x L):
- AIS mode ON: 105.9 mm x 497.0 mm (4.17 inch x 19.6 inch)
- AIS mode OFF: 106.3 mm x 497.0 mm (4.19 inch x 19.6 inch)
- Print Margin (in relation to paper transport direction):
- Top/Bottom: 1.5 mm (0.06 inch)
- Left/Right (Including Liner):
- AIS mode ON: 2.7 mm (0.11 inch)
- AIS mode OFF: 2.5 mm (0.10 inch)
- Note: When using label paper, it must have left and right margins, each of which is 1.5mm (0.06 inch) or wider in relation to the left and right paper edges respectively.
- Print Head: 5,030 nozzles (effective nozzles)
- Ink Used: Aqueous dye-based ink (Yellow (Y), Magenta (M), Cyan (C), and Black (Bk))
- Interface: USB 2.0 (High Speed), 1000BASE-T/100BASE-TX/10BASE-T Ethernet
- Operating Noise: About 55 dB (A) or less
- Installation Environment:
- Temperature: 15 to 30 degrees Celsius (59 to 86 degrees Fahrenheit)
- Humidity: 10% to 80% (with no condensation)
- Power Supply: AC100-240V 50/60Hz
- Power Consumption:
- Maximum power consumption: 233 W (Reference value: with optional cutter: 268 W)
- Sleep mode: 8 W
- Dimensions (W x D x H):
- 386 mm x 570 mm x 394 mm (15.2 inch x 22.4 inch x 15.5 inch)
- With optional cutter: 386 mm x 687 mm x 394 mm (15.2 inch x 27.0 inch x 15.5 inch)
- Weight: About 24 kg (About 53 lbs) (without ink tanks and printhead)
Paper Specifications:
- Paper Form: Dedicated roll paper (Label, Tag), Dedicated fanfold paper
- Paper Type: Matte coated paper, Glossy paper, Synthetic paper
- Paper Size:
- Width (W): 25.4 mm - 120 mm (1.00 inch - 4.72 inch)
- Length (L): 6.0 mm - 500 mm (0.24 inch - 19.7 inch)
- Paper Thickness: 145 μm - 255 μm (5.71 mil - 10.0 mil)
- Paper Capacity:
- Outer diameter: Φ200 mm (7.87 inch) and less
- Core diameter: Φ76.2 +/- 1.0 mm (3 +/- 0.039 inch)
- Fanfold Paper Recommended Media Feeding Condition:
- Media height: 40 mm (1.57 inch) - 850 mm (33.5 inch) from rear feeder slot to a downward direction.
- Transportation direction Media front-edge alignment: 100 mm (3.94 inch) and less from rear feeder slot to a backward direction.
Auto Cutter (Option) Specifications:
- Type: Rotary Cutter
- Installation Configuration: Screwed to the paper delivery slot of printer.
- Cutting Rate: Similar to the printer speed.
- Condition of the Paper: Dedicated paper (matte coated paper, glossy paper, synthetic paper)
- Cut Size:
- Width (W): 25.4 mm - 120 mm (1.00 inch - 4.72 inch)
- Length (L): 38.1 mm - 500 mm (1.50 inch - 19.7 inch)
- Paper Thickness: 45 μm - 255 μm (1.77 mil - 10.0 mil)
- Dimensions (W x D x H): 221 mm x 193 mm x 230 mm (8.70 inch x 7.60 inch x 9.06 inch)
- Weight: Approx. 4.0kg (8.82 lbs)
- Installation Environment:
- Temperature: 15 to 30 degrees Celsius (59 to 86 degrees Fahrenheit)
- Humidity: 10% to 80% (with no condensation)
Usage Features:
The printer offers a range of features for basic operation, printing, and driver customization.
Maintenance Features:
- Cleaning the Print Head: Instructions for performing light, medium, and strong print head cleaning to address clogged nozzles and faint prints.
- Cleaning During Printing: How to pause printing and perform print head cleaning from the status monitor.
- Adjusting Print Head Position: Detailed procedure for adjusting print head position to correct color shifts, including printing adjustment patterns and entering adjustment values for black, cyan, and yellow.
- Detailed Printhead Position Adjustment: Advanced adjustment procedures for maintenance personnel.
- Checking Setting Values: How to print information about the current printer settings to a printer or file.
- Replacing the Ink Tank: Step-by-step guide for replacing ink tanks, with safety precautions and tips for optimal ink usage.
- Checking the Ink Information: Explains how ink warning lamps and the status monitor indicate ink levels (full, low, empty) and when replacement is needed.
- Replacing the Maintenance Cartridge: Instructions for replacing the maintenance cartridge when it becomes full, with precautions for handling.
- Checking the Maintenance Cartridge Information: Explains how the maintenance cartridge warning lamp and status monitor indicate cartridge status (full, limited free space, free space).
- Cleaning the Printer:
- Cleaning the Exterior of the Printer: Instructions for wiping the printer exterior clean.
- Cleaning the Transport Area: Steps to clean the paper transport area to prevent paper jams and dirty prints.
Troubleshooting:
The manual includes a comprehensive troubleshooting section covering common issues and their solutions.
- For Troubleshooting Operations: General advice to contact the place of purchase if problems persist.
- Power Does not Turn On: Checks for power key status, power cord connection, and power outlet functionality.
- Printing Does not Start/Complete: Addresses error messages, computer connection, correct printer selection, large image processing, prolonged printing, test pattern printing, and computer problems.
- Paper is Not Feeding Correctly: Checks for paper compatibility, folded/curled paper, deteriorated label adhesive, correct paper guide setting, and stained transport area.
- Status Monitor Does Not Start: Solutions for incorrect Status Monitor settings and communication issues between the printer and computer.
- Improving the Print Quality: Addresses streaks, incomplete prints, color deviation, coarse halftone representation, uneven areas around characters/layers, poor overall print appearance, wavy paper, rubbing marks, and missing images on paper edges.
- Paper Is Jammed: Step-by-step instructions for removing jammed paper from the roll cover, upper unit, and transport section, with safety cautions.
- "Request of the print head check" Appears on the Screen: Explains the warning/error message and the need for print head checks.
- List of Error Messages/Warning Messages: A detailed table listing various error messages (Operator Call Error, Service Call Error) and warning messages, their content, and corresponding handling procedures. This includes issues like open units/doors, empty/low/faulty ink tanks, full/faulty maintenance cartridges, paper errors (empty, length/width difference, load error, jam), gap/mark length difference, firmware update errors, data mismatch, memory full, overlay data errors, unknown errors, bidirectional communication errors, clock battery low, and print speed not optimal.
Appendix:
- Moving the Printer: Detailed instructions for preparing the printer for relocation on the same floor, including executing "Moving The Printer" from the driver, safety precautions for lifting, and disconnecting cables.
- Shipping the Printer: Comprehensive guide for preparing the printer for long-distance transport, including executing "Shipping The Printer" from the driver, checking maintenance cartridge status, removing ink tanks, and disconnecting cables.
- Uninstall Printer Driver: Steps to uninstall the printer driver from Windows, including removing interface cables and using the uninstaller.
- About Network Utility: Information on the network utility software for configuring the printer's network environment.
- Starting the Network Utility: How to launch the utility and display the main screen.
- Configuring the Network:
- Configure the Installation Site: Set the printer's installation location.
- Changing the Password: Change the network configuration password (default is "admin").
- Setting IP Address: Configure the printer's IP address (automatically via DHCP or manually).
- Saving the Printer's Log File: Save log files related to printer and network communication.
- Saving the Computer's Log File: Save log files related to network communication between the printer and computer.
- Confirming Communication Status: Check the LAN's communication status.
- Configuring Access Restrictions for the Printer: Set MAC address filters to restrict printer access.
- Initializing the Printer's Network Settings: Reset all network settings to factory defaults.
- Configuring Network Using the Network Utility: Set the printer's search range and extend the network time-out value.