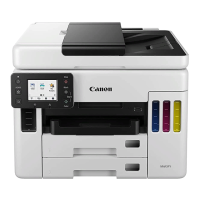
Do you have a question about the Canon MAXIFY GX7070 and is the answer not in the manual?
Ensure the printer is powered on before starting wireless setup.
Navigate to the printer's home screen by pressing the HOME button.
Tap the Wi-Fi icon on the printer's screen to access network settings.
Select the Wi-Fi option from the LAN settings menu.
Initiate the Wi-Fi setup process by selecting the Wi-Fi setup option.
Choose the manual connection method for setting up the wireless connection.
Select your wireless router from the list of available networks.
Input the Wi-Fi password, noting that text entry is case-sensitive.
Confirm the entered password by tapping the OK button.
Confirm the successful connection to the wireless router by tapping OK.
Return to the printer's home screen after the network setup is complete.
Visit the Canon website to download the necessary printer driver.
Select and download the specific setup package for Mac.
Download the file and then run the installer to begin the installation.
Initiate the installation process by clicking the 'Setup' button.
Confirm opening the downloaded application from the internet.
Proceed to the next step in the installation wizard by clicking 'Next'.
Enter your computer's password to authorize the installation of helper tools.
Begin the printer setup process by clicking 'Start Setup'.
Advance to the next configuration screen in the setup wizard.
The system is retrieving software information and downloading files.
Accept the license agreement by clicking 'Yes' to proceed with the installation.
Read the service agreement and choose to agree or disagree with data sharing.
The system is checking the printer's status.
Allow the printer to connect via Wi-Fi by confirming the prompt.
The system is downloading the IJ Scan Utility.
Initiate the process of adding a new printer to the system.
Select the printer model and add it to the system for printing.
The system is processing the printer addition.
Proceed to the next step, which is recommended print head alignment.
Confirm that printing from the computer is now possible and proceed.
Finalize the installation and optionally visit the Canon website for more information.
| Print Technology | Inkjet |
|---|---|
| Functions | Print, Scan, Copy, Fax |
| Print Resolution | Up to 600 x 1200 dpi |
| Connectivity | USB, Ethernet, Wi-Fi, Wi-Fi Direct |
| Operating System Support | Windows, macOS |
| Two-Sided Printing | Yes |
| Scanner Type | Flatbed and ADF |
| Print Speed (Black) | Approx. 24.0 ipm |
| Print Speed (Color) | Approx. 15.5 ipm |
| Duplex Printing | Automatic |
| Ink Type | Pigment-based |
| Ink Cartridges | GI-76 (Cyan, Magenta, Yellow, Black) |
| Scan Resolution | 1200 x 1200 dpi |
| ADF | Yes, 50 sheets |
| Paper Sizes | A4, A5, B5, Letter, Legal |
| Mobile Printing | AirPrint, Mopria, Canon PRINT app |
| Fax Type | Super G3 |
| Dimensions | 399 x 410 x 254 mm |
| Paper Handling Input | 250-sheet cassette + 100-sheet rear tray |