Do you have a question about the Canon MAXIFY MB2120 and is the answer not in the manual?
Remove all protective material, tape, and packing materials from the printer before setup.
Turn on the printer and configure initial settings such as language, date, and time.
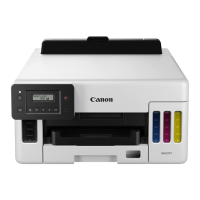
Install the ink tanks securely into their designated slots until they click into place.
Connect only the power cord initially; do not connect other cables until prompted.
Follow the instructions displayed on the printer's screen to proceed with setup.
Load plain paper into the printer's paper cassette, ensuring correct orientation.
Connect the printer to a PC, smartphone, or tablet using wireless or USB connection.
Follow the steps in 'Getting Started 2' to complete connections and software installation.
Specific guidance for setting up AirPrint or Google Cloud Print functionalities.
Connect an iOS device to the printer through a wireless router using the Canon PRINT app.
Connect an iOS device directly to the printer without a wireless router.
Connect an Android device to the printer via wireless router or direct connection.
Download setup files and install software on a Windows or Mac OS computer.
Guidance on what to do if the printer is not registered during setup.
Instructions for selecting alternative WLAN setup methods like Cableless setup.
| Print technology | Inkjet |
|---|---|
| Maximum resolution | 600 x 1200 DPI |
| N-in-1 print function | Yes |
| Print speed (ISO/IEC 24734) mono | 19 ipm |
| Print speed (ISO/IEC 24734) color | 13 ipm |
| Print speed (black, normal quality, A4/US Letter) | - ppm |
| Copier resize | 25 - 400 % |
| Maximum copy resolution | - DPI |
| N-in-1 copy function (N=) | 2, 4 |
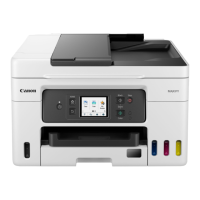
| Scanner type | Flatbed & ADF scanner |
| Input color depth | 48 bit |
| Output color depth | 24 bit |
| Maximum scan resolution | 19200 x 19200 DPI |
| Optical scanning resolution | 1200 x 1200 DPI |
| Faxing | Color faxing |
| Modem speed | 33.6 Kbit/s |
| Fax speed dialing (max numbers) | 100 |
| Digital sender | - |
| Printing colors | Black, Cyan, Magenta, Yellow |
| Maximum duty cycle | - pages per month |
| Number of print cartridges | 4 |
| Standard interfaces | USB 2.0, Wireless LAN |
| Ethernet LAN | No |
| Wi-Fi standards | 802.11b, 802.11g, Wi-Fi 4 (802.11n) |
| Display | LCD |
| Product color | Black |
| Display diagonal | 2.5 \ |
| Market positioning | Home & office |
| Envelopes sizes | 10 |
| Paper tray media types | Glossy paper, Matte paper, Photo paper, Plain paper |
| Photo paper sizes (imperial) | 4x6, 5x7, 8x10 \ |
| Maximum ISO A-series paper size | A4 |
| Power consumption (copying) | 27 W |
| Power consumption (standby) | 0.9 W |
| Power consumption (average operating) | - W |
| Windows operating systems supported | Windows 10, Windows 10 Education, Windows 10 Education x64, Windows 10 Enterprise, Windows 10 Enterprise x64, Windows 10 Home, Windows 10 Home x64, Windows 10 Pro, Windows 10 Pro x64, Windows 7 Enterprise, Windows 7 Enterprise x64, Windows 7 Home Basic, Windows 7 Home Basic x64, Windows 7 Home Premium, Windows 7 Home Premium x64, Windows 7 Professional, Windows 7 Professional x64, Windows 7 Starter, Windows 7 Starter x64, Windows 7 Ultimate, Windows 7 Ultimate x64, Windows 8, Windows 8 Enterprise, Windows 8 Enterprise x64, Windows 8 Pro, Windows 8 Pro x64, Windows 8 x64, Windows 8.1, Windows 8.1 Enterprise, Windows 8.1 Enterprise x64, Windows 8.1 Pro, Windows 8.1 Pro x64, Windows 8.1 x64, Windows Vista Business, Windows Vista Business x64, Windows Vista Enterprise, Windows Vista Enterprise x64, Windows Vista Home Basic, Windows Vista Home Basic x64, Windows Vista Home Premium, Windows Vista Home Premium x64, Windows Vista Ultimate, Windows Vista Ultimate x64, Windows XP Home, Windows XP Home x64, Windows XP Professional, Windows XP Professional x64 |
| Total input capacity | - sheets |
| Total output capacity | 250 sheets |
| Depth | 465 mm |
|---|---|
| Width | 460 mm |
| Height | 262 mm |