Do you have a question about the Canon MV300i and is the answer not in the manual?
Guide to mastering basic camcorder operations before exploring advanced features.
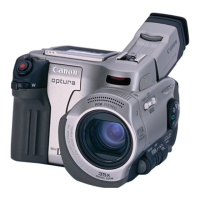
Explains the camcorder's capability for digital video recording.
Describes adding special effects during recording or playback.
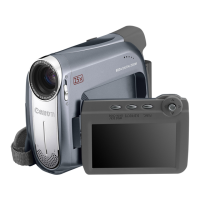
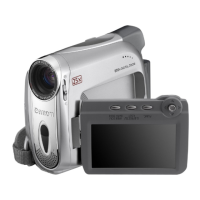
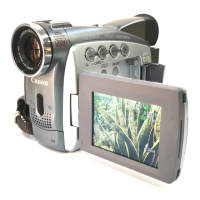
Highlights the easy-to-use LCD screen for shooting and playback.
Explains how the image stabilizer ensures steady recordings at high magnification.
Details how to add new sound to prerecorded tapes.
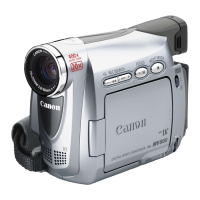
Describes the optical and digital zoom capabilities for versatile framing.
Explains replacing existing scenes on prerecorded tapes.
Covers the camcorder's ability to capture crisp, clear digital still pictures.
Describes the camcorder's ability to charge battery packs internally.
Explains the digital sound recording capabilities.
Details the DV terminal for digital data transfer with minimal quality loss.
Step-by-step guide to connecting the camera to a power source.
Instructions on how to attach and charge the camcorder's battery packs.
Guidelines for safely handling and storing video cassettes.
Steps to follow after completing a recording session.
Instructions for setting up widescreen TV recording format.
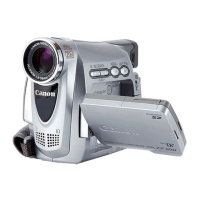
Explains the use of the 10x optical zoom for framing scenes.
Details how to use the digital zoom to magnify the image up to 200x.
Instructions on how to open and activate the LCD screen.
Guide to adjusting the LCD screen angle for comfortable viewing.
How to adjust the brightness level of the LCD screen.
How to pause playback and resume it later.
Instructions for playing back the tape at high speed forwards.
Instructions for playing back the tape at high speed backwards.
How to play back the tape frame by frame.
How to play back the tape in reverse frame by frame.
How to play back the tape at slow speed forwards.
How to play back the tape at slow speed in reverse.
How to play back the tape in reverse at normal speed.
How to play back the tape at double speed forwards.
How to play back the tape at double speed in reverse.
Guide for connecting the camera to a TV or VCR using a SCART terminal.
Instructions for connecting to TVs with S-video input for better picture quality.
Steps for connecting the camera using audio/video input terminals.
Techniques for holding the camcorder for stable shooting.
Guidance on using a tripod to prevent unwanted camera movement.
Advice on framing subjects for more interesting shots.
Discusses choosing picture angles for storytelling and effect.
Explains techniques for panning and tilting the camera.
Instructions for installing batteries into the wireless controller.
How to set the remote sensor mode for compatibility.
Troubleshooting tips for when the wireless controller fails to operate.
How to set the camcorder's time zone and daylight saving time.
Step-by-step guide to setting the camcorder's date and time.
How to choose whether to display date and time during recording.
Instructions for taking still pictures while in record pause mode.
Instructions for taking still pictures while actively recording.
How to search tape forwards or backwards to find recording points.
How to quickly review the last few seconds of a recording.
Simple point-and-shoot operation using the Easy Recording program.
Auto mode offering Easy Recording plus manual function access.
Ideal for high-speed sports in bright conditions, allows frame analysis.
Enhances subjects with softened backgrounds, good for close-ups.
Designed for spotlit scenes, auto-adjusts exposure for glare-free results.
For bright backgrounds like sunny beaches or ski resorts.
For recording in dimly lit places, best for slow or stationary subjects.
Details which digital effects are available in different camera modes.
Lists digital effects available during playback in different modes.
Fades the scene in from black or out to black.
Wipes the screen vertically to transition between scenes.
Wipes the screen horizontally to transition between scenes.
Blurs the image by enlarging pixels as it fades.
Adds a paint-like, solarization effect to the image.
Records the image in monochrome black and white.
Records a monochrome image with a brownish tint.
Blurs the image by enlarging pixels, creating a mosaic effect.
How to activate or deactivate fader effects.
How to activate or deactivate visual effects.
How to choose between 16-bit and 12-bit audio recording modes.
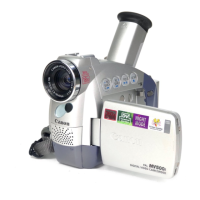
Instructions for connecting and using an external microphone.
How to use the self-timer for recording movies.
How to lock the exposure at the current level for consistent brightness.
How to manually adjust picture brightness after locking exposure.
How to set shutter speed for stable shots of moving subjects.
How to lock focus at a specific point.
How to manually adjust focus using the selector dial.
How to choose which date/time elements to display in the data code.
How to choose date/time, camera data, or both for the data code.
How to edit recordings by connecting to a VCR.
Steps required before dubbing with the MV300i.
Details on editing using the MV300i's DV terminal.
A step-by-step example of dubbing audio to the camera.
Steps required before performing audio dubbing.
Instructions on how to perform audio dubbing using the wireless controller.
How to adjust the viewfinder for comfortable viewing.
Instructions for attaching the lens cap cord and hook.
Guidance on adjusting the grip belt for comfortable handling.
How to attach the shoulder strap for security and portability.
Details on battery charging times and recording durations.
Explains how to interpret the battery power indicator.
Advice on when to recharge the camcorder's battery pack.
Guidelines for maintaining the battery pack's condition.
Recommendations for storing the battery pack for long-term use.
Instructions for installing the CR2025 lithium battery for settings backup.
Important warnings and precautions for camera maintenance.
Recommendations for storing the camera when not in use.
Instructions for cleaning the camcorder's viewfinder.
Guidance on cleaning the LCD screen and handling temperature changes.
How to clean the camera body and lens.
How to clean video heads to resolve picture noise or blank screens.
Information on using power adapters and battery packs internationally.
Details on connecting to PAL system TVs for playback abroad.
Steps to prevent damage from condensation when moving between temperatures.
Explains the warning displays and camera behavior when condensation is detected.
Actions to take if condensation is detected to prevent camera damage.
Solutions for common problems encountered during recording and playback.
Continues troubleshooting common issues during recording and playback.
Solutions for problems related to the wireless controller, power indicator, and camera malfunctions.
How to disable on-screen displays for a clearer playback view.
| Optical Zoom | 18x |
|---|---|
| LCD Screen Size | 2.5 inches |
| Weight | 480 g |
| Image Sensor Type | CCD |
| Recording Media | MiniDV |
| Focus | Auto / Manual |
| Image Stabilization | Electronic |
| Microphone | Stereo |
| Battery | Lithium-ion |
| Image Sensor | 1/6-inch CCD |
| Video Resolution | 720x480 |
| Image Sensor Size | 1/6 inch |
| Effective Pixels | 680, 000 |
| LCD Screen | 2.5-inch color LCD |
| Viewfinder | Color |
| Interface | IEEE 1394 (FireWire) |