EasyManua.ls Logo

Canon PIXMA MG2120 Series User Manual

Canon PIXMA MG2120 Series
4 pages
To Next Page IconTo Next Page
Page #1 background imageLoading...
Page #1 background image
1
XXXXXXXX ©CANON INC.2011
5
6
(Color/Black)
1
3
4
2
1
2
series
Retire la cinta (tape).
Compruebe que se le han suministrado los siguientes elementos.
Cable de alimentación
Cartuchos FINE (FINE Cartridges)
CD-ROM de instalación (Setup CD-ROM)Manuales y otros documentos
Es necesario un cable USB
(no suministrado).
Aún no conecte el cable USB.
Conecte el cable de alimentación.
55
Pulse el botón ACTIVADO (ON).
66
Abra la cubierta delantera (Front
Cover) y la bandeja de salida del
papel (Paper Output Tray).
11
Retire la cinta naranja (orange tape).
33
Cierre la tapa de salida del papel
(Paper Output Cover).
44
Preparación
Elementos
suministrados
Abra la tapa de salida del papel
(Paper Output Cover).
22
Si aparece E > 4 > 0 en la pantalla
LED, pulse el botón ACTIVADO (ON)
para apagar el equipo y repita desde
el paso 2.
ESPAÑOL
Guía de inicio
Léame en primer lugar
Consérvelo a mano para utilizarlo
como referencia en el futuro.
Para llevar a cabo la instalación, coloque el equipo cerca
del ordenador.
Windows es una marca comercial o una marca comercial registrada de Microsoft
Corporation en EE. UU. y/u otros países.
Windows Vista es una marca comercial o una marca comercial registrada de Microsoft
Corporation en EE. UU. y/u otros países.
Macintosh, Mac y Mac OS son marcas registradas de Apple Inc, registradas en EE. UU.
y/u otros países.
Número de modelo: K10371 (MG2120)
Equipo multifunción fotográco Canon Inkjet
Solicitar ayuda a Canon
Correo electrónico del servicio técnico:
www.usa.canon.com/support
Teléfono gratuito del servicio técnico:
1-800-OK-CANON
Este servicio ofrece asistencia técnica telefónica gratuita, de lunes
a viernes (excepto festivos), durante el período de garantía.
El soporte mediante dispositivo telefónico para decientes
auditivos (TDD) está disponible en el 1-866-251-3752.
Remove the tape.
Check the included items.
A USB cable (not included) is
required.
Manuals and other documents
Power cord
FINE Cartridges
Setup CD-ROM
Do not connect the USB cable yet.
Connect the power cord.
55
Press the ON button.
66
Open the Front Cover and the
Paper Output Tray.
11
Remove the orange tape.
33
Close the Paper Output Cover.
44
Preparation
Included Items
Open the Paper Output Cover.
22
If E > 4 > 0 are displayed on the LED,
press the ON button to turn OFF the
machine, then redo from step 2.
Getting Started
Read me rst!
Keep me handy for future reference.
Windows is a trademark or registered trademark of Microsoft Corporation in the U.S.
and/or other countries.
Windows Vista is a trademark or registered trademark of Microsoft Corporation in the
U.S. and/or other countries.
Macintosh, Mac and Mac OS are trademarks of Apple Inc., registered in the U.S. and
other countries.
Model Number: K10371 (MG2120)
To perform setup, place the machine near the computer.
ENGLISH
Canon Inkjet Photo All-In-One
Getting Help from Canon
Email Tech Support — www.usa.canon.com/support
Toll-Free Tech Support— 1-800-OK-CANON
This option provides live telephone technical support, free of
service charges, Monday-Friday (excluding holidays), during the
warranty period.
Telephone Device for the Deaf (TDD) support is available at
1-866-251-3752.
QT5-4276-V01
PRINTED IN XXXXXXXX
Question and Answer IconNeed help?

Do you have a question about the Canon PIXMA MG2120 Series and is the answer not in the manual?
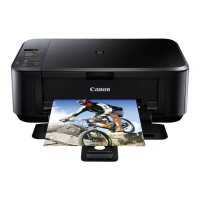
Canon PIXMA MG2120 Series Specifications

General IconGeneral
Print TechnologyInkjet
Max Print Resolution4800 x 1200 dpi
Scanner TypeFlatbed
Scanner Optical Resolution1200 x 2400 dpi
InterfaceUSB 2.0
FunctionsPrint, Copy, Scan
Print Speed (Black)8.4 ipm
Print Speed (Color)4.8 ipm
Paper Input Capacity100 sheets
Operating System SupportWindows, macOS
Paper SizesLetter, Legal
Copy Speed (Black)Approx. 2.5 ipm
Ink Cartridge CompatibilityPG-240 Black, CL-241 Color
Weight12.1 lbs

Summary

Included Items

Power Cord

Checks the included power cord for the printer.

FINE Cartridges

Checks the included FINE Cartridges (Color/Black) for the printer.

Manuals and Other Documents

Checks the included manuals and other documentation.

Setup CD-ROM

Checks the included Setup CD-ROM for software installation.

Printer Preparation and Initial Setup

Remove Protective Tape

Removes protective tape from the printer before setup.

Open Front Cover and Trays

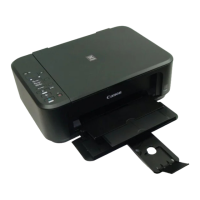
Opens the front cover, paper output tray, and paper output cover.

Connect Power Cord

Connects the power cord, ensuring USB is not yet connected.

Power On Printer

Presses the ON button to power on the printer.

Installing Ink Cartridges

Open Paper Output Tray and Cover

Opens the paper output tray and cover, and checks the head cover.

Lower Ink Cartridge Lever

Lowers the ink cartridge lock lever to install cartridges.

Unpack and Insert Cartridges

Unpacks FINE cartridges, removes protective tape, and inserts them correctly.

Lift Ink Cartridge Lever

Lifts the ink cartridge lock lever to secure the installed cartridges.

Close Paper Output Cover

Closes the paper output cover and checks the display.

Loading Paper

Prepare Paper Output Tray

Checks paper output tray and pulls out paper support.

Adjust Paper Guides

Slides paper guides to fit paper size and opens output tray extension.

Insert Paper

Inserts paper until it stops, checking orientation for printable side.

Software Installation

Insert CD-ROM and Start Setup

Inserts the CD-ROM into the computer and starts the setup process.

Follow On-Screen Instructions

Follows on-screen prompts for language selection and installation progress.

Read On-Screen Manual

Accesses the On-screen Manual for detailed functions, operations, and troubleshooting.

Related product manuals