Do you have a question about the Canon Pixma MX520 Series and is the answer not in the manual?
Information regarding the reproduction, modification, and disclosure of the online manual content.
Recommended operating system and web browser for optimal use of the online manual.
Instructions on using the browser's print function to print the online manual.
Tips for finding pages by entering model name and function keywords.
How to get accurate search results by entering model name and support code.
Tips for finding pages by entering application name and function keywords.
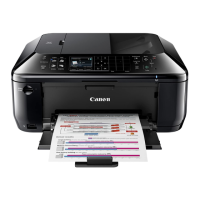
Details on the main components and fundamental operations of the machine.
Procedures for maintaining the machine's performance and appearance.
Instructions on modifying machine settings via computer or LCD.
Information and guidance for connecting the machine to a network.
Advice on how to achieve the best print results.
Information on legal restrictions concerning product use and image reproduction.
Technical details and specifications of the machine.
Description of the operation panel for machine settings and operation.
Instructions for loading documents into the ADF for copying, scanning, or faxing.
Explanation of Wi-Fi lamp status indications for wireless LAN.
Instructions on using paper guides to align paper stacks.
Instructions for loading originals on the platen glass for copying, scanning, or faxing.
Information on inserting and using USB flash drives with the machine.
Procedure for opening the transport unit to remove jammed paper.
Instructions for connecting the supplied power cord.
Instructions for connecting the telephone line.
Instructions for connecting the LAN cable to the machine.
Instructions for connecting the USB cable to the computer.
Description of the ink cartridge lock lever for securing FINE cartridges.
Information on the replaceable cartridge integrating print head and ink tank.
Instructions for installing the FINE cartridge into the holder.
Explanation of how the head cover opens for FINE cartridge replacement.
Description of the ON button for turning the machine's power on or off.
Description of the COPY button for switching to copy mode.
Description of the FAX button for switching to fax mode.
Description of the LCD for displaying messages, menus, and operational status.
Description of the Stop button to cancel operations in progress.
Explanation of the Alarm lamp indication for errors.
Description of the Black button for starting B&W copying, scanning, faxing.
Description of the Color button for starting color printing, copying, scanning, faxing.
Description of the MENU button for accessing functions, maintenance, and settings.
Description of the SCAN button for switching to scan mode.
Description of the +/- buttons for specifying copies or adjusting values.
Description of the Back button to return to the previous screen.
Description of the OK button for finalizing selections or resuming operation.
Description of navigation and character input buttons.
Description of the Numeric buttons for entering numbers and characters.
How to check if the machine is turned on by observing indicator lamps.
Procedure for turning the machine's power on and off.
Important notices regarding the power plug and cord.
Procedure and precautions for unplugging the power cord.
Explanation of how to use function buttons to navigate menus and select options.
How to switch between lowercase, uppercase, and numeric input modes.
Procedure for editing entered characters, inserting spaces, or deleting.
Instructions for loading various types of paper.
Guidance on how to place originals for scanning or copying.
Procedure for inserting and removing USB flash drives.
Steps for preparing paper, including aligning edges and flattening curls.
Step-by-step instructions for loading paper into the front tray.
Instructions for preparing envelopes, including flattening and aligning edges.
Step-by-step instructions for loading envelopes into the front tray.
List of commercially available and Canon genuine papers for printing.
Information on supported standard and non-standard page sizes.
Details on the acceptable paper weight range and precautions.
Recommendations for storing paper to maintain quality and prevent curling.
Table showing paper load limits for commercially available papers.
Table detailing paper load limits for Canon genuine papers.
List of media types and their corresponding settings on the operation panel.
List of Canon genuine paper types and their settings on the operation panel.
Explanation of the printable area and recommended printing area.
Printable area dimensions for various non-standard paper sizes.
Printable area dimensions for Letter and Legal paper sizes.
Recommended printing area dimensions for European DL and US Comm. Env. #10 envelopes.
Information on the two positions for loading originals: platen glass and ADF.
Instructions for placing documents, photos, or books on the platen glass.
Instructions for loading multiple documents of the same size into the ADF.
Step-by-step guide for loading originals onto the platen glass.
Step-by-step guide for loading documents into the ADF.
Guidance on loading originals according to selected functions like copying or scanning.
Instructions for loading multiple originals on the platen glass for scanning.
Details on the types of originals that can be loaded on the platen glass or in the ADF.
Procedure for inserting a USB flash drive into the port.
Procedure for safely removing the USB flash drive.
Procedure for replacing a FINE cartridge when ink is low or an error occurs.
How to check the remaining ink level using the machine's LCD or computer.
Step-by-step instructions for replacing a FINE cartridge.
Important precautions for handling FINE cartridges to avoid damage.
Procedure for removing the empty FINE cartridge by releasing the lock lever.
Steps for preparing a new FINE cartridge, including removing protective tape.
Instructions for inserting and locking the new FINE cartridge into the holder.
Procedure for closing the paper output cover after replacing the cartridge.
How to check ink levels directly on the machine's LCD.
How to check ink status using the computer screen via status monitor.
Troubleshooting steps for faint printing or incorrect colors.
Maintenance operations that can be performed using the computer.
Procedures for cleaning various parts of the machine.
Procedure to print nozzle check pattern, clean print head, and align print head.
Steps to resolve blurred or uneven print results: print check pattern, clean print head.
Procedure to align the print head to correct misaligned lines or uneven results.
Procedure to print the nozzle check pattern to check ink ejecting status.
How to examine the nozzle check pattern and determine if cleaning is necessary.
Procedure to clean the print head to resolve missing lines or white streaks.
Procedure for deep cleaning the print head when standard cleaning is ineffective.
Procedure to print the head alignment sheet and adjust print head position.
Steps to clean the print head nozzles using the printer driver.
Procedure to clean paper feed rollers using the printer driver.
Methods to adjust print head position automatically or manually.
Procedure for manually adjusting print head position via computer.
How to print a nozzle check pattern using the computer.
Procedure for cleaning the inside of the machine, including bottom plate cleaning.
Modifying machine settings using the printer driver on your computer.
Modifying machine settings directly on the machine's LCD.
Detailed print driver settings for print data sent from applications.
How to register and manage frequently used printing profiles.
How to specify the most appropriate ink cartridge for intended use.
Function to manage the machine power directly from the printer driver.
How to use the quiet mode to reduce operating noise.
Procedure for configuring custom settings to switch between operation modes.
Description of setting items related to FAX functions.
Settings related to print quality, extended copy amount, and photo fix.
Settings for wireless and wired LAN connections.
Settings related to date/time, sound control, and country/region selection.
Settings for printing photos from a mobile phone via Bluetooth.
Settings for Bluetooth communication, including device name and security.
Settings for printing directly from a PictBridge compliant device.
How to change the display language for messages and menus on the LCD.
Procedure for updating the machine's firmware and DNS/proxy server settings.
How to revert all machine settings back to their default values.
Settings for automatic duplex printing and reducing operating noise.
Enables reducing operating noise, with options for time range setting.
Information on network connection, including initial values and connection methods.
Procedure to add another computer to the LAN connection.
Procedure to change connection method from USB to LAN.
Utility for displaying and modifying machine network settings.
Procedure to change wireless network settings using IJ Network Tool.
Detailed settings for WEP encryption method.
Detailed settings for WPA or WPA2 encryption methods.
Procedure to change wired LAN settings using IJ Network Tool.
Setting an administration password for setup and configuration operations.
Checking printer status and connection performance wirelessly.
Procedure to reset network settings to factory defaults.
Displaying the confirmation screen after modifying printer settings.
Displays detected printers, their status, and port names.
Performs printer detection again if the target printer is not displayed.
Click to configure settings of the selected printer.
Displays screen to associate a created port with a printer driver.
Reverts network settings to factory default and mounts card slot as network drive.
Selects Infrastructure mode to connect the printer to a wireless LAN via an access point.
Displays the SSID of the wireless LAN, with unique value as initial setting.
Displays search screen to select an access point for connection.
Selects the encryption method used over the wireless LAN.
Displays the type of authentication used for client authentication (PSK).
Displays the dynamic encryption method.
Displays the Authentication Type Confirmation screen.
Displays the type of authentication used for client authentication (PSK).
Displays the dynamic encryption method.
Displays the Authentication Type Confirmation screen.
Displays the type of authentication used for client authentication (PSK).
Sets the IP address of the printer for use over the LAN.
Set a password for administrator privileges for setup and configuration.
Field to enter the password for the administrator.
Field to re-enter the password for confirmation.
Select access control type (MAC address or IP address) to limit access.
Specifies accessible computers by MAC addresses.
Specifies accessible computers by IP addresses.
Enter the MAC address of a computer or network device for access.
Optional field to enter information to identify the device.
Select Single Address or Range Specification to add IP addresses.
Enter IP address for computers or network devices to allow access.
Optional field to enter information to identify the device.
Displays detected printers, their status, and port names.
Performs printer detection again if the target printer is not displayed.
Click to configure settings of the selected printer.
Displays screen to associate a created port with a printer driver.
Reverts network settings to factory default and mounts card slot as network drive.
Instructions for scanning using the IJ Scan Utility application.
Using ScanGear scanner driver for scanning with advanced settings.
Tips and information related to scanning, including cropping, resolution, and data formats.
Introduction to IJ Scan Utility and its capabilities for scanning photos, documents, etc.
Information on how scanned images are automatically saved in preset folders.
How to use scanned images with other applications like email or text extraction.
Procedure for scanning by automatically detecting item type.
Instructions for scanning photos with settings suitable for photos.
Instructions for scanning items with settings suitable for documents.
How to save and use favorite scan settings for convenience.
Procedure to scan large items by combining halves into one image.
How to scan multiple photos or small items at once and save them individually.
Instructions for scanning multiple documents from the ADF simultaneously.
How to check scan results before saving images to a computer.
Procedure to send scanned images via e-mail using the operation panel.
How to scan text from documents and display it in Notepad.
List of various screens and dialog boxes related to IJ Scan Utility.
Procedure to send scanned data to a computer using the operation panel.
Procedure to attach scanned data to an e-mail using the operation panel.
Procedure to save scanned data on a USB flash drive using the operation panel.
Procedure to delete scanned data from the USB flash drive using the operation panel.
How to change scan settings like size, resolution, and data format on the operation panel.
Settings for connecting scanner or printer to a network for sharing.
Specifying how the machine responds when scanning from the operation panel.
Troubleshooting steps for when the machine does not power on.
Checks and procedures to resolve issues when printing does not start.
Troubleshooting steps for paper feeding errors or 'No Paper' messages.
Checks for issues causing unsatisfactory print results like streaks or color problems.
Troubleshooting steps for issues with ink ejection or FINE cartridge recognition.
Actions to take when paper jams occur, including removing jammed paper.
General guidance on how to handle errors and support codes displayed.
Troubleshooting steps for issues related to sending faxes.
Troubleshooting steps for issues related to receiving faxes.
Checks to improve the quality of received faxes.
Troubleshooting steps for issues with receiving color faxes.
Common errors encountered during fax reception and their resolutions.
Checks to improve clarity when sending faxes.
Troubleshooting steps for telephone line connection and type issues.
Troubleshooting general issues with the machine's operation or display.
Troubleshooting steps for issues during software installation or downloading.
Information about various error messages and their meanings.
Guidance on what to do if problems persist and contacting service.
Steps to set up the machine for faxing, including line connection and basic settings.
Instructions for connecting the machine to various types of telephone lines.
Procedure to set the correct telephone line type for the machine.
How to select the machine's receiving operation mode (TEL priority, FAX only, DRPD).
Procedure to set sender information like name, fax/telephone number, and date/time.
Instructions for sending faxes directly from the machine's operation panel.
Methods for registering recipient information using the operation panel or Speed Dial Utility.
Information and procedures for receiving faxes, including paper settings and memory reception.
Information on other fax functions like Information Services and ECM.
Instructions for sending faxes using the fax driver from a computer.
Troubleshooting common issues when sending faxes using the fax driver.
Important restrictions and points to consider when using the fax driver.
Procedure for dialing and sending faxes directly using the numeric buttons.
Methods for automatic and manual redialing when a line is busy.
Utilizing functions like speaking to recipient, speed dialing, and sequential broadcasting.
Procedure to register recipients for coded speed dial or group dial via the operation panel.
Using Speed Dial Utility software to manage recipient information on computer and machine.
Preparation and procedure for receiving faxes, including paper and receive mode settings.
How to change paper settings for printing received faxes.
Specifying advanced settings for receive modes like TEL priority, FAX only, DRPD.
What happens when faxes cannot be printed and are stored in memory.
Information on useful functions for receiving faxes, like USB saving and remote reception.
Instructions for printing from a computer using the printer driver.
Detailed guidance on using the printer driver for various printing tasks.
Instructions for printing various types of data directly from the machine's operation panel.
Information and procedures for using web services for printing.
Procedure for accessing and printing photos from online photo sharing sites.
How to download and print various template forms from the web service.
Information related to Bluetooth communication for printing.
Instructions and features for making copies using the machine.
Detailed guidance on using the printer driver for various printing tasks.
Overview of different printing methods available.
How to specify page size and orientation for printing.
How to set the number of copies and specify the printing order.
Procedure for setting the staple side and margin width.
Procedure for printing data without margins by enlarging the image.
Procedure for printing documents enlarged or reduced to fit page size.
Procedure for printing documents enlarged or reduced to fit page size using scaling factor.
Function to print multiple page images on a single sheet of paper.
Procedure to enlarge image data, divide into pages, and print as a poster.
Function to print data for a booklet, ensuring proper collation and folding.
Procedure for printing data on both sides of a sheet of paper.
Function to print stamp text or bitmap images over or behind document data.
Procedure to create and register new stamps or change existing ones.
Procedure to select and register bitmap files as backgrounds.
Procedure for performing envelope printing, including media type and orientation.
Procedure for printing on postcards, including media type and orientation.
How to display and check the print result before actually printing.
How to edit print documents or retrieve print history for reprinting.
Adjusting print quality and correcting image data using printer driver settings.
Procedure to print using ICC profiles for effective color space management.
How to adjust colors using the printer driver's color correction function.
Information and procedures for printing using Google Cloud Print.
Instructions for printing photographs directly from PictBridge compliant devices.
Procedure to print photos from a mobile phone using Bluetooth communication.
Procedure for making copies using the standard copy function.
How to preview an image of the printout before copying.
How to change copy settings like magnification and intensity.
Procedure to specify magnification for reducing or enlarging copies.
Procedure for copying two original pages onto both sides of a single sheet.
Information on other selectable copy functions like borderless and frame erase.
Procedure to copy two original pages onto a single sheet by reducing each image.
Procedure to copy four original pages onto a single sheet by reducing each image.
How to copy thick originals like books without black margins or gutter shadows.
Procedure for copying images to fill the entire page without borders.
How to obtain sorted printouts when making multiple copies of multi-paged originals.
Procedure to scan printed photos and print them all at one time.
| Functions | Print, Copy, Scan, Fax |
|---|---|
| Input Capacity | 100 sheets |
| Print Resolution (Maximum) | 4800 x 1200 dpi |
| Paper Sizes Supported | Letter, Legal, Envelope |
| Scanner Type | Flatbed, ADF |
| Scan Resolution (Optical) | 1200 x 2400 dpi |
| Fax Resolution (Black) | 300 x 300 dpi |
| Wireless | Yes |
| Connectivity | USB, Wi-Fi |
| Fax Speed | Approx. 3 seconds per page |